
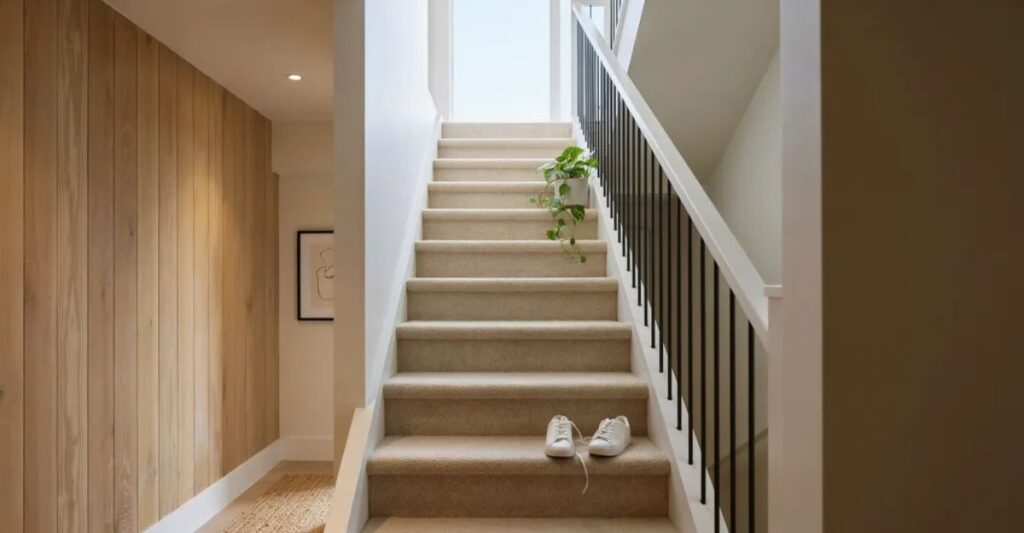
Quick answer: How to Install Carpet on Stairs involves measuring each tread and riser, installing tackless strips and padding, then securing the carpet with a knee kicker while working from the bottom of the staircase to the top. Most DIYers can carpet a straight staircase of 12 to 16 steps in a weekend, although the waterfall method is generally easier and faster than the cap-and-band method.
Carpeting stairs can feel intimidating the first time you look into it. There are two different installation methods, a handful of specialized tools you probably don’t already own, and a real risk of wasting expensive carpet if you measure something wrong. None of that means you need to hire a professional, though. With the right prep and a bit of patience, carpeting your own stairs is a genuinely doable weekend project. This guide walks through exactly how to do it, method by method and tool by tool, without skipping the parts that trip people up.
Cost Summary Box
- Professional installation: $10 to $55 per step, or roughly $150 to $880 for a standard 12 to 16 step staircase
- DIY material cost only: $2 to $15 per square foot of carpet, plus $0.75 to $1.75 per square foot for padding
- Tackless strips: usually under $1 per linear foot
- Typical time for a DIY straight staircase: one full day to a weekend
- Best fiber for stairs: nylon, since it resists the crushing and flattening that stairs cause faster than any other surface in the home
Waterfall vs. Cap-and-Band: Choosing Your Installation Method
Before you buy carpet or tools, decide which of the two main methods you’re using. This choice changes how much carpet you need and how you’ll cut it, so it’s worth settling before you shop.
| Method | How It Works | Best For | Difficulty |
| Waterfall | One continuous piece of carpet drapes over each tread and falls straight down to the next step without wrapping the riser | Straight staircases, thick or plush carpet, faster installs | Beginner to intermediate |
| Cap-and-band (also called Hollywood or French cap) | Carpet is cut and fitted individually to wrap tightly around each tread and riser, including the nosing | Staircases with a visible nose, a more tailored or upscale look | Intermediate to advanced |
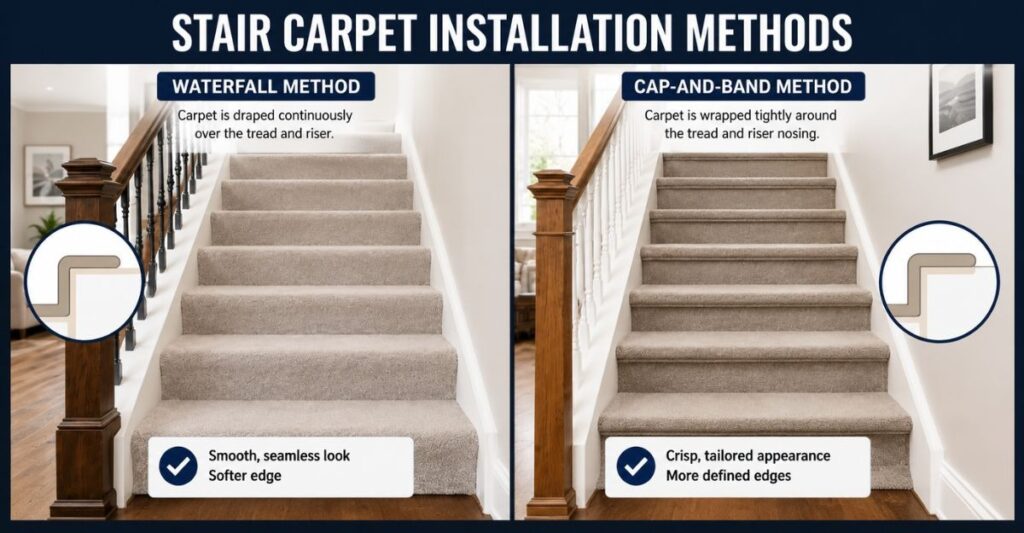
The waterfall method is what most DIYers should start with. It uses less carpet, requires fewer precise cuts, and forgives small measurement errors, since the carpet simply flows over each edge rather than being fitted exactly to it. Cap-and-band gives a cleaner, more finished look, particularly on staircases where the tread nose is visible, but it demands more exact measuring and more time per step. If this is your first carpet installation, waterfall is the more realistic choice. If you’ve already tackled a few flooring projects and want a more polished result, cap-and-band is worth the extra effort.
Direct answer: What is the easiest way to carpet stairs? The waterfall method is the easiest for DIYers. It uses one continuous strip of carpet that drapes over the front of each tread and down to the next step, requiring fewer measurements and cuts than the cap-and-band method.
Tools and Materials You’ll Need
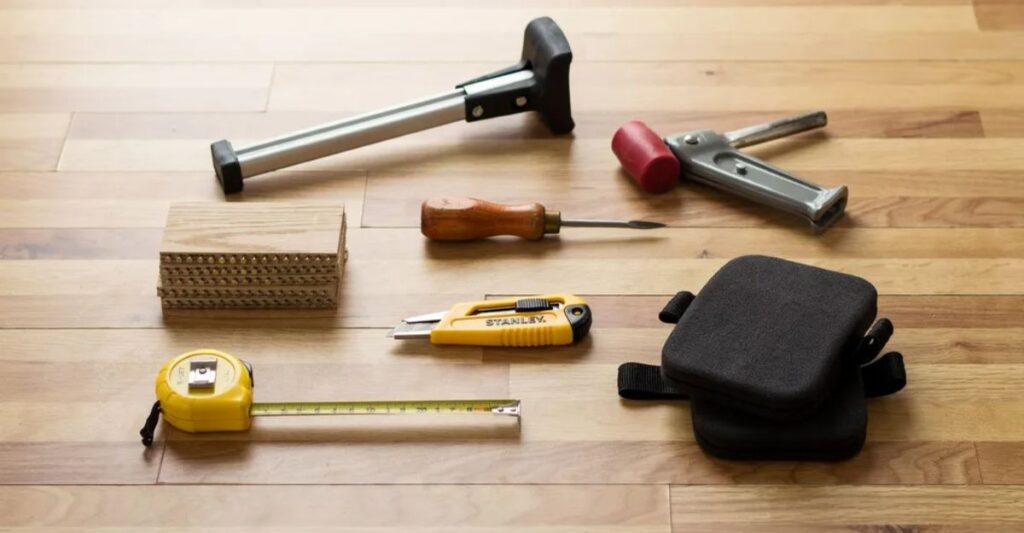
Once you’ve picked a method, gather your tools before you start. Having the right equipment makes installing carpet on stairs much easier and helps you achieve a professional-looking result.
| Tool or Material | Purpose |
| Carpet and padding | Cut to fit your treads, risers, and any landing |
| Tackless strips | Hold the carpet in place without visible tacks or staples |
| Knee kicker | Stretches carpet tight against the tackless strips |
| Power stretcher | Used on longer runs or by more experienced installers for even tension |
| Hammer tacker or staple gun | Secures padding and carpet edges |
| Carpet awl | Pushes carpet into tackless strips safely, without using your hands |
| Stair tool or tucker | Presses carpet edges into tight corners along walls and risers |
| Utility knife with sharp blades | Cuts carpet and padding cleanly; dull blades cause ragged edges |
| Tape measure and chalk line | Ensures accurate, consistent measurements across every step |
| Molding lifter | Removes old tackless strips without damaging the wood underneath |
| Heavy cardboard scraps | Protects baseboards when nailing tackless strips near walls |
| Knee pads and work gloves | Stair work is hard on the knees, and tackless strips are genuinely sharp |
With your tools and materials ready, the next step is getting accurate measurements, which is where most first-time installations either go smoothly or go wrong.
How to Install Carpet on Stairs, Step by Step
Step 1: Measure Your Staircase Accurately
The first step in how to install carpet on stairs is measuring every tread, riser, and landing accurately to avoid costly mistakes. Then measure the depth of the tread and the height of the riser, and add them together to get the length needed per step. If your stairs have a nose (the part of the tread that overhangs the riser), measure the top of the tread plus the front of the riser separately, since the nose adds a few extra inches per step that are easy to miss.
Multiply your per-step length by the total number of steps, then add extra for the landing if you have one, plus a small buffer of about one inch per step for the nosing and any minor trimming. Buying slightly more carpet than the bare minimum is far cheaper than running short mid-project.
Direct answer: How much carpet do I need for stairs? Multiply the tread depth plus riser height by your total number of steps, then add roughly one extra inch per step for the nosing and about 18 additional inches overall as a safety buffer.
Step 2: Remove Old Carpet and Prepare the Stairs
If you’re replacing existing stair carpet, pull it up along with the old padding and tackless strips. Use a molding lifter to remove old tackless strips from underneath, rather than prying from the top, which can chip or splinter the wood. Once everything is removed, sweep and vacuum thoroughly so no old staples, tacks, or debris are left under the new installation. You can skip this step entirely if you’re working with bare, unfinished stairs.
Step 3: Install Tackless Strips
Cut tackless strips to match the width of each tread and riser. You need at least one strip running wall to wall near the back of each tread, leaving a gap behind it that’s roughly twice the thickness of your carpet. This gap is what lets the carpet tuck in cleanly later. If you’re using the waterfall method, you’ll also need a strip near the bottom of each riser. For cap-and-band, strips go on both the tread and the top of the riser, positioned just under the nosing. Proper tackless strip placement is one of the most important parts of how to install carpet on stairs, as it keeps the carpet securely anchored.
Nail strips down with the angled tacks pointing toward the corner where the carpet will be pushed in, never toward you or an open walkway. Slide a piece of heavy cardboard between any strip and a nearby baseboard before hammering, so a missed swing doesn’t dent your trim.
Step 4: Cut and Staple the Padding
Cut padding into pieces matching the width of each tread, sized about three inches longer than the tread’s depth. Padding should never cover the tackless strips themselves. Staple one edge in front of the tack strip using a hammer tacker, spacing staples about three inches apart, then pull the padding around the nosing and staple it to the underside, again every three inches. Trim any excess where the nosing meets the riser.
Pro Tip: If you’re using the waterfall method, clip the corners of the padding at each nosing before stapling. This keeps the padding from bunching visibly under the finished carpet.
Step 5: Cut Your Carpet Pieces
For the waterfall method, you’re generally working with one continuous strip that runs the full length of the staircase, so most of your cutting happens after the carpet is roughly positioned rather than before. For cap-and-band, you’ll cut individual pieces for each tread and riser based on your Step 1 measurements. Either way, always cut with a sharp utility blade against a straightedge, and cut slightly generously. It’s much easier to trim excess carpet than to stretch carpet that was cut too short.
Step 6: Install the Carpet, Working Bottom to Top
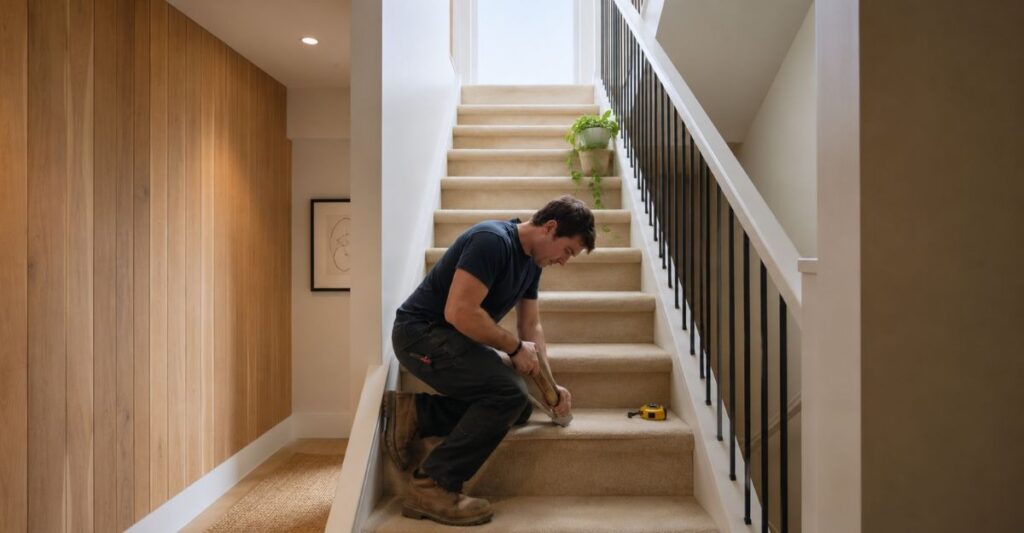
Start at the bottom step and work your way up the staircase. This order matters, since each step’s carpet needs to overlap correctly with the one below it for the finished look to read as continuous rather than pieced together.
This stage of how to install carpet on stairs requires patience, as stretching the carpet correctly prevents wrinkles and loose areas.
Center the carpet on the bottom tread, using an awl (never your bare hands) to press the edge into the tackless strip. Use your knee kicker to stretch the carpet snugly against the strip, working from the center of the step outward toward each side to avoid trapping wrinkles or air bubbles. For the waterfall method, let the carpet fall over the nosing and down the riser, then press it into the gully at the back of the next tread. For cap-and-band, wrap the carpet tightly around the nosing and staple it to the riser before moving on to the next step.
Repeat this process step by step up the entire staircase, checking as you go that the carpet stays centered, with equal amounts of the stair visible on each side if you’re installing a runner rather than full-width carpet.
Direct answer: Do you install carpet on stairs from the top or bottom? Always work from the bottom of the staircase to the top. Installing bottom to top lets each tread’s carpet overlap correctly with the step below, which keeps the finished look seamless rather than mismatched at the seams.
Step 7: Tuck and Finish the Edges
Once the carpet is stretched and secured, use your stair tool to tuck any exposed raw edges tightly against the walls on either side of each step, hiding them from view. On cap-and-band installations, use the tucker to press any visible carpet edges on the riser underneath the main carpet piece. Check every step for wrinkles, loose spots, or gaps at the wall before considering the job finished.
Step 8: Inspect and Vacuum
Walk the entire staircase slowly, checking for movement, visible padding, or loose seams. A properly installed stair carpet shouldn’t shift underfoot at all. Finish with a thorough vacuum to remove any leftover fibers, staples, or debris from the installation process.
With the installation itself covered, it helps to know roughly what you’re budgeting for before you commit to either the DIY route or a professional quote.
How Much Does It Cost to Carpet Stairs
If you’re deciding between DIY and hiring a professional, cost is usually the deciding factor. Professional installers typically price stair carpeting per step rather than by square footage, since the cutting and shaping involved is more labor-intensive than a flat room.
| Staircase Size | Estimated Professional Cost | Notes |
| 12 to 14 steps, straight, no spindles | $150 to $400 | Standard nylon, waterfall method |
| 12 to 14 steps with spindles | $250 to $600 | Spindles add $10 to $20 per step for the extra cutting involved |
| 14 to 16 steps, cap-and-band, premium carpet | $400 to $880 | Higher labor cost due to precision fitting |
| Curved or spiral staircase | $500 and up | Every step requires a custom cut, priced individually |
Direct answer: How much does it cost to carpet stairs? Expect $10 to $55 per step professionally installed, or roughly $150 to $880 total for a standard straight staircase of 12 to 16 steps, depending on carpet quality and whether the stairs have spindles.
DIY installation saves most of the labor cost, which typically runs $6 to $20 per step on its own, but it does require renting or buying a knee kicker and possibly a power stretcher if you don’t already own one. For a single staircase, renting these tools for a day is usually far cheaper than a professional installation quote, especially if you’re also comfortable doing the measuring and cutting yourself.
If you’re weighing a stair carpet upgrade against other projects with a bigger impact on resale value, our guide to cheap ways to increase home value breaks down where flooring updates rank against other budget-friendly improvements.
Choosing the Right Carpet for Stairs
Cost and installation method matter, but none of it holds up if you pick the wrong carpet fiber for a surface that gets this much daily wear. Stairs are one of the highest-traffic surfaces in any home, since every step compresses the fibers at the same point, over and over, in a way flat flooring never experiences.
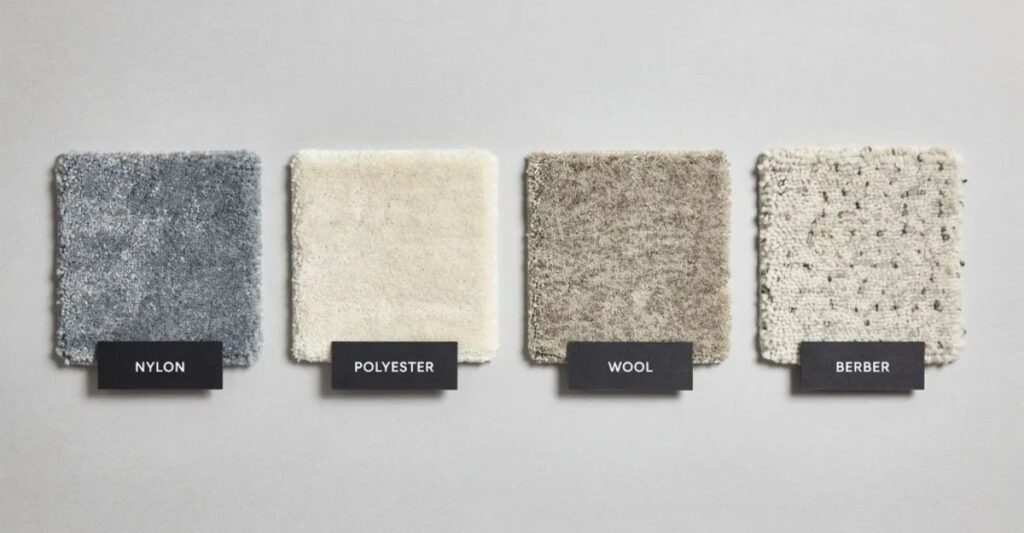
- Nylon is the professional standard for stairs. It resists crushing and holds its texture far longer than other synthetic fibers.
- Polyester looks good initially and costs less, but tends to flatten within two to three years on stairs specifically, even though it performs fine in low-traffic rooms.
- Wool is durable and looks excellent, but its thickness makes it noticeably harder to work with during installation, particularly for the cap-and-band method.
- Berber and looped styles can look great on stairs but carry a real risk: a single snagged loop can run and unravel across multiple steps, so households with pets or a lot of foot traffic should weigh this carefully.
Stairs also see their fair share of spills and messes, especially in households with kids or pets underfoot. If a sticky mess ever ends up ground into the fibers, our guide on how to get slime out of carpet covers safe removal methods that won’t damage the pile, which is worth bookmarking before it happens rather than after.
A stair runner, which covers only the center portion of each tread rather than the full width, is a popular middle-ground option. Runners typically use less carpet, expose some of the wood or existing flooring on either side, and cost somewhat less overall while still providing the cushioning and noise reduction of full carpet.
Common Mistakes to Avoid
Even a carefully planned installation can go sideways over a few avoidable errors. Many DIY errors happen because homeowners rush how to install carpet on stairs without taking accurate measurements or using the proper tools. Here’s what trips up most first-time DIYers:
- Skipping the buffer in your measurements. Cutting carpet to the exact measured length with no margin for error is the single most common way DIYers end up short mid-installation.
- Working top to bottom instead of bottom to top. This creates visible mismatches at the seams and makes the final overlap look pieced together rather than continuous.
- Using your hands instead of an awl near tackless strips. The angled tacks are sharp enough to cause real injury. Always push carpet into place with the tool designed for it.
- Choosing polyester or a delicate looped weave for high-traffic stairs. It may look fine on day one, but stairs punish the wrong fiber choice faster than any other surface in the house.
- Not stretching the carpet fully with a knee kicker. Carpet that isn’t properly stretched will ripple, bunch, or loosen within months, creating a trip hazard on a part of the home where falls are already more dangerous than on flat flooring.
- Nailing tackless strips without cardboard protection near baseboards. A single missed hammer strike can dent or chip trim that’s otherwise fine.
- Ignoring squeaks or loose treads before installing carpet. Carpet covers noise and unevenness temporarily, but it doesn’t fix a structural issue. If your stairs currently creak, it’s worth addressing that first using the same techniques covered in our guide on how to fix squeaky hardwood floors, since many of the same subfloor and fastening fixes apply to stair treads as well.
Frequently Asked Questions About Installing Carpet on Stairs
How long does it take to carpet a staircase?
A straight staircase of 12 to 16 steps typically takes a full day for an experienced DIYer using the waterfall method, or a full weekend for a first-timer or when using the more detailed cap-and-band method. Professional crews often complete the same job in three to five hours.
Can I install carpet on stairs without tackless strips?
Yes, though it’s less common. Carpet can be secured to stairs using a heavy-duty carpet adhesive and staples instead of tackless strips, particularly on landings or stairs where tackless strips aren’t practical. This method requires careful attention to keep the carpet flat and smooth as you work down each step, since there’s no strip to anchor the edge as firmly as a tackless installation does.
What’s the difference between a stair runner and full stair carpet?
A stair runner covers only the center portion of each tread, leaving finished wood or flooring visible on either side, while full carpet covers the entire width of each step wall to wall. Runners generally use less material and cost less overall, while full carpet offers more complete cushioning and sound dampening.
Do stairs need special padding, or can I use regular carpet pad?
Stairs generally need a firmer, thinner padding than what’s used in a living room or bedroom. Standard plush padding compresses unevenly under the concentrated foot traffic of stair use, which can create lumps or premature wear. Ask your carpet supplier specifically for stair-rated padding rather than assuming leftover pad from another room will work.
Is it safe to DIY carpet installation on stairs?
Yes, for most straight staircases, DIY installation is a reasonable project for a homeowner comfortable with basic tools. The main safety consideration is handling tackless strips carefully, since the angled tacks are sharp, and always using a carpet awl rather than your hands to press carpet into them. Curved, spiral, or unusually steep staircases are more forgiving to leave to a professional, since the margin for measurement error is much smaller.
How often does stair carpet need to be replaced?
Well-installed nylon carpet on stairs typically lasts 8 to 12 years under normal household use, though high-traffic homes or households with pets may see noticeable wear sooner, particularly on the nosing of each step, which takes the most direct impact.
Does carpeting stairs improve safety?
Yes, in most cases. Carpeted stairs provide more traction and cushioning than bare wood, which can reduce the severity of slips, though a properly installed and well-maintained hardwood stair with adequate lighting and handrails is also a safe option. The Carpet and Rug Institute’s residential installation standards note that carpet must be power-stretched correctly to avoid the wrinkling and rippling that actually creates a trip hazard, so installation quality matters as much as the choice to carpet at all.
Bottom Line on Installing Carpet on Stairs
How to Install Carpet on Stairs is a manageable DIY project that can save money while giving your staircase a clean, professional finish. Waterfall installation is the more forgiving starting point for a first attempt, while cap-and-band rewards the extra time with a more tailored, upscale finish. Measure generously, work from the bottom of the staircase to the top, and don’t skip the padding or the proper tackless strip placement, since those details are what separate a stair carpet that lasts a decade from one that ripples within a year.
If this project is part of a bigger flooring or interior refresh, browse our full home improvement section for related guides on tackling the rest of the house room by room.

I started Domelite Home because I got tired of home improvement advice that was either too vague or written by people who had never actually picked up a drill. I’m Naik Zali Shah I’ve spent years obsessing over renovation projects, smart home setups, and interior design, and I built this site to share what actually works. No fluff, no filler. Just honest advice for homeowners who want to get things right the first time.