
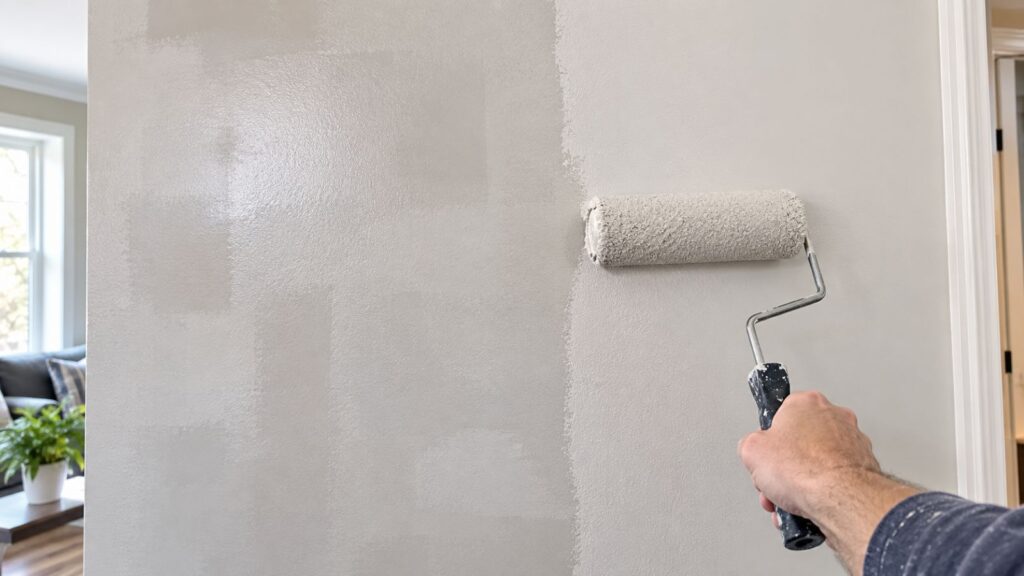
You step back once the roller is finally down and notice something is off. Part of the wall looks slightly darker than the rest. If you’re wondering how to fix uneven paint, the good news is that it is rarely a sign that something went irreversibly wrong. It is usually one of a handful of fixable issues, and once you know which one you are dealing with, the fix is often just an evening of extra effort.
This guide covers why paint ends up looking uneven, then gets specific about each situation, because uneven paint on a ceiling is not quite the same problem as uneven paint from a touch-up, or a wall with patchy sheen. Each case gets its own section so you are not left guessing.
Quick Answer
Lightly sand the problem area, wipe away the dust, prime any spots that were patched or repaired, and roll on a full, even coat while keeping a wet edge as you work. If what you are actually seeing is a sheen difference, some parts shinier and some flatter rather than an actual color difference, repainting the whole wall usually looks better than trying to touch up just the patch.
Why Does Paint Look Uneven in the First Place?
There is rarely just one cause. More often it is a mix of a few small things that add up. Paint applied with inconsistent pressure or thickness is a common culprit, and so is the wrong roller nap or a cheap roller that does not hold paint evenly. One coat is rarely enough for full, opaque coverage, so thin spots often trace back to skipping the second coat. Painting straight onto an unprepped or unsanded surface causes problems too, as does skipping primer over patches and repairs.
Touch-up paint that no longer quite matches the surrounding wall is another frequent cause, along with two different sheens ending up on the same surface. Losing your wet edge, meaning you let one section dry before blending in the next, is one of the most common reasons for visible streaking. Heat, sun, and humidity can also mess with how fast paint dries and how well it blends.
Figuring out which of these actually applies to your wall matters, because the fix is genuinely different depending on whether you are dealing with a coverage issue, a sheen issue, or a technique issue.
How to Fix Uneven Paint: Step-by-Step
Lightly sand the problem area, wipe away the dust, prime any spots that were patched or repaired, and roll on a full, even coat while keeping a wet edge as you work.
Step 1: Figure Out What You Are Actually Looking At
Look at the wall under a couple of different light sources before doing anything else. Natural daylight helps, and so does a lamp held at an angle. Angled light is unforgiving. It shows texture and sheen differences that overhead light hides completely. Check for streaks or visible brush strokes, roller marks or lines where one pass met the next, thin or patchy spots, actual color differences between sections, and shinier or duller patches.
One thing worth ruling out first is whether you are looking at a real inconsistency at all. Sometimes what looks like uneven paint is just how light is bouncing off the wall. If the unevenness seems to shift or disappear depending on where you are standing, you are probably looking at sheen reflection rather than a coverage problem, and that changes how you would approach fixing it.
Step 2: Narrow Down the Cause
Once you know where the problem is, figure out why it happened. Poor coverage means some areas simply did not get enough paint, or need another coat to look fully opaque. Uneven application happens when you press harder in some spots than others, or roll in different directions, which leaves visible differences once it dries. Surface issues come from a wall that was not cleaned, patched, or primed properly, so it absorbs paint unevenly and shows up blotchy. A touch-up mismatch can happen even with the exact right color if the surrounding paint has aged or faded since it was applied.
Step 3: Prep the Surface
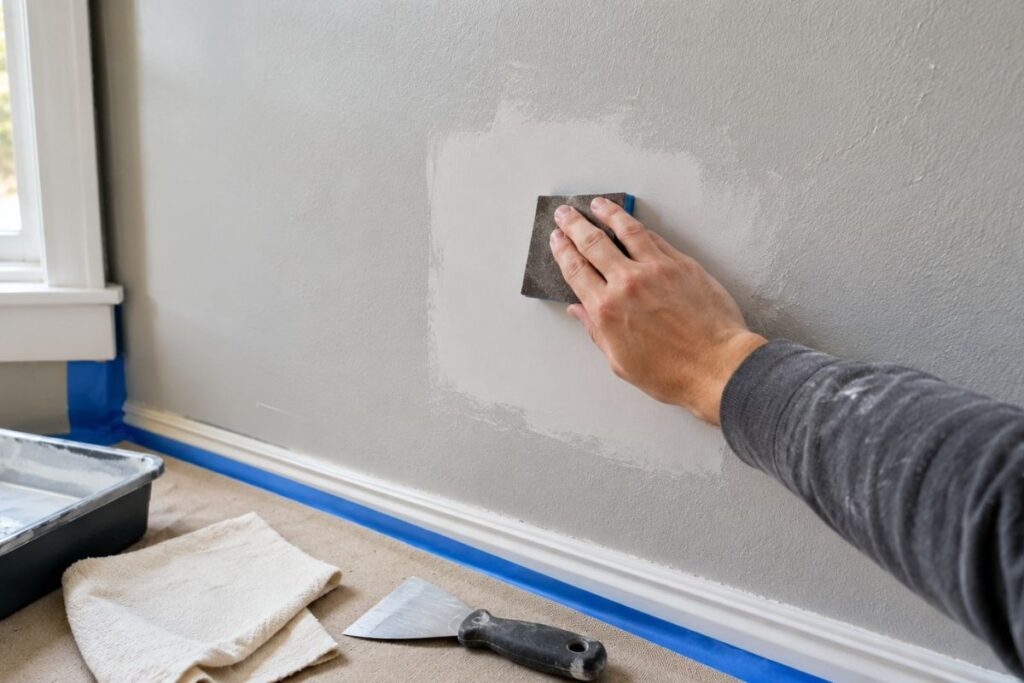
Most cases of a second coat still looking uneven trace back to this step being rushed. Before you repaint, lightly sand any rough, raised, or glossy spots. Fine 220-grit sandpaper works for most situations. Wipe down all the dust with a tack cloth or a slightly damp rag afterward. Fix any dents or holes and let the repair dry completely before moving on. Prime anywhere the paint seems to be soaking in differently, since patched drywall and spackle are the usual offenders.
Step 4: Apply the New Coat Properly
If what you are seeing is actually peeling or cracking rather than just patchy color, that is a separate issue worth handling first. Our guide to fixing peeling paint covers that before you think about repainting over it.
Once the wall is ready, do not skimp on paint quality. Cheaper formulas often have less pigment and need extra coats to look even. Match the roller nap to your wall’s texture, with 3/8 inch being a safe bet for most smooth interior walls. Keep your pressure consistent across the whole wall instead of bearing down harder in some spots than others. Maintain a wet edge so sections blend into each other instead of leaving visible lines, and go for full, even coats rather than thin, rushed passes.
If you can, repaint the whole wall corner to corner instead of just touching up the trouble spots. It is more work up front, but it avoids any risk of a visible line where old paint meets new.
Uneven Paint Layers
This happens when some parts of the wall end up with noticeably more paint buildup than others, usually from inconsistent rolling, a string of small touch-ups over the years, or coats applied at different thicknesses. To even it out, let everything dry completely first, then sand down any raised or thick areas until the surface feels consistent under your hand. Clear away the sanding dust and roll on a fresh, even coat across the whole area, not just the thin-looking spots.
It is tempting to dab a bit of paint onto the thin spots and call it done, but that usually backfires. Those small patches build up differently than the surrounding paint and end up making the unevenness more obvious rather than less.
Uneven Paint Sheen (Flashing)
Sometimes the color is fine, but parts of the wall look shinier or flatter than the rest. Painters call this flashing, and it trips up plenty of experienced people too, since it is often invisible while you are painting and only shows itself once the paint has fully dried and is catching light at a certain angle.
Flashing usually comes down to missing or inconsistent primer, uneven pressure or thickness while rolling, painting over patches without sealing them first, a cheap roller or brush laying paint down unevenly, or painting in dim light where you cannot see the streaks until it is too late.
To fix it, sand the area lightly, then prime any patched or repaired spots. These almost always absorb paint differently and are usually the real cause of flashing. Repaint with smooth, even strokes, blending into the surrounding area rather than stopping sharply at the edge, and work under decent lighting so you can catch streaks while they are still wet and fixable.
For sheen problems specifically, two thin coats beat one thick one. Paint applied too heavily is actually a common cause of shiny patches in the first place.
Does the Finish You Choose Matter?
Quite a bit. The glossier the paint, the more it will show any unevenness underneath.
| Finish | Reflectivity | Best For | Notes on Evenness |
| Matte/Flat | Lowest | Bedrooms, living rooms, low-traffic areas | Forgiving of imperfections, harder to keep clean |
| Eggshell | Slightly higher | Low-traffic bedrooms, dining rooms | Soft sheen, less durable than satin |
| Satin | Medium | Kitchens, bathrooms, high-traffic walls | Smooth look, but flashing is more visible than on flat |
| Semi-Gloss | High | Trim, baseboards, doors | Durable and washable, unevenness shows more |
| High-Gloss | Highest | Cabinets, trim, high-traffic surfaces | Most reflective, most likely to reveal any inconsistency |
Glossier finishes clean up nicer and last longer, but they are also less forgiving of any unevenness underneath. That is part of why many professional painters lean toward eggshell or satin for most walls, and matte for older rooms with a lot of texture or repair history.
If you are matching an existing wall color for a touch-up, check the sheen along with the color. Paint stores can match a color from a chip pretty reliably, but sheen can still come out looking different once it is dry, so a small test patch somewhere inconspicuous is worth the extra few minutes.
Paint Streaks
Streaks are almost always about technique rather than the paint itself. Common causes include too little paint on the roller, going over the same spot repeatedly as it starts drying, pressure that is not consistent across the wall, and letting one section dry before moving into the next.
To fix streaking, let what is there dry fully first. Sand down any rough or raised patches, then apply a full, fresh coat. Resist the urge to just fill in the streaked lines, since that tends to create new texture differences instead of fixing the old ones. Keep a wet edge from start to finish, working section by section without stopping midway across a wall.
You will see the phrase “wet edge” in nearly every painting guide, so it is worth explaining what it actually means. It means you are always painting into an area that is still wet, rather than letting paint dry and then butting new paint up against it. In practice, that means working in roughly 3×3 foot sections, rolling a loose W or N shape and filling it in, then moving to the next section while the edge of the last one is still wet and overlapping slightly. Rolling in one consistent direction rather than going back and forth helps strokes blend instead of crossing and leaving texture lines. Heat and direct sun speed up drying, which makes this harder to manage, so working in smaller sections or painting when it is cooler helps.
Uneven Lines Around Edges and Trim
This shows up most around ceilings, corners, trim, and anywhere an accent wall meets a different color. Let the existing paint dry completely, then lightly sand any rough or ridged edges. Tape off a clean, straight line if you are redefining the edge, and repaint carefully with a good angled brush. A roller will not give you the control you need here.
Cutting in a clean line is slower and more deliberate work than rolling a flat wall. If it still looks uneven after your first pass, a second thin, careful coat usually does the trick. Trying to fix it with one heavy pass tends to make things worse.
Uneven Ceiling Paint
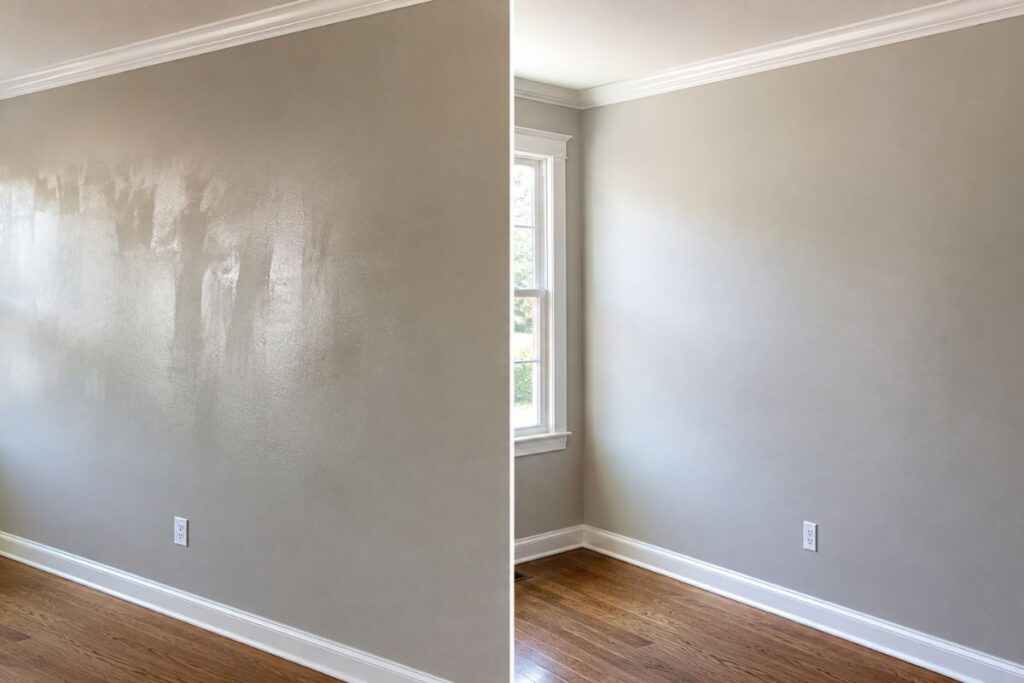
Ceilings are harder to get right, mostly because overhead light shows every roller mark and coverage gap that would barely register on a wall. The usual culprits are visible roller marks from inconsistent pressure, thin or patchy coverage, sections that do not blend well into each other, and different parts drying at different speeds, especially near windows or vents.
Use paint made for ceilings, since it is usually formulated to hide lap marks better and dries to a flatter, more forgiving finish. Keep your roller pressure consistent across the whole ceiling, not just the parts that are easy to reach, and work in manageable sections instead of trying to cover the entire ceiling in one go. Add a second coat if the first one does not fully hide the old color or any patchiness.
Uneven Touch-Up Paint
This is especially frustrating because you did everything right, same can, same color, and it still stands out. Usually it comes down to the wall’s original paint having aged, faded, or yellowed a bit since it was applied. The wall may have seen more sun, cleaning, or general wear than the fresh touch-up has. The sheen of the touch-up might not quite match the surrounding paint, or the touch-up spot may simply absorb new paint differently than the rest of the wall.
Clean the area first, then sand lightly if there is any texture difference or old touch-up buildup. Prime if the patch seems to be absorbing paint noticeably differently, which is common over spackle or drywall repairs. For the cleanest result, repaint the whole wall edge to edge rather than trying to blend a small patch. Touch-ups are convenient, but of everything covered here, they are the most likely to still be visible under angled light.
Do You Really Have to Repaint the Whole Wall?
Not always. Many professional painters use a fairly simple approach for fixing localized flashing or unevenness without redoing an entire wall: sand lightly to level out the problem spot and cut down on unwanted reflection, spot-prime any patches or repairs since they tend to absorb paint differently than the rest of the surface, then repaint carefully, matching the direction and thickness of the surrounding coat as closely as possible.
This works well for small, localized issues. Keep your expectations realistic, though. Even a careful spot fix can leave a slight sheen difference, since porosity, weather, and small variations between paint batches all play a part.
A full repaint is usually the better call if the unevenness covers a large chunk of the wall rather than one spot, if your touch-up or repair still looks shiny, dull, or off after drying, if the repair paint’s sheen does not match the rest of the wall, or if you have already tried a spot fix once and it is still noticeable.
If you do go the full repaint route, sand for an even texture, clear all the dust, prime thoroughly, especially over patches, and let that dry completely before applying two full coats. If there is actual cracking or flaking mixed in with the unevenness, it is worth reading our DIY guide to fixing peeling and cracking wall paint before you start.
Does Weather Actually Affect This?
A little, though it is usually a secondary factor compared to prep and technique. Heat and direct sunlight speed up drying, which makes it harder to keep a wet edge and is a common cause of streaking on exterior walls or rooms with big, sun-facing windows. Painting in moderate temperatures and keeping the working surface out of direct sun makes it noticeably easier to keep everything blending smoothly.
Good Tools Make a Difference
It is easy to underestimate this, but tool quality really does affect how even a paint job turns out. A good roller or brush holds and releases paint more consistently, which cuts down on streaking, lap marks, and patchy spots. Benjamin Moore’s own painting guide suggests rolling a loose W shape and then filling it in with light strokes before reloading, a simple habit that helps avoid the dimpled, textured look that comes from reloading too often in the same spot.
It is worth having a roller with the right nap for your wall’s texture and in decent shape, not shedding fibers. A roller extension pole helps keep pressure consistent across a full wall or ceiling. A good angled brush makes clean, controlled edges possible, and decent lighting, even just painting during the day, lets you catch problems while the paint is still wet enough to fix.
Preventing This Next Time
The easiest way to deal with uneven paint is to avoid it in the first place. Clean the surface properly before you start, and handle any dents, holes, or repairs ahead of time. Prime where it is needed, especially over patches, and pick a finish that actually suits the room and its lighting. Do not cheap out on rollers and brushes, and plan on two coats even with paint that claims one-coat coverage. Avoid painting in extreme heat, direct sun, or very dry conditions, and buy enough paint from the same batch to finish the whole job, since color and sheen can shift slightly between batches.
None of this is complicated, but it is easy to rush past, and rushing past it is exactly what leads to redoing the wall a week later. If you are working on cabinets or trim rather than walls, evenness matters even more since you are looking at them up close. Our painted kitchen cabinet ideas guide gets into finish and sheen choices specific to cabinetry.
FAQ
Why does my second coat still look uneven? Usually the first coat was not fully dry before you added the second, the roller was not loaded consistently, or there is a patched spot that never got primed. Let the first coat cure properly, prime anything absorbent, and roll the second coat with even pressure throughout.
Can I just touch up one spot instead of repainting the whole wall? You can, and a fresh touch-up with the same paint, blended in while it is still wet, can work fine. The catch is that existing wall paint fades and shifts in sheen over time, so even the right paint can end up looking like a patch. Repainting corner to corner tends to look more seamless.
Does the sheen I pick actually affect how visible unevenness is? Yes, more than people expect. Flat and matte finishes are forgiving and hide roller marks and small inconsistencies well. Satin, eggshell, semi-gloss, and high-gloss all reflect more light, which means any unevenness, flashing, or touch-up is going to stand out more.
What exactly is flashing in painting? It is the term for uneven sheen, meaning spots that look more matte or more glossy than the rest of the wall. It is usually invisible while you are painting and only becomes obvious once everything is dry and the light hits it a certain way.
How many coats do I actually need? Two, for almost every wall, even with paint marketed as one-coat. Darker colors, big color changes, or glossier finishes sometimes need a third.
Why does my ceiling look worse than my walls? Overhead lighting is unforgiving. It exposes roller marks and coverage gaps that you would barely notice on a vertical wall. Ceiling-specific paint, working in manageable sections, and keeping your roller pressure even all help.
Can I always fix uneven paint without repainting the whole room? Most of the time, yes. Sanding, spot-priming, and a proper coat handle the majority of cases. A full repaint tends to be the better option for widespread flashing, a major color mismatch, or touch-ups that still look off after you have already tried fixing them once.
Is this a job for a professional, or can I handle it myself? Minor streaking, small touch-up mismatches, and localized flashing are all manageable as DIY projects. If the problem covers a large area, keeps coming back, or involves a tricky surface such as heavy texture, high ceilings, or exterior walls, it might be worth bringing in a professional for a guaranteed even result.

I started Domelite Home because I got tired of home improvement advice that was either too vague or written by people who had never actually picked up a drill. I’m Naik Zali Shah I’ve spent years obsessing over renovation projects, smart home setups, and interior design, and I built this site to share what actually works. No fluff, no filler. Just honest advice for homeowners who want to get things right the first time.