

Your walls looked great when you moved in. Now there’s a patch of peeling paint near the bathroom, a hairline crack running across the living room, and a chip where the door handle keeps swinging too far. Sound familiar?
Wall paint repair is one of the most common and most ignored home fixes. People assume it’s complicated or expensive. It’s not. A small DIY repair kit costs under $25, and most jobs take under two hours. In fact, simple repairs like this are one of the smartest ways homeowners cut renovation expenses, especially when following practical money-saving home renovation tips.
This guide covers everything you need: why paint fails, how to fix it yourself, and when to call a pro.
Why Peeling Paint Repair Starts with Finding the Cause
Before you touch a scraper, identify the cause. Fixing the symptom without addressing the root problem means your wall paint repair will peel again in weeks.
The four most common causes:
1. Moisture: This is the #1 reason interior paint fails. Water trapped beneath the surface breaks the bond between paint and wall. Look for yellow or brown stains, bubbling, or sagging paint — all signs of moisture damage. Fix any leaks or ventilation problems before you repaint.
2. Poor surface prep: Paint applied over dirty, dusty, or previously glossy surfaces won’t adhere. If an old coat of enamel or oil-based paint wasn’t properly primed before a latex coat was applied on top, peeling is almost guaranteed.
3. Age: Paint loses flexibility over time. After several years, it becomes brittle and starts to crack, chip, or flake away from the wall. This is especially common in older homes.
4. Temperature swings: Rooms with high humidity fluctuations, such as bathrooms, kitchens, and basements, experience more paint stress than other areas. Heat and cold cause walls to expand and contract, which eventually breaks the paint film.
Identify your cause. Then repair.
What You Need: Tools & Materials
Wall paint repair doesn’t require expensive equipment. Here’s your complete list:
- Paint scraper or putty knife
- Wire brush
- 100-grit and 220-grit sandpaper
- Spackling compound or drywall joint compound
- Bonding primer (for peeling) or stain-blocking primer (for water stains)
- Matching wall paint
- Drop cloth and painter’s tape
- Safety glasses and a dust mask
Cost to DIY: Most homeowners complete a standard wall paint repair for under $25 in materials. A full DIY kit, including spackle, patch, putty knife, and sandpaper, typically runs $10–$55.
Step-by-Step Wall Paint Repair Guide
Step 1: Protect the Area
Lay a drop cloth directly below the damaged wall and push it snug against the baseboard. Secure it with painter’s tape. Put on your safety glasses, paint chips are sharp and can fly. If your home was built before 1978, test for lead paint before scraping anything. Lead dust is a serious health hazard.
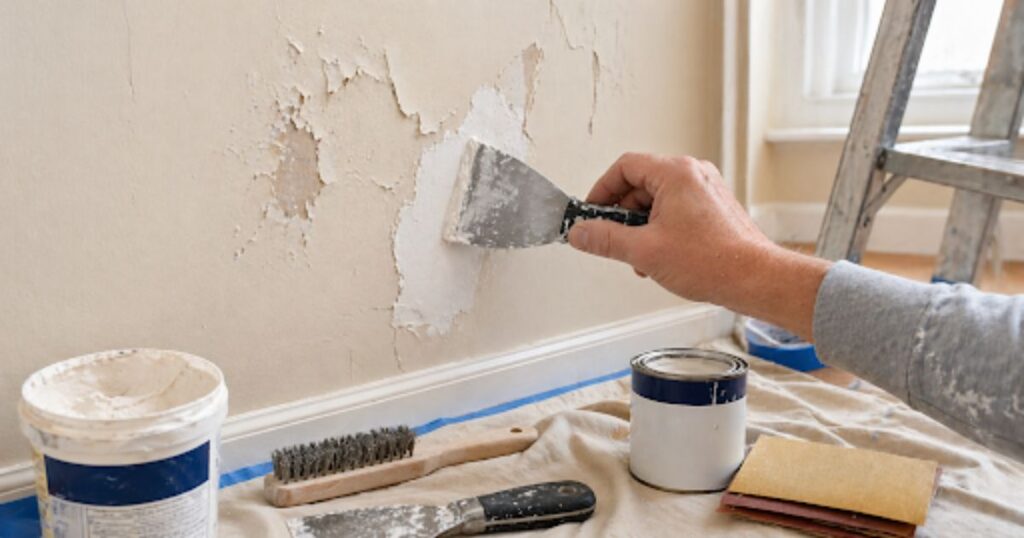
Step 2: Remove All Loose and Damaged Paint
This is the most important step. Never paint over flaking paint; it will peel again. Use your putty knife or paint scraper to chip off large paint flakes by pushing the blade forward and underneath them until they pop off. Work around the entire damaged area until no more fragments fall.
Most homeowners think peeling paint repair requires professional help, but small sections can be fixed easily with the right prep.
Then use a wire brush to remove any smaller loose bits. For semi-gloss or high-gloss walls, lightly scuff the area with 100-grit sandpaper a few inches beyond the damage to help new materials bond to the surface.
Step 3: Clean the Surface
Wipe the repaired area with a damp, lint-free cloth. Remove all dust, debris, and loose material. Let it dry completely before moving to the next step. This matters more than most people realize — any residue left on the surface will prevent proper adhesion.
Step 4: Fill Cracks and Holes
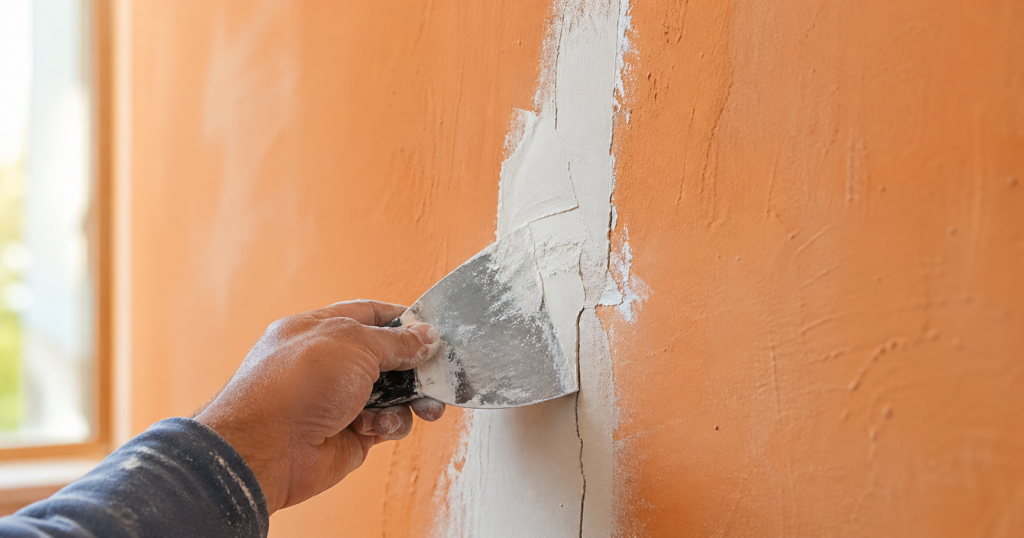
Using a putty knife, apply spackling compound or joint compound in a thin, smooth layer over the damaged area. For hairline cracks, a single thin pass is enough. For deeper holes, apply in layers, each layer no more than ¼ inch thick, and allow each layer to dry fully before adding the next.
Pro tip: If the patching material shrinks as it dries (common with standard spackle), lightly sand and apply another thin coat. Don’t rush this. A lumpy patch is immediately visible under fresh paint.
Once dry, sand the patch smooth with 220-grit sandpaper until it sits flush with the surrounding wall. Wipe away all dust with a clean, damp cloth.
Step 5: Apply the Right Primer
Priming is non-negotiable for a lasting wall paint repair.
- For peeling paint areas: Use a bonding primer. It grips the edges of the remaining paint and creates a stable base for the new coat.
- For water stain areas: Use a stain-blocking primer (oil-based or shellac-based works best). Painting directly over a water stain without this primer means the stain will bleed through, no matter how many coats you apply.
Apply one even coat of primer with a brush or roller. Let it dry completely per the product instructions, usually 1–2 hours.
Step 6: Paint the Repaired Area
Apply one or two coats of wall paint in the matching color, allowing full drying time between coats. Use a brush for small patches and a roller for larger areas to match the existing wall texture.
If you don’t have the original paint, take a large paint chip to your hardware store — modern paint-matching technology can get extremely close. Be aware that paint fades unevenly depending on sun exposure, so the repair may be slightly visible regardless of the match. If the difference is noticeable, consider painting the entire wall for a uniform finish.
DIY vs. Hiring a Pro: When Does It Make Sense?
| Damage Type | DIY or Pro? | Estimated Cost |
| Small chips and scuffs | DIY | $10–$25 |
| Hairline cracks | DIY | $10–$30 |
| Peeling paint (no moisture) | DIY | $15–$55 |
| Water-damaged paint | Pro recommended | $150–$800+ |
| Large holes (6 inches+) | Pro | $125–$475 |
| Mold behind the wall | Always hire a pro | $350–$1,500+ |
For minor wall paint repair jobs, DIY is straightforward and inexpensive. But water damage is a different story. The average home water damage claim exceeds $12,000, and mishandling even a minor moisture repair by sealing before the wall cavity is fully dry can trap moisture inside the wall and lead to mold growth. When moisture is involved, get it properly assessed first.
How to Prevent Wall Paint Damage (Make Your Repair Last)

- Control humidity. Keep indoor humidity between 25–50%. Bathrooms and kitchens need proper exhaust ventilation.
- Use a quality primer before every paint job. Skipping primer is the single most common cause of premature peeling.
- Always let each coat dry fully before adding the next. Rushing the drying process causes chipping and peeling within weeks.
- Save leftover paint. Store a small amount in an airtight jar after painting any room. Touch-ups are infinitely easier when you have the exact original color on hand.
- Fix water leaks immediately. Don’t let moisture linger. The longer it sits, the deeper the damage and the more expensive the repair.
Frequently Asked Questions
Can I paint over peeling paint without removing it? No. Painting over peeling paint will cause the new coat to fail quickly. Always remove all loose paint first.
How long does wall paint repair take? Small chips and hairline cracks: 1–2 hours total (including drying). Larger patches requiring multiple compound coats: 1–3 days, since each layer needs to dry overnight before sanding.
What is the best primer for peeling paint repair? A bonding or adhesive primer is the best choice. It grips the edges of existing paint and provides a stable, smooth surface for the new coat.
How do I know if I need a pro? If you see yellow/brown water stains, soft or spongy wall surfaces, bubbling paint, or smell something musty, stop DIYing. These are signs of moisture damage or mold that need professional assessment before any cosmetic repair.
Final Thoughts
A proper wall paint repair and peeling paint repair process can restore damaged walls without expensive labor. Wall paint repair is one of the most rewarding home fixes you can tackle yourself. The steps are straightforward, the tools are cheap, and the results are immediate. Get the cause right, prep the surface properly, prime before you paint, and your walls will look clean and solid for years.
Tools used in this guide: putty knife, wire brush, spackling compound, bonding primer, 220-grit sandpaper.
I started Domelite Home because I got tired of home improvement advice that was either too vague or written by people who had never actually picked up a drill. I’m Naik Zali Shah I’ve spent years obsessing over renovation projects, smart home setups, and interior design, and I built this site to share what actually works. No fluff, no filler. Just honest advice for homeowners who want to get things right the first time.

3 thoughts on “Wall Paint Repair: How to Fix Peeling, Cracking & Chipping Paint (Step-by-Step)”