
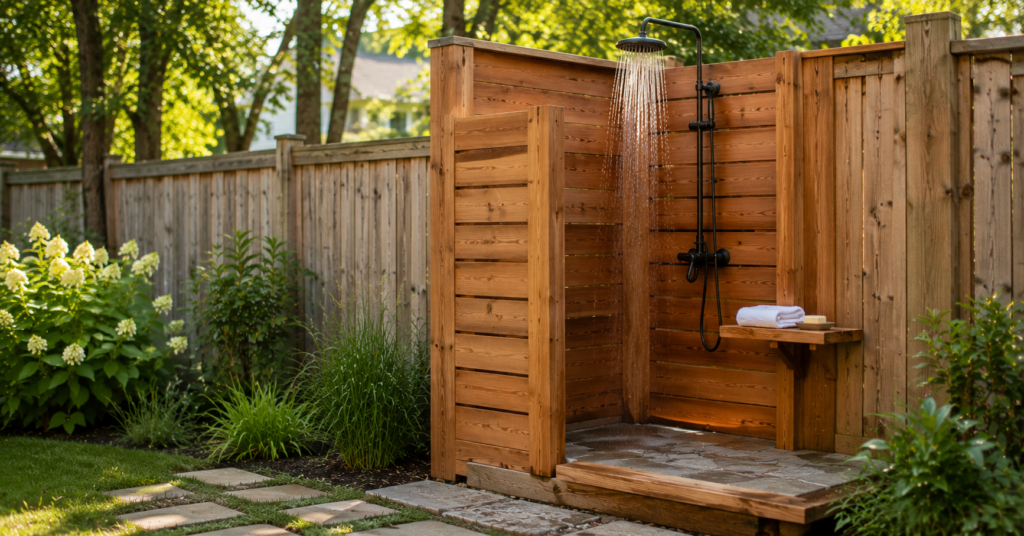
Quick answer: A basic DIY outdoor shower costs $200 to $800 with a garden hose hookup, a gravel drainage bed, and a simple privacy screen. The two things that make or break the project are drainage (water needs somewhere to go besides your foundation) and knowing whether your build needs a permit, which usually depends on whether you’re tapping into your home’s plumbing or building an enclosure larger than 120 square feet. Cold water only is the fastest, cheapest path; hot water adds cost but is doable in a weekend with PEX and push fit fittings.
You know that moment after a pool day or a muddy afternoon in the garden when you’re standing at the back door trying to decide how much dirt you’re willing to track through the house? That’s the exact problem a DIY outdoor shower solves, and it’s one of the rare backyard upgrades you can actually finish in a weekend without calling a contractor.
This guide covers everything you need to plan and build a DIY outdoor shower, from picking the spot to running water and drainage the right way: plus real cost numbers and the mistakes that turn a fun project into a wet foundation.
Why Build a DIY Outdoor Shower in the First Place
Beyond “rinse off before you track sand through the house,” a DIY outdoor shower earns its keep in a few concrete ways.
It protects your indoor plumbing and floors from constant sand, chlorine, mud, and garden chemicals. It’s genuinely enjoyable, showering outside with a rainfall head and some breeze is a different experience from a windowless bathroom. It adds resale value, too. Listings that mention a DIY outdoor shower have sold for around 2.8% more than comparable homes without one, according to real estate market data. And it works as a rinse station for kids, dogs, and gardeners, so nobody has to strip down in the mudroom.
None of that requires a luxury build. A hose bib, a privacy screen, and a gravel patch will do the job. Everything beyond that is about comfort and looks. If you’re weighing this project against other ways to add value without a full renovation, it’s worth a look at home renovation tips and money-saving tricks before you commit to a budget.
Types of DIY Outdoor Showers
Most people searching for a DIY outdoor shower fall into one of four camps, so it helps to know which one fits before buying anything.
Wall-Mounted Showers
These attach directly to your house’s exterior wall, tapping into existing plumbing behind it. The water line run is short, often just a few feet through the wall, which keeps cost and complexity down.
Freestanding Showers
These stand on their own post or frame away from the house. You get more flexibility on placement, but you’re running a longer water line, usually PEX tubing buried a few inches to a foot underground.
Kit-Based Enclosures
Pre-cut cedar or composite panel kits, often called Cape Cod style, bolt together without any carpentry. A decent kit runs $600 to $1,200, depending on size and features, and a separate plumbing kit with the showerhead, mixing valve, and hose connections adds another $150 to $300.
Portable and Hose-Powered Showers
The true budget and renter friendly option: A solar shower bag like the Advanced Elements 5-gallon camp shower, a garden hose attachment, or a freestanding tower that just needs a hose connection. No trenching, no permits, no permanence.
Planning Your DIY Outdoor Shower: Location Comes First
Walk your yard before buying a single board for your DIY outdoor shower, and think through three things: privacy, water access, and drainage path.
Privacy Usually Decides the Spot
Look at sightlines from neighboring windows, the street, and your own upstairs windows. A shower tucked behind an existing fence line, hedge, or the corner of the house needs far less structure to feel private than one sitting in the open middle of the yard. If security and monitoring the backyard matter to you, too, then the space stays both private and safe.
Water Access Shapes Your Budget
The closer your shower sits to an existing spigot or your home’s plumbing, the cheaper and simpler the build. Every extra foot of buried line adds material and labor. Professional trenching alone runs $50 to $150 per linear foot, so a 10-foot run instead of a 40-foot one is a real budget difference even if you’re doing the digging yourself.
Think About Where the Water Goes
This is the part people skip and regret: More on it below.
DIY Outdoor Shower Water Supply: Cold Only vs. Hot and Cold
The simplest and cheapest version of a DIY outdoor shower is a cold water only shower fed by a garden hose or a dedicated line off an existing spigot, using a metal Y-connector to keep your hose bib free for other uses. In most of the country, “cold” tap water in summer is perfectly comfortable, and plenty of DIY builds run this way for years before anyone adds hot water.
If you want hot water, plan on running PEX supply lines from your home’s water heater or installing a dedicated tankless propane or electric unit at the shower itself. PEX is the material of choice here: flexible, freeze resistant compared to rigid pipe, and easy to work with: using push fit connectors like SharkBite fittings that skip the soldering entirely and are available at any Home Depot or Lowes. A half inch line handles a single showerhead under 2.5 GPM fine; step up to three quarter inch if you’re running a longer line or feeding more than one fixture.
A quick gut check on pressure: code minimum is around 20 PSI at the showerhead, but 40 to 60 PSI delivers a more satisfying spray without stressing the fixtures. A $12 hose bib pressure gauge like the Measureman or Watts model tells you where you stand before you build anything.
DIY Outdoor Shower Drainage: The Part That Actually Matters Most
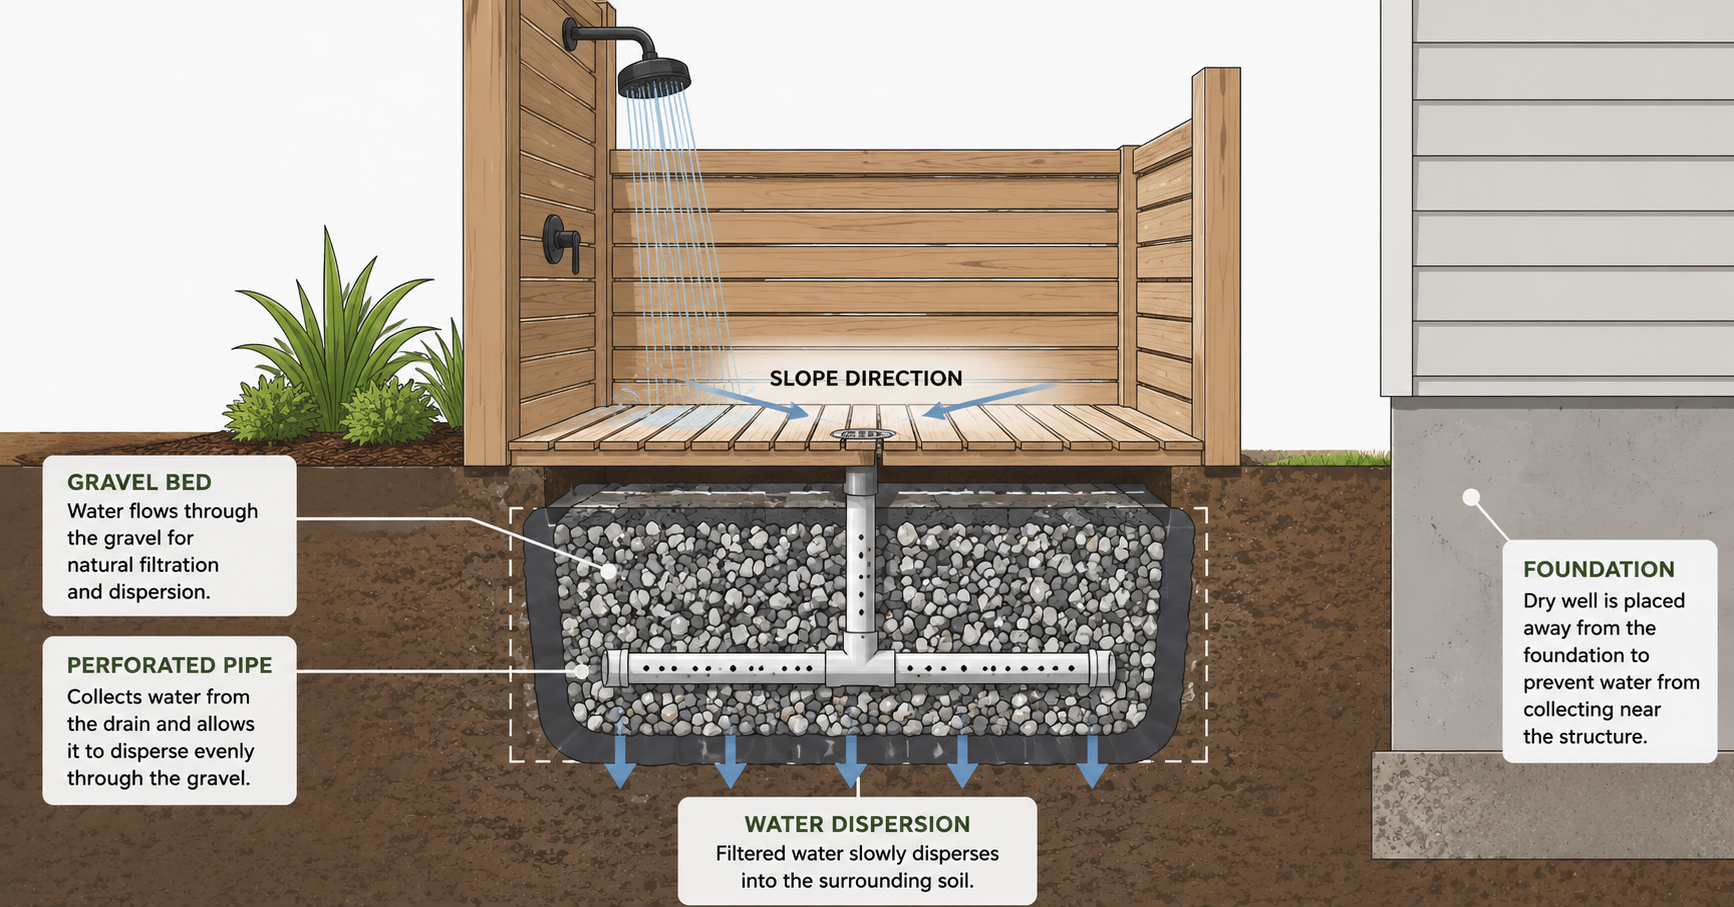
Standing water next to a foundation invites mold, rot, and cracked slabs, so drainage isn’t optional even if a permit isn’t required where you live. This is the section most tutorials rush through, and it’s the one that determines whether your build causes problems two years from now.
You’ve got four realistic options depending on soil type and local rules.
Natural Percolation
If your soil is sandy and drains fast, and your shower sits well away from the foundation, water can simply soak into the ground. Test it yourself: dump a full bucket of water on the spot and time how long it takes to disappear. If it’s still standing after five minutes, natural drainage won’t cut it.
Gravel Bed or Dry Well
A dry well is a gravel-filled pit through which water percolates. A common recommendation is an area extending about 16 inches beyond the shower’s perimeter on all sides, dug to a depth of roughly four feet. This is the go-to option for clay or slow-draining soil.
French Drain
A sloped, gravel-filled trench with a perforated pipe that carries water away from the shower and the house. The general rule is a slope of about one inch of drop for every eight feet of trench length. Materials for a DIY French drain typically run $300 to $800.
Sewer or Greywater Tie-In
Required in some coastal towns and anywhere near lakes or streams, where local rules often mandate wastewater go into a septic or municipal line rather than draining freely. Greywater rules vary a lot by state, and the EPA’s water reuse guidance is a solid starting point for understanding what’s generally allowed before you check your specific local code.
Whichever route you pick, slope the shower floor itself toward the drain; a quarter inch of drop per foot is the standard target, so water doesn’t pool underfoot.
Do You Need a Permit for a DIY Outdoor Shower?
The honest answer is it depends: so check before you dig. As a rule of thumb, tying into your home’s potable water supply or building an enclosure larger than 120 square feet is what typically triggers a plumbing or accessory-structure permit in most municipalities. A simple hose-fed portable shower with no permanent plumbing usually doesn’t need one anywhere.
Dry wells, specifically, are also regulated in a lot of areas; some counties (particularly on Long Island and in parts of Oregon and Washington) require a permit before you install one at all. Local codes are typically built on the International Plumbing Code framework maintained by the International Code Council, though your city or county can amend it, so the base code alone won’t tell you the whole story.
A five-minute call to your local building department, or even an email with a sketch of your plan, saves you from re-digging a trench after a failed inspection, which can run $500 to $2,000 in redone labor.
DIY Outdoor Shower Materials and Realistic Costs
Prices vary a lot depending on how far you take your DIY outdoor shower. Here’s a realistic range based on current builds.
| Build Type | What Is Included | Typical Cost |
| Portable or hose-powered | Solar bag or freestanding hose tower | $50 to $300 |
| Basic DIY cold water only | Hose hookup, privacy screen, gravel floor | $200 to $800 |
| Pre-cut cedar kit | Enclosure kit plus plumbing kit | $750 to $1,500 |
| Full custom DIY | Framing, hot and cold plumbing, stone floor, drainage | $1,000 to $3,000 |
| Contractor built | Design, permits, labor included | $3,000 to $8,000 |
A few cost-saving moves that show up again and again in real builds: cedar fence panels make an instant privacy wall for under $200, buying fixtures in the September through October off-season can save 40 to 60%, and building the enclosure yourself while hiring a plumber only for the water connection splits the difference between DIY and full custom without the risk of a botched supply line.
Choosing a Floor Material for Your DIY Outdoor Shower
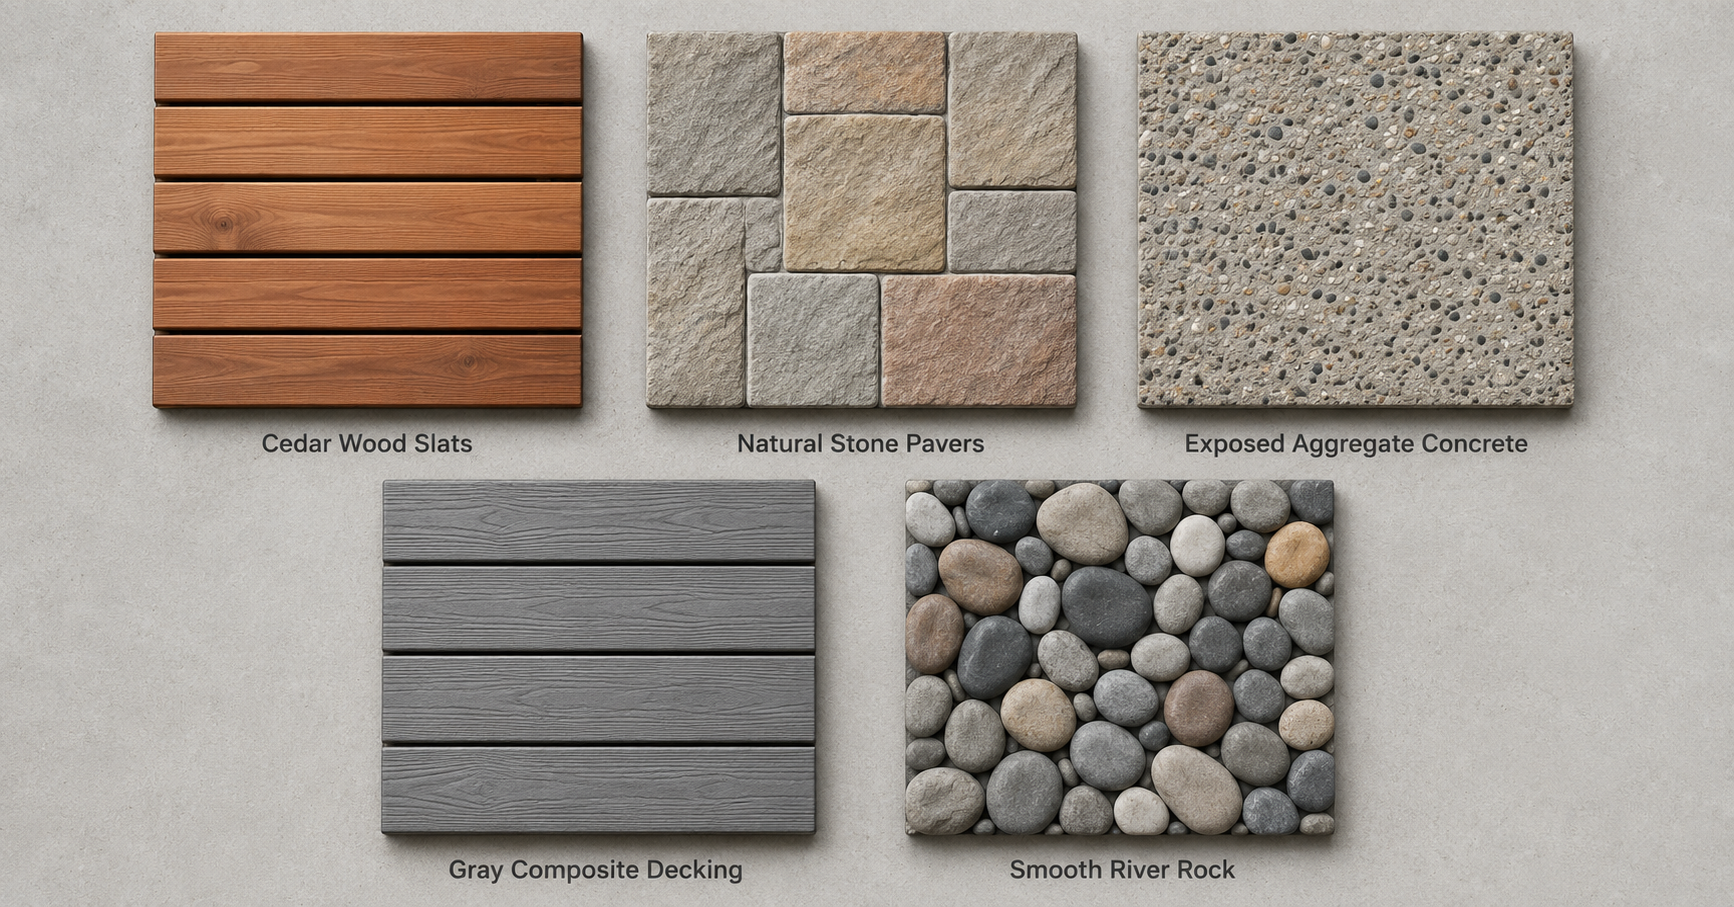
The floor takes the most abuse and the most water, so it’s worth getting right.
Cedar or teak slats are naturally slip resistant, drain well between boards, and need annual sealing, running roughly $8 to $15 per square foot. Natural stone is durable and attractive but needs a textured, not polished, finish to stay safe underfoot, at $10 to $25 per square foot. Concrete with exposed aggregate is budget-friendly at $4 to $8 per square foot and grips well when textured. Composite decking is low maintenance, drains through the gaps, and won’t rot, at $7 to $12 per square foot. River rock or pea gravel is cheap and self-draining, but test it barefoot first since not all stone sizes feel good underfoot.
Skip smooth tile and painted surfaces, both turn dangerously slick the moment they’re wet. If slip safety matters to you beyond the shower itself, the same non-slip logic that guides ADA grab bar placement in bathrooms applies here, too, and a grab bar or handhold near the entrance isn’t a bad idea for an outdoor shower either.
Step-by-Step: How to Build a Basic DIY Outdoor Shower
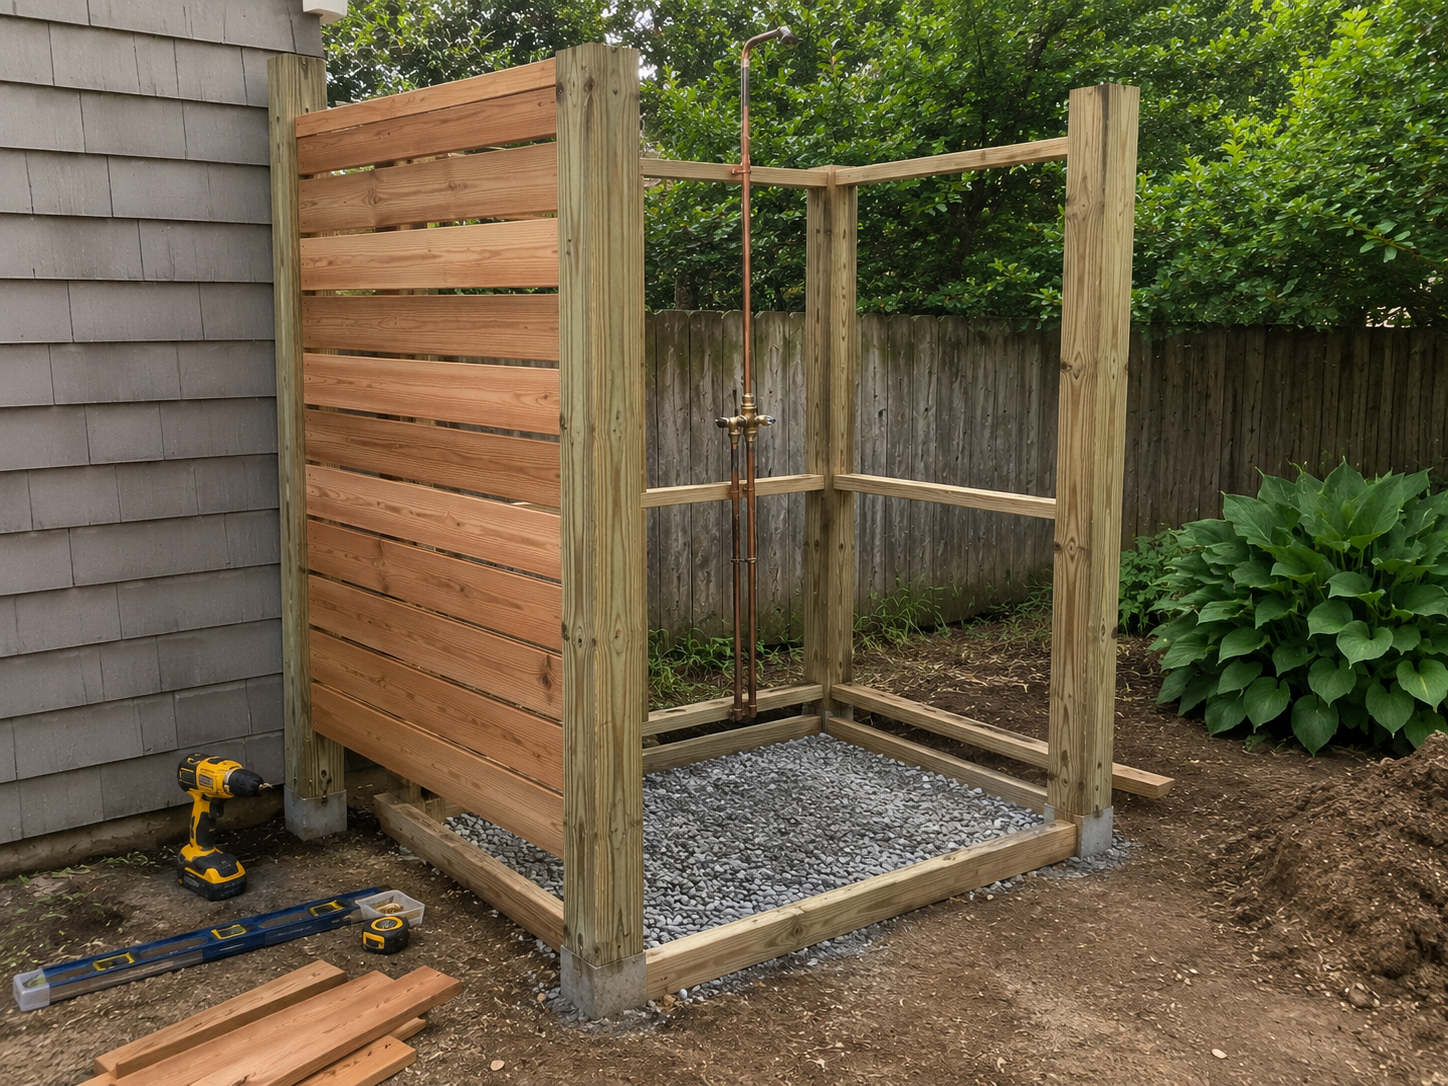
- Pick and mark the spot, factoring in privacy, sun exposure, and distance to your water source.
- Call your building department to confirm whether you need a permit for the plumbing or the structure size.
- Prep the base. Dig out grass and a few inches of soil, keeping a gentle slope away from the house, then tamp the ground flat.
- Build the drainage layer, gravel bed, dry well, or French drain, based on your percolation test and soil type.
- Run the water supply. Tap off an existing spigot with a Y-connector for cold only, or run PEX from the house if you want hot water. Add a shutoff valve you can reach from inside the shower.
- Frame the enclosure using pressure-treated lumber or a pre-cut kit, and secure it to the base so it doesn’t wobble.
- Install the flooring, pavers, gravel, or decking, sloped toward the drain.
- Mount the showerhead and fixtures, wrapping every threaded joint with plumber’s tape.
- Test the system. Run the water for 30 seconds to flush out debris, then check every joint for drips before you call it done.
- Add the finishing touches, towel hooks, a small shelf, a bench, and the details that make it feel like an actual outdoor room instead of a utility fixture.
Winterizing and Cold-Climate Considerations
If you live somewhere that sees hard freezes, don’t skip this step. A basic hot and cold line with shutoff valves and minimal insulation can stay live year-round in regions that don’t drop below freezing, but freeze-prone climates need deeper trenches, pipe insulation rated R-4 or higher, and either a drain-down valve or a frost-proof hydrant so you can empty the lines before the first hard freeze. Skipping this is the single most common reason a DIY outdoor shower turns into a burst-pipe repair job the following spring.
Common DIY Outdoor Shower Mistakes to Avoid
Skipping the percolation test and assuming the ground will just drain. Ignoring permits for anything tied into potable water, it’s a cheap phone call versus a costly redo. Undersizing the supply line for more than one fixture leaves you with a weak trickle. Using smooth or painted flooring that turns into a slip hazard the moment it’s wet. Placing the shower too close to the foundation without adequate slope or drainage away from the house. If security and monitoring the backyard matter to you alongside your new outdoor shower, pairing it with the right garden camera setup is worth considering from the start. Forgetting a shutoff valve you can reach without walking back inside, especially useful for winterizing.
Frequently Asked Questions
Q: Do DIY outdoor showers need a permit?
A: Usually, only if you’re tying into your home’s potable water supply or building an enclosure larger than 120 square feet. A simple hose-connected portable shower typically doesn’t need one, but rules vary by city and county, so a quick call to your local building department is the safest first step.
Q: Do I need a drain for a DIY outdoor shower?
A: Not always a formal drain, but you do need somewhere for the water to go. Sandy, fast-draining soil can sometimes handle runoff naturally; clay or compact soil usually needs a gravel bed, dry well, or French drain to keep water from pooling near your foundation.
Q: Can I build a DIY outdoor shower without plumbing experience?
A: Yes, especially for a cold water, hose-fed setup. Many people manage this with a Y-connector, PEX, and push fit fittings that don’t require soldering. Hot water lines and any connection into your home’s main supply are where it’s worth having a licensed plumber at least check your work.
Q: How much does a DIY outdoor shower cost?
A: Realistically, anywhere from $50 for a portable hose-fed unit up to $1,500 to $3,000 for a full custom build with hot water, framing, and a finished floor. A pre-cut cedar kit with plumbing typically lands around $750 to $1,500 all in.
Q: What’s the cheapest way to build a DIY outdoor shower?
A: A garden hose Y-connector for water, a gravel or river rock floor for drainage, and a cedar fence panel or two for privacy. That combination can come in well under $300 and still hold up for years.
Q: Does a DIY outdoor shower need hot water?
A: No. Plenty of people run cold only for the entire warm season and add a tankless propane or electric heater later if they want it usable in cooler months.
Q: What’s the best flooring for a DIY outdoor shower?
A: Cedar or teak slats and composite decking are the most popular for good reason; both drain well and stay comfortable underfoot. Avoid smooth tile or painted surfaces, which get slippery fast once wet.
A DIY outdoor shower is one of those backyard upgrades that looks like a big project from the outside but breaks down into a handful of manageable decisions: where it goes, how the water gets in, and where the water goes when you’re done. Get drainage and your water source sorted first, and the rest, the cedar walls, the stone floor, the little shelf for soap, is the fun part.

Samreen Khadim Hussain is a home improvement writer and content creator at Domelite Home. She specializes in making home renovation, interior design, and bathroom safety accessible to everyday US homeowners, turning technical subjects into clear, actionable advice. Her work is rooted in research, real-world practicality, and a genuine belief that a better home is within everyone’s reach.
1 thought on “DIY Outdoor Shower: 10 Steps to an Easy, Affordable Build”