
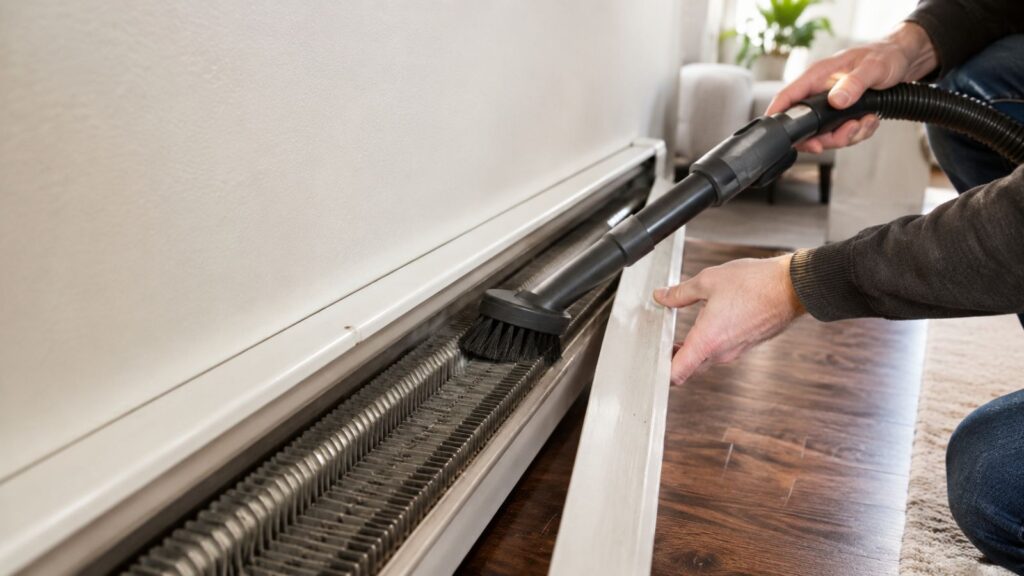
Quick answer: Turn the heater off first flip the breaker if it’s electric, shut off the boiler or zone if it’s hydronic and let it cool completely before you touch anything. Pull the front cover, vacuum the fins with a brush attachment, then follow up with a stiff-bristle brush or fin comb to loosen what the vacuum left behind. A dry or barely damp cloth handles the cover. Snap everything back together and restore power. For most homes, doing this once a year, right before the season’s first cold snap, is plenty. Twice a year if pets are part of the household.
What Is a Baseboard Heater?
If you’ve ever stared at the long metal box running along the bottom of your wall and wondered how it’s any different from a furnace vent, here’s the short answer: it isn’t heating the room the same way at all. A baseboard heater sits low, usually tucked under a window, and works through convection plain old warm air rising. It pulls in cool air near the floor, pushes it past a row of metal fins, and lets the warmed air drift back out into the room.
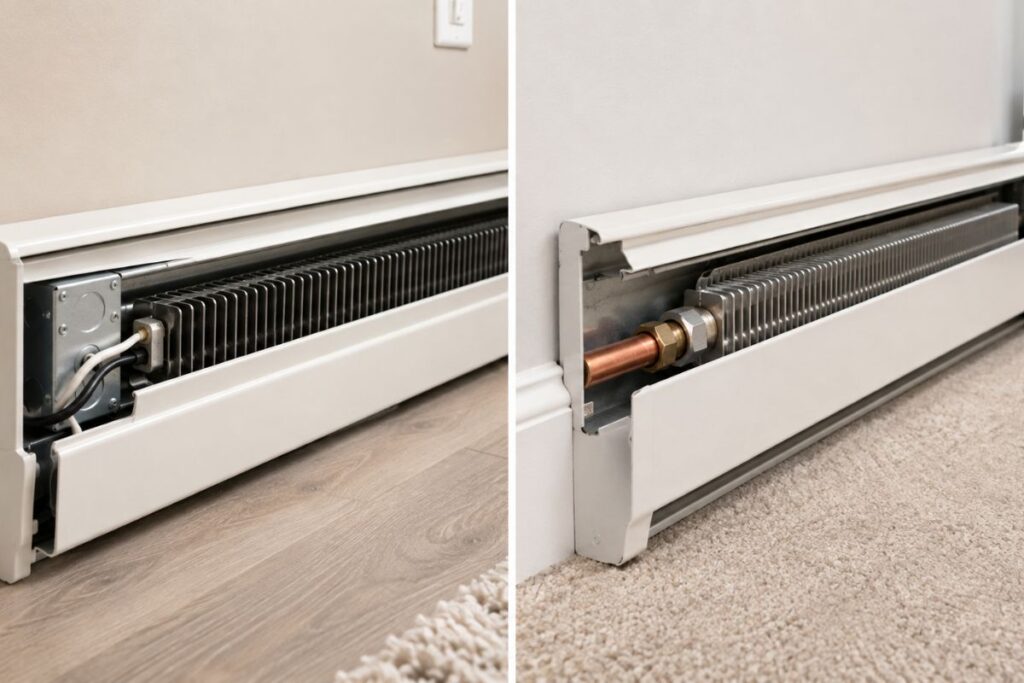
There are two versions, and knowing which one you’ve got matters, mostly because it changes how you kill the power before you start cleaning.
- Electric (resistance) baseboard heaters generate heat directly at the fins using an electric coil. No boiler, no ductwork tying it to anything else each unit runs off its own thermostat and stands entirely on its own.
- Hydronic baseboard heaters work a little differently. A central boiler heats water (or sometimes a heat-transfer oil), which then circulates through a sealed pipe running the length of the unit. That’s the reason hydronic heat feels steadier than electric the fluid keeps giving off warmth for a while even after the heating cycle technically ends.
Here’s the good news: both types collect dust in exactly the same spot, jammed between the fins. The actual cleaning process barely changes between them. What’s different is step one how you cut the power before you get started.
Why Bother Cleaning Them?
A baseboard heater is basically pulling air off your floor all day long, which means it’s also pulling in everything riding along with that air. Dust, pet hair, whatever lint escaped the dryer vent down the hall it all ends up in the same place.
Give it a full season, and that turns into a dense, felt-like layer wedged between the fins. That’s not just a cosmetic problem. It causes a few issues worth taking seriously.
The most immediate one is efficiency. Once airflow through the fins gets choked off, the heater has to work longer to bring a room up to temperature than it would with clean fins. In practice, that means you’re paying to heat air that’s fighting its way through a layer of dust before it ever reaches you.
Then there’s the smell most people already know. You flip the heat on for the first time in October, and for a few minutes the house smells faintly like something’s burning. That’s usually just dust and lint on the heating element cooking off normal, and it should clear within a few minutes. But it’s also a good reminder that a cleaning is overdue.
If the smell lingers, or gets stronger rather than fading, that’s a different situation. Shut the unit off and hold off on using it again until it’s been checked out.
It’s worth taking the safety angle seriously, too. The National Fire Protection Association tracks heating equipment as one of the more common causes of home fires nationwide, and its data points to space heaters and heating stoves as responsible for a large share of the deaths and injuries tied to home heating fires disproportionate to how many of the overall fires they actually cause. The same NFPA figures show that home heating fires cluster heavily in December, January, and February, right when a clogged baseboard unit is being asked to work hardest.
To be fair, built-in baseboard heaters are considered lower risk than portable space heaters, and dust buildup alone isn’t usually what starts a baseboard fire. Still, restricted airflow and debris are a recognized factor in overheating for fixed electric units and it’s one of the easiest risks to knock out. Twenty minutes with a vacuum covers it.
It’s also a task that fits naturally into whatever else you’re already doing around the house. If you’re working through how to clean vinyl flooring or tackling other floor-level chores, the baseboard heaters are right there no reason not to knock them out at the same time.
Tools You’ll Need
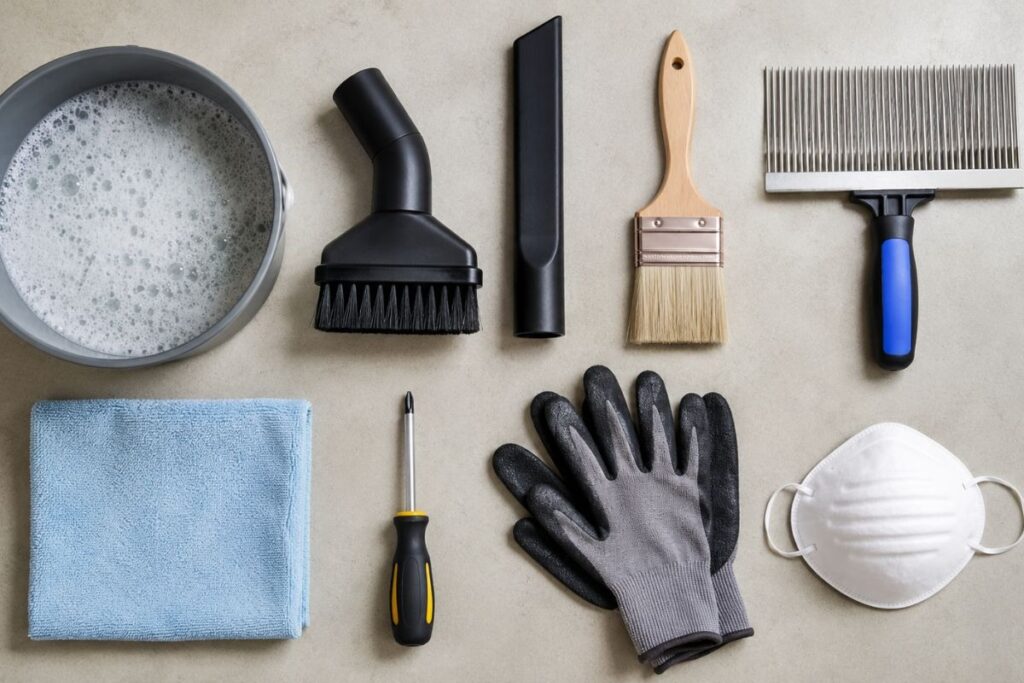
Nothing exotic here. Most of it’s probably already sitting in a closet somewhere:
- Vacuum cleaner with a brush attachment and crevice tool
- A stiff-bristle brush (an old paintbrush works fine) or an HVAC fin comb
- Microfiber cloths
- A bucket of warm water with a few drops of mild dish soap
- A screwdriver, in case your cover is screwed on rather than snapped
- Work gloves and a dust mask
- A non-contact voltage tester, if you happen to have one not strictly necessary, but a good way to confirm the power’s actually dead before you start poking around inside
Skip anything abrasive. Steel wool, scouring pads, and harsh chemical cleaners will scratch the finish, and the fins are thin enough that a heavy hand will bend or tear them.
How to Clean Baseboard Heaters, Step by Step
- Kill the power (or the heat), then wait for it to cool. For an electric unit, that means the breaker, not just the thermostat. A cool wall thermostat tells you nothing about whether the unit is actually live. For hydronic units, shut down the boiler or that zone specifically and let the water cool down. This is the one step where cutting corners actually gets people hurt, so don’t rush it.
- Pull the front cover off. Most snap off grab the bottom edge and pull up and toward you. Some are held on with screws or end caps instead, so take a look before you start yanking.
- Vacuum the fins. Run the brush attachment slowly along the exposed fins, top to bottom, both sides. This clears out the bulk of the loose dust and hair before you do anything that risks packing it in tighter.

- Get into the gaps with a brush. A vacuum alone won’t pull everything out from between fins that are set close together. Work a stiff-bristle brush or narrow paintbrush through the gaps, brushing downward so debris falls toward the floor instead of deeper into the unit. Follow up with the vacuum again once you’re done.
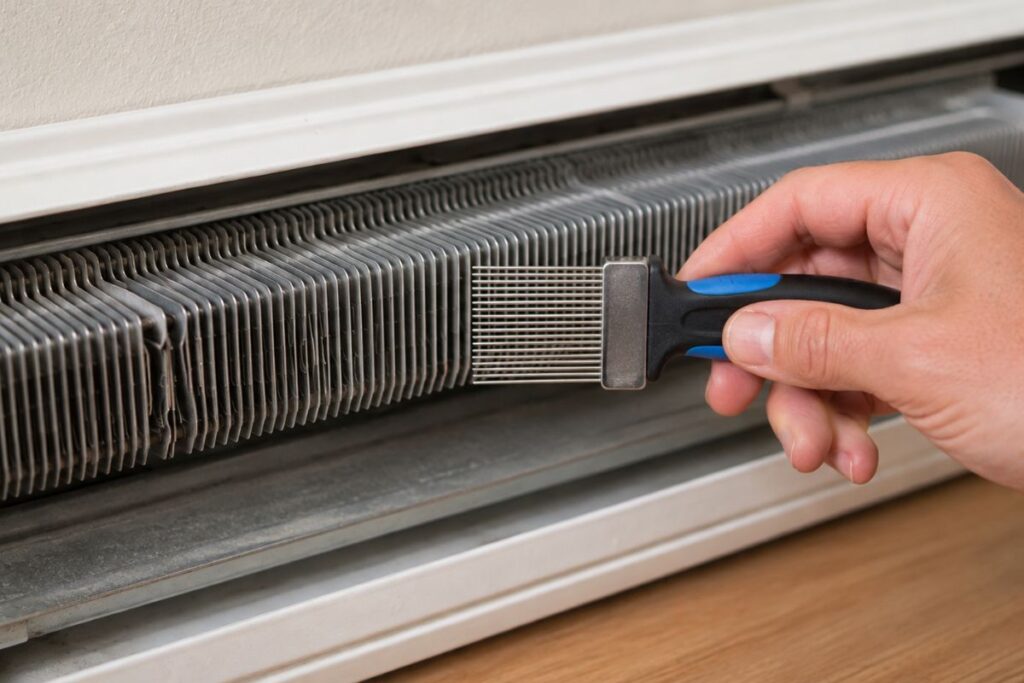
- Straighten any bent fins. Crushed or bent fins choke airflow just as badly as dust does, so it’s worth a look while everything’s already open. An inexpensive HVAC fin comb will realign them cleanly. In a pinch, an old butter knife can handle minor bends just go slow, since the aluminum is thinner than it looks and tears easily if you push too hard.
- Wipe down the cover and casing. A dry or barely damp microfiber cloth with a touch of mild soap is all the exterior needs. Don’t soak anything moisture near electrical components is a shock risk, and trapped moisture inside a hydronic unit’s casing just sets you up for rust later on.
- Vacuum behind and under the heater before the cover goes back on. Whatever’s sitting on the floor or wall behind it gets pulled right back into the fins the moment the unit starts running again, so there’s no point cleaning the inside and leaving that behind.
- Reassemble and restore power. Reattach the cover, flip the breaker or bring the boiler zone back online, and let it run for a few minutes to make sure everything’s behaving no lingering burning smell past the first few minutes, no strange noise.
How Often Should You Actually Do This?
| Household situation | Recommended frequency |
| Standard household, no pets | Once a year, before heating season |
| Homes with pets or shedding animals | Twice a year (spring and fall) |
| Allergy or asthma sufferers in the home | Every 3 months during heating season |
| Dusty environment (nearby construction, unfinished basement) | Every 3 months |
| Light surface dusting between deep cleans | Monthly, with a vacuum brush or long-handled duster |
Electric vs. Hydronic: What Actually Changes
| Electric Baseboard | Hydronic Baseboard | |
| How you shut it off | Circuit breaker | Boiler or heating zone valve |
| Moving parts inside | None just coils and fins | Sealed fluid line; may occasionally need air bled from the system |
| Water near the unit | Avoid it entirely | A bit more forgiving, but still keep it away from electrical connections |
| Typical cleaning frequency | Annual (more often with pets or allergies) | Annual, plus occasional air bleeding for even heat |
| Extra thing to check | Nothing beyond the standard cleaning | Look for leaks at the pipe fittings while the cover’s off |
| Running cost, generally | Tends to run higher electric resistance heat converts nearly all the electricity it uses into heat, but doesn’t get the multiplying effect a heat pump does | Tends to run a bit lower — the heated fluid keeps radiating warmth after the cycle ends, which usually means fewer on/off cycles than an electric unit |
Mistakes That Are Easy to Make
- Turning down the thermostat instead of cutting the breaker. These aren’t the same thing, and mixing them up is what actually gets people hurt.
- Using a soaking wet cloth on the inside of the unit. Fine for the outer cover not fine anywhere near coils or wiring.
- Reaching for metal tools instead of a proper fin comb or soft brush. Scrapers and wire brushes bend fins, scratch the coating, and can create a short-circuit risk that isn’t worth it.
- Pushing furniture back too close once you’re done. All the airflow you just restored gets choked right back off if a couch or curtain ends up a few inches from the unit. Leave at least six inches of clearance, more if you can spare it.
- Treating one cleaning as a season’s worth of maintenance. Dust doesn’t stop accumulating just because you cleaned once in October. With pets in the house or the heat running constantly, a single fall cleaning won’t still be doing its job come February.
A Few Things Worth Knowing
Clean in summer if you can swing it. The heater’s guaranteed to be cold, and you skip dealing with that first-of-the-season smell catching you off guard.
If you already vacuum the room on a regular basis, get in the habit of running the brush attachment along the base of the heater each time you’re in there. Keeping dust from piling up in the first place is a lot less work than deep-cleaning months of it out later.
For fin gaps that a vacuum and brush still can’t fully clear, a can of compressed air helps short bursts, aimed to push debris out and down rather than further into the unit.
And if working near electrical components isn’t something you’re comfortable with, there’s no shame in calling in an HVAC tech. It’s also a reasonable time to have the wiring looked at, especially in an older home.
Frequently Asked Questions
How often should I clean my baseboard heaters? Once a year for most households, ideally right before heating season starts. Bump that up to twice a year with pets in the house, and quarterly if anyone deals with allergies or asthma.
Can I clean a baseboard heater without removing the cover? You can run a vacuum crevice tool along the vents with the cover still on, but that’s more upkeep than a real cleaning. Getting the airflow and fire-risk benefits means pulling the cover and reaching the fins directly.
Is it safe to vacuum a baseboard heater? Yes, as long as the power’s off and the unit has cooled down. Stick with a brush attachment rather than a bare nozzle, and go gently the fins are thinner than they look and bend easily if you force the vacuum between them.
Why does my baseboard heater smell like it’s burning when I first turn it on? Almost always dust and lint on the heating element burning off after months of sitting idle. It should fade within a few minutes. If it doesn’t, gets worse, or you see actual smoke, turn the unit off at the breaker and have it looked at before using it again.
Can I use water to clean a baseboard heater? A barely damp microfiber cloth is fine for the outside cover and casing. Keep actual water, or even a very wet cloth, away from the internal fins, coils, and any electrical connections.
How do I fix bent fins in a baseboard heater? An HVAC fin comb drawn gently along the bent section straightens most fins without damage. A butter knife can handle minor bends if you don’t have a comb on hand just take it slow, since the aluminum is thin and tears more easily than you’d expect.
Do hydronic baseboard heaters need different cleaning than electric ones? Not really the fin-cleaning process is identical either way. The real difference is step one: hydronic units get shut down at the boiler or zone valve instead of a breaker, and it’s worth glancing at the pipe fittings for leaks while the cover’s already off.
Should I hire a professional to clean baseboard heaters? Not required most homeowners can handle this without any special skills. It’s worth calling someone in if you’re not comfortable working near electrical components, want the wiring inspected while everything’s open anyway, or you’re facing a lot of units across a bigger property.
Bottom Line
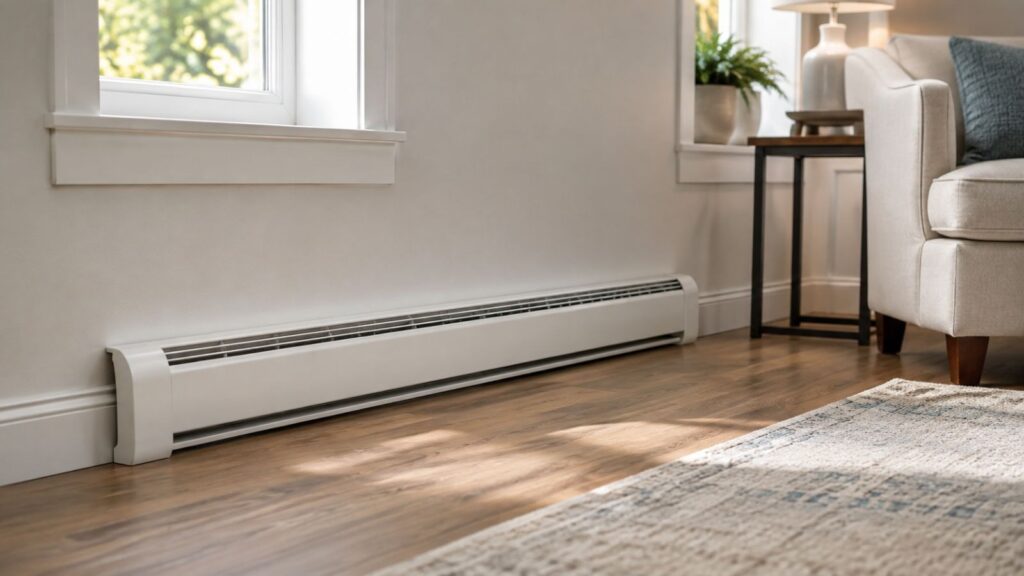
Cleaning a baseboard heater isn’t complicated. Cut the power, let it cool, vacuum and brush the fins until the airflow’s clear again, and put everything back before you lose track of a screw. Do that once a year twice if pets are part of the picture and you’ll keep the unit running efficiently, skip most of that seasonal burning smell, and close off one of the more overlooked fire risks in a home’s heating setup.

I started Domelite Home because I got tired of home improvement advice that was either too vague or written by people who had never actually picked up a drill. I’m Naik Zali Shah I’ve spent years obsessing over renovation projects, smart home setups, and interior design, and I built this site to share what actually works. No fluff, no filler. Just honest advice for homeowners who want to get things right the first time.