

Quick Answer: To fix peeling paint, scrape off all loose paint, sand the edges smooth, clean the surface, prime with the right primer for your specific cause, and repaint with two thin coats. The real fix depends on why it peeled in the first place. Skip that step, and it will peel again within a year.
If you’re searching for how to fix peeling paint, you’ve probably painted that wall two years ago, maybe even less.
Frustrating does not even cover it. You did the work, it looked great for a while, and now you are right back where you started.
Here is the thing most guides do not tell you upfront: peeling paint is rarely just a paint problem. It is a symptom. Something underneath caused the bond between the paint and the surface to fail, and if you just scrape it off and slap on a new coat without addressing that underlying cause, you will be back here again in twelve months.
This guide covers how to fix peeling paint for every common cause, room by room.
If you are dealing with peeling paint as part of a wider repair project on a specific wall or surface, our guide on wall paint repair for peeling and cracking paint covers the surface-level repair process in more detail. This guide focuses specifically on why peeling happens and how to stop it from coming back.
Why Is Your Paint Peeling? Find Your Cause First

Before you grab a scraper, take a minute to actually look at what is happening. The pattern of the peeling tells you almost everything about the cause, and the cause determines which fix will actually work. The cause is the key to how to fix peeling paint properly; get this part right, and the rest is straightforward.
Moisture and Humidity
This is the single most common cause of peeling paint in US homes, and it is responsible for the majority of peeling in bathrooms, kitchens, basements, and any exterior wall that faces weather.
What it looks like: paint that bubbles before it peels, often in larger sheets. The surface underneath may feel soft, damp, or show water staining. Peeling tends to happen near windows, in corners, around plumbing, or on walls that back onto bathrooms or exterior walls.
Why it happens: moisture gets underneath the paint film, either from inside the home (steam, humidity, plumbing leaks) or from outside (rain getting behind siding, roof leaks, condensation). Once that moisture is trapped behind the paint, it breaks the bond between the paint and the surface, and the paint lifts away.
Sherwin-Williams notes that addressing the moisture source itself, not just the paint, is the only way to permanently resolve this type of peeling, which is the core idea behind how to fix peeling paint caused by humidity or leaks. Their full guidance on fixing paint peeling caused by moisture covers ventilation and sealing steps in more detail.
Poor Surface Prep
What it looks like: peeling that started not long after the paint was applied, often in small flakes rather than large sheets. You might notice the paint comes off cleanly, almost like a sticker peeling off, revealing a clean surface underneath with no damage.
Why it happens: paint was applied to a surface that was dirty, dusty, greasy, or glossy without proper sanding. Paint needs a clean surface with some texture to grip onto. Skip the cleaning and sanding step, and the paint never really bonds in the first place. It is sitting on top of the old surface rather than gripping into it.
Incompatible Paint Layers (Oil Over Latex or Vice Versa)
What it looks like: peeling in sheets along old paint lines, especially in older homes with multiple layers of paint history. The top layer comes off cleanly, sometimes revealing a completely different color underneath.
Why it happens: Oil-based and latex paints do not bond well to each other without the right primer in between. If someone painted latex paint directly over an old oil-based paint without priming first, the layers never properly bonded and eventually separate. This is extremely common in homes that have been repainted multiple times over decades by different owners.
Painting in Bad Conditions
What it looks like: peeling that appears in patches rather than uniformly, often with a slightly uneven or textured look to the paint surface itself, sometimes described as looking like alligator skin before it fully peels.
Why it happens: paint applied when it was too hot, too cold, too humid, or in direct sunlight dries unevenly. The surface of the paint dries faster than the layer underneath, creating a skin that cracks and eventually peels as the paint continues curing improperly underneath.
Old, Failing Paint Layers
What it looks like: peeling on a surface that has not been painted in many years, often with multiple visible layers of old paint coming off together. This is extremely common on older trim, doors, and exterior surfaces.
Why it happens: paint has a lifespan. Even properly applied paint eventually loses its elasticity and adhesion over the years of temperature changes, sunlight, and general wear. Multiple old layers compound the problem because each layer adds weight and reduces flexibility, until the whole stack eventually fails at once.
Sun and Heat Exposure (Exterior)
What it looks like: peeling concentrated on the side of the house that gets the most direct sun, particularly south and west-facing walls in most of the US. Often combined with visible fading of the paint color compared to shaded areas.
Why it happens: UV exposure breaks down the binders in paint over time, making it brittle. Combined with the expansion and contraction of wood or siding from heat, the paint film eventually cracks and lifts. This is why exterior paint on sun-facing walls typically fails years before paint on shaded walls of the same house.
Important: Check for Lead Paint First (Homes Built Before 1978)
Before you scrape, sand, or disturb any peeling paint in a home built before 1978, stop and read this section.
Lead-based paint was commonly used in US homes until it was banned for residential use in 1978. If your home was built before that year, there is a real possibility that some layers of paint, especially older layers underneath newer paint, contain lead.
Scraping or sanding lead paint creates lead dust, which is genuinely hazardous, particularly for children and pregnant women. This is not an exaggerated warning. The EPA has detailed guidance specifically for this situation, and it is worth reading before you start any scraping or sanding work on a pre-1978 home. You can find the full guidance at the EPA’s lead-based paint renovation guidance.
If you suspect lead paint, lead test kits are available at most hardware stores for under $15 and give results in minutes. If the test comes back positive, either hire an EPA Lead-Safe Certified contractor for the work, or use wet scraping methods combined with proper containment and a HEPA vacuum to minimize dust. Do not dry sand suspected lead paint.
For homes built after 1978, or if your test comes back negative, proceed with the steps below normally.
How to Fix Peeling Paint Step by Step

Here’s how to fix peeling paint properly, step by step, so it doesn’t come back.
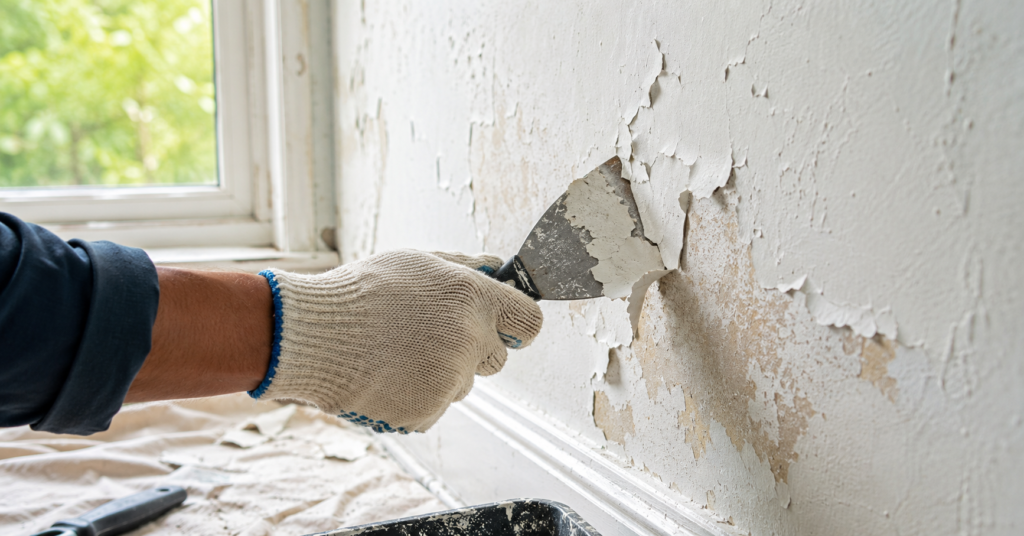
Step 1: Remove All Loose Paint
Use a paint scraper or putty knife to remove every bit of paint that is loose, bubbled, or flaking. Work methodically across the entire affected area, not just the most obvious spots. Press the scraper at a low angle and work in the direction the paint is lifting.
Do not stop at the edges of what looks like the problem area. Gently test the paint just beyond the visible peeling. If it lifts easily with light pressure from the scraper, it needs to come off, too. Painting over paint that is about to fail just delays the problem, and you will be back here again soon.
Wear safety glasses and a dust mask during this step, and lay down a drop cloth to catch the debris.
Step 2: Sand and Smooth
Once all the loose paint is removed, you will likely have an uneven surface where the remaining paint creates a ridge against the bare area. Sand these edges with 120 to 150 grit sandpaper to create a smooth transition. The goal is not a perfectly flat surface, just no sharp edges where old paint meets bare surface.
If there are holes, gouges, or significant damage from the peeling, now is the time to fill them with spackle or wood filler, depending on the surface. Let the filler dry completely, then sand it smooth and level with the surrounding area.
Step 3: Clean the Surface
This step gets skipped constantly, and it is genuinely important. Wipe down the entire area with a damp cloth to remove sanding dust, then go over it again with a cloth dampened with a mild soap solution to remove any grease, grime, or residue. For bathrooms and kitchens, this step matters even more because grease and soap residue are common culprits in poor paint adhesion.
Let the surface dry completely before moving on. This usually means waiting at least a few hours, longer in humid conditions.
Step 4: Prime Correctly for Your Cause
This is the step that determines whether your fix lasts or fails again, and it depends entirely on what caused the peeling in the first place.
If your cause was moisture, use a moisture-blocking or stain-blocking primer. These primers create a vapor barrier that helps prevent the moisture problem from breaking the new paint’s bond in the same way it broke the old one. Note that primer alone does not fix an active moisture problem; it only helps the new paint resist what the old paint could not.
If your cause was incompatible paint layers, use a bonding primer designed specifically to adhere to both oil and latex paints. This creates a proper bridge layer so your new paint bonds correctly, regardless of what is underneath.
If your cause was poor prep or old, failing paint, a high-adhesion primer designed for glossy or worn surfaces gives the new paint something to properly grip onto.
If you are dealing with bare plaster or new drywall as part of this repair, those surfaces need their own specific primers due to their porosity and pH, which is a separate consideration from the peeling-specific primers above.
Apply primer evenly and let it dry fully according to the can’s instructions before painting. Do not rush this step. A primer that has not cured properly will not give your paint the bond it needs.
Step 5: Repaint Properly

Apply your topcoat in two thin, even coats rather than one thick coat. Thick coats are a leading cause of future peeling because the surface dries before the layer underneath, creating exactly the kind of internal stress that leads to cracking and peeling down the line.
Let the first coat dry completely according to the manufacturer’s recommended time, which is often longer than people expect, before applying the second coat. For most interior latex paints, this means waiting at least 4 hours, and ideally overnight for the best results.
Match your paint type to the existing surrounding paint where possible. If you are unsure whether the existing paint is oil or latex, a small test with rubbing alcohol on a cotton ball in an inconspicuous area will tell you. Latex paint will transfer onto the cotton ball; oil-based paint will not.
Can You Paint Over Peeling Paint Without Scraping?
If you’re wondering how to fix peeling paint without scraping, the honest answer is no, not if you want it to last.
It is tempting to skip the scraping step, especially for a large area or a high ceiling where scraping is awkward. But painting over peeling paint without removing the loose material first means your new paint is bonding to old paint that is already failing. The new paint cannot be stronger than the surface it is attached to. Within months, sometimes weeks, the new paint will peel along with the old paint underneath it, often taking even more of the surrounding area with it.
The only exception is paint that is showing very early signs of failure, like fine surface cracking without any actual lifting or flaking. In that specific case, a bonding primer applied directly over the intact but cracked paint can sometimes provide enough of a base for new paint to hold. But if any paint is actually loose enough to lift with a fingernail, it needs to come off.
There are no shortcuts here that actually save time. Skipping the scraping step means doing this entire job again much sooner than if you had done it properly the first time.
Room-Specific Fixes
Bathroom and Kitchen
These rooms have the highest moisture exposure in most homes, and that is almost always the underlying cause of peeling here. Before repainting, address the moisture source directly. This usually means improving ventilation, fixing a bathroom fan that is not venting outside properly, repairing any leaks around tubs, sinks, or dishwashers, and using a kitchen exhaust fan consistently when cooking.
Once the moisture source is addressed, use a moisture-resistant or mildew-resistant primer followed by a paint specifically formulated for bathrooms and kitchens. These paints contain additives that resist mildew growth and handle humidity fluctuations better than standard interior paint.
If your kitchen project extends to cabinets as well as walls, peeling paint on cabinet surfaces follows the same diagnosis process but typically needs a different approach due to the surface material and how often cabinets are touched and cleaned. Our guide on painted kitchen cabinet ideas covers the specific prep and paint choices that hold up to daily use.
For bathrooms specifically, if you are tackling peeling paint as part of a larger bathroom refresh that includes accessibility or safety upgrades, our guide on ADA grab bars for bathrooms covers how to plan wall work alongside those installations, since both involve similar wall prep considerations.
Exterior Walls and Trim

Exterior peeling is almost always either moisture-related or sun and heat related, and often both at once. Before repainting any exterior surface, walk the full perimeter of your home and check gutters, downspouts, caulking around windows and doors, and any areas where wood touches the ground or sits close to soil. These are the most common moisture entry points behind exterior paint failure.
For sun-exposed walls, particularly south and west facing sides in most of the US, expect to repaint more frequently, regardless of how well the prep is done. Using a higher quality exterior paint with UV-resistant additives on these walls specifically is a worthwhile investment, since the difference in lifespan between budget and premium exterior paint is most noticeable on sun-exposed surfaces.
Ceilings
Peeling ceiling paint is almost always a moisture sign, and it deserves more attention than wall peeling because of what it might indicate. Peeling on a ceiling can mean condensation from poor attic ventilation, a roof leak, or a plumbing leak from the floor above. Before repainting a peeling ceiling, it is worth a few minutes in the attic or crawl space above to check for any signs of moisture, staining, or active leaks. Repainting over an active leak will fail again very quickly, and you will have wasted the effort entirely.
How to Stop Peeling Paint From Coming Back
Once you know how to fix peeling paint correctly, here’s how to make sure it stays fixed.
Fixing the immediate peeling is only half the job. Here is what actually prevents it from happening again:
Address the root cause first, always. If moisture caused the peeling, fix the moisture source before repainting. No primer or paint, however good, can permanently overcome an active moisture problem.
Always prime bare or repaired surfaces. Skipping primer to save time or money is one of the most common reasons paint fails prematurely.
Apply thin, even coats and respect drying times. This single habit prevents more peeling than almost anything else on this list.
Match paint types correctly. When in doubt, test the existing paint before choosing your new paint, and use a bonding primer if you are unsure or switching types.
Maintain caulking and weatherstripping around windows and doors. Gaps here are a major moisture entry point for both interior and exterior peeling. If you have sliding glass doors, proper weatherstripping prevents the moisture infiltration that often shows up as peeling paint on nearby walls. Our guide on sliding glass door weather stripping covers exactly how to maintain these seals.
Ventilate high-moisture rooms properly. Bathroom fans that vent into attics rather than outside are a common hidden cause of recurring peeling on bathroom ceilings and adjacent walls.
Cost Breakdown: Tools and Materials
Here is what fixing peeling paint typically costs in the US, depending on the scope of the project:
| Item | Estimated Cost |
| Paint scraper or putty knife | $5 to $15 |
| Sandpaper (120 to 150 grit, multipack) | $8 to $15 |
| Spackle or wood filler | $8 to $20 |
| Bonding or moisture-blocking primer (1 gallon) | $25 to $50 |
| Interior paint (1 gallon, quality) | $35 to $70 |
| Exterior paint (1 gallon, quality) | $45 to $80 |
| Lead test kit (if needed) | $10 to $15 |
| Drop cloths and basic supplies | $10 to $25 |
For a single room with moderate peeling, total materials typically run $80 to $150 for a DIY approach. If moisture issues require additional repairs like caulking, ventilation fan replacement, or gutter repair, those costs are separate and depend heavily on the specific issue.
Professional painters typically charge $300 to $800 per room for full prep and repaint of a problem area, with the variation depending heavily on the extent of the underlying moisture or surface issues that need addressing first.
Frequently Asked Questions
Q: Why does my paint keep peeling even after I fix it?
A: Recurring peeling almost always means the underlying cause was not addressed, usually moisture. If you scrape and repaint without fixing a leak, ventilation problem, or condensation issue, the new paint will fail the same way the old paint did, often within months. Identify and fix the root cause before repainting. This is the most important part of how to fix peeling paint for good.
Q: Is peeling paint a sign of a serious problem?
A: It depends on the cause. Peeling from old age or poor prep is generally cosmetic. Peeling caused by moisture can indicate a leak, poor ventilation, or condensation issue that may cause further damage if left unaddressed, including mold growth or structural wood damage over time. Persistent or recurring peeling, especially on ceilings or near plumbing, is worth investigating beyond just repainting.
Q: How do I know if my old paint contains lead?
A: If your home was built before 1978, assume any old paint layers could contain lead until tested. Lead test kits are available at hardware stores for under $15 and give results within minutes by swabbing a small area. If the test is positive, follow EPA lead-safe practices, including wet scraping, containment, and proper cleanup, or hire an EPA Lead-Safe Certified contractor for larger areas.
Q: Can I just paint over peeling paint to save time?
A: No. Painting over loose or peeling paint means your new paint bonds to a surface that is already failing. The new layer will peel along with the old layer underneath, usually faster than you would expect. Scraping, sanding, cleaning, and priming properly takes more time upfront, but it is the only approach that actually lasts.
Q: What is the best primer for peeling paint caused by moisture?
A: Use a moisture-blocking or stain-blocking primer specifically formulated to create a vapor barrier. These primers help the new paint resist the moisture that broke down the old paint’s bond. However, a primer cannot fix an active moisture source. Address the leak, ventilation, or condensation issue first, then prime and repaint for a lasting result.
Dealing with peeling paint in a specific spot and not sure what’s causing it? Tell us what you’re seeing in the comments, and we’ll help you figure out how to fix peeling paint in your exact situation. Describe what you are seeing in the comments, and we will help you figure out the cause and the right fix.

Samreen Khadim Hussain is a home improvement writer and content creator at Domelite Home. She specializes in making home renovation, interior design, and bathroom safety accessible to everyday US homeowners, turning technical subjects into clear, actionable advice. Her work is rooted in research, real-world practicality, and a genuine belief that a better home is within everyone’s reach.
