


Smart homes sound impressive… until you try to figure out how they actually work.
Most people in the U.S. picture smart homes as expensive setups filled with voice assistants, sensors everywhere, and complicated installations. And yes, those systems exist—but that’s not where most people start.
In reality, most DIY smart home projects for beginners begin with something simple. A light that turns on when you enter a room. A sensor that alerts you when someone approaches your door. A fan that switches on automatically when the room gets hot.
Nothing complicated. Just a small automation that makes daily life easier.
The good part? You don’t need to be an engineer to build these systems. With tools like Arduino, ESP32, and Raspberry Pi, you can start small and gradually turn your home into something genuinely smart—at your own pace and budget.
What a Smart Home Actually Means
A smart home isn’t about flashy gadgets. It’s about convenience.
It simply means your home can respond to situations automatically or through your phone.
For example:
- The lights turn on when you walk in
- Air conditioning adjusts when it gets too hot
- You get alerts when movement is detected outside
- Appliances can be controlled remotely
In many American homes, the first step into smart automation is something basic—like a motion light in a garage or a smart plug for a coffee machine. It’s rarely a full system from day one.
And honestly, that’s the smarter way to do it.
Why DIY Smart Home Projects for Beginners Make Sense
Buying a pre-built smart system sounds easy, but it comes with trade-offs.
You usually get:
- Limited customization
- Ongoing app or cloud dependency
- Higher overall cost
- Compatibility restrictions
DIY projects flip that completely.
When you build your own system, you get:
- Full control over how it works
- Lower long-term cost
- The ability to upgrade anytime
- A real understanding of your home system
Most beginner-level projects in the U.S. cost around $10 to $80, depending on how far you go.
And here’s something people don’t realize until later:
Once you build one working project, the rest will feel difficult. They start making sense.
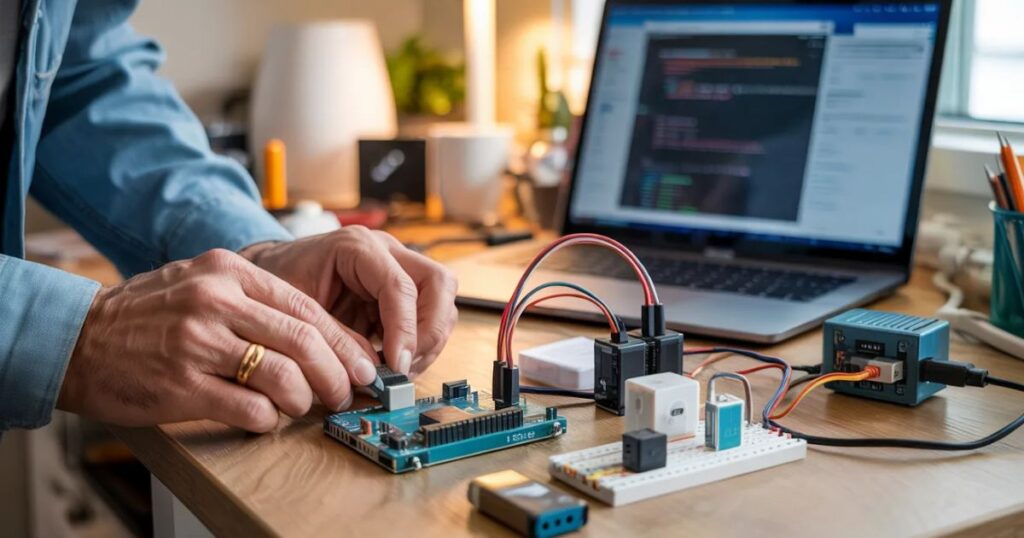
Getting Started: Tools You Actually Need
Let’s keep this realistic, you don’t need a lab or expensive gear.
Basic setup includes:
- Arduino Uno or Nano
- ESP32 board (highly recommended)
- Breadboard and jumper wires
- Relay modules
- Sensors (motion, temperature, distance)
- USB power supply
Optional but helpful:
- Raspberry Pi (for full home control systems)
- Multimeter (for debugging circuits)
- Soldering kit (for permanent installations)
Real-world cost (USA):
Most beginners spend around $30–$80 for their first setup.
That’s fewer than a single smart home device from major brands.
Arduino Smart Home Projects (Simple and Reliable)
Arduino is perfect when you want to understand how automation actually works. The official Arduino introduction guide is a reliable starting point for anyone new to the platform.
Motion-Activated Lighting
This is one of the easiest and most practical beginner projects.
When you walk into a room or garage, the lights turn on automatically using a motion sensor.
Where it works well in U.S. homes:
- Garages
- Hallways
- Storage rooms
Cost: around $10–$20
One thing beginners often miss is sensor placement. If it’s angled wrong, it either triggers too often or doesn’t detect movement properly.
RFID Door Access System
Instead of using a physical key, you unlock a door using a card or tag.
It’s commonly used for indoor spaces like storage areas or workrooms.
A useful tip here: always include a manual backup. Technology is great—until it isn’t.
Smart Trash Bin
This one is simple but surprisingly useful. A sensor detects your hand and opens the lid automatically.
It’s the kind of project that makes you think, “Why don’t all bins work like this?”
ESP32 Smart Home Projects (Where Things Get Interesting)
ESP32 is where most beginners start feeling like they’re building real smart home systems.
It comes with Wi-Fi built in, which makes everything more practical.
Why is the ESP32 so popular?
- Built-in Wi-Fi and Bluetooth
- Very low cost
- Works with Home Assistant and IoT systems
- Easy to scale into larger setups
Smart Lighting Control
This allows you to control lights from your phone or automate them based on time or conditions.
You can even connect it with Alexa or Google Home later if you want.
Cost: $5–$15
It’s one of those upgrades that immediately feels useful in everyday life.
Temperature Monitoring System
This project tracks temperature and humidity and sends the data to your phone.
In warmer U.S. states, this becomes surprisingly practical for managing cooling systems.
Smart Mailbox Alerts
Instead of checking your mailbox constantly, you get a notification when mail arrives.
It sounds small, but in suburban areas where mailboxes are far from the house, it actually saves effort.
Raspberry Pi Smart Home Projects (The Control Center)
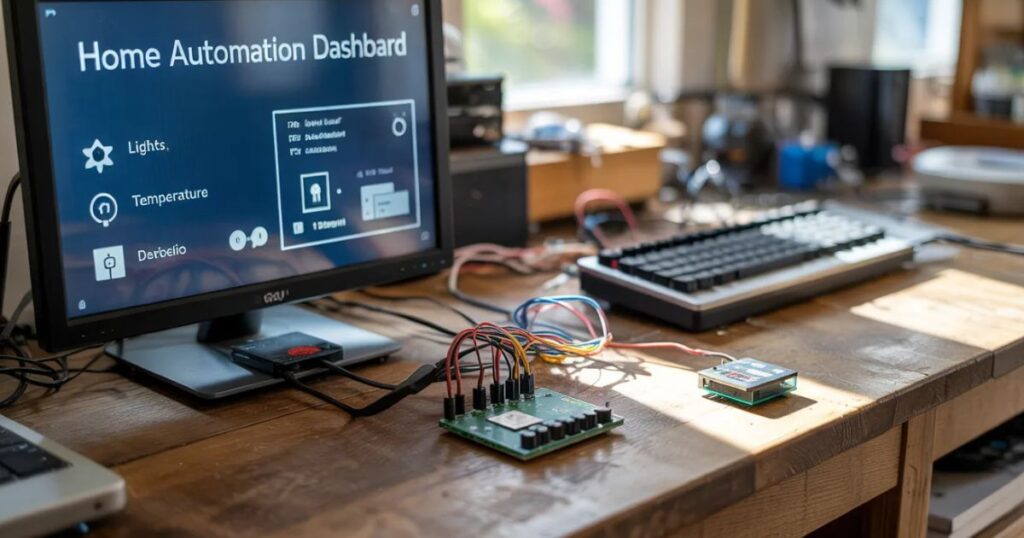
Raspberry Pi acts as the brain of your entire system.
It’s what ties everything together.
Home Automation Dashboard
This gives you one place to control everything—lights, sensors, cameras, and more.
It’s the step where your setup starts feeling like a real smart home system.
Smart Security System
By combining cameras and motion sensors, you can build a simple home monitoring setup.
Many homeowners in the U.S. use this as a low-cost alternative to paid security services.
Energy Monitoring System
This helps track how much electricity your devices are using.
With rising energy costs, this isn’t just a tech project; it’s a money-saving tool. The U.S. Department of Energy’s energy-saving guide explains how home automation and smart monitoring can reduce electricity bills significantly.
Mistakes Most Beginners Make
This is where many DIY projects fall apart:
- Starting with overly complex builds
- Ignoring power stability
- Poor Wi-Fi coverage planning
- Not thinking about future upgrades
- Copying projects without understanding them
A better approach is slower but more reliable: build one thing, make it work properly, then move on.
Practical Pro Tips (From Real Experience)
Here’s what actually makes a difference in real smart home setups:
- Solve one real problem first, not ten small ones
- ESP32 is usually the best long-term choice for beginners
- Local control systems are more reliable than cloud-based ones
- Always test before permanent installation
- Keep each system modular so it can be upgraded easily
A simple rule worth remembering:
If it doesn’t improve your daily routine, it’s not worth building yet
Real Example: A Beginner Setup in the U.S.
A homeowner in California builds a small setup:
- ESP32 lighting automation
- Arduino motion sensor in the garage
- Raspberry Pi running Home Assistant
Total cost: around $100
What they get:
- Lower electricity usage
- Better home security
- Remote control from phone
- A scalable system for future upgrades
No complicated installation. Just practical improvements.
Final Thoughts
Getting started with DIY smart home projects for beginners doesn’t require a big budget or technical background.
What it does require is a simple mindset: Start small, focus on usefulness, and build step by step.
A smart home isn’t something you buy in one go.
It’s something you slowly build—based on what actually makes your life easier.
And once you start, you’ll probably realize something important:
The real value isn’t in the technology itself… It’s in how naturally it fits into your everyday life.
I started Domelite Home because I got tired of home improvement advice that was either too vague or written by people who had never actually picked up a drill. I’m Naik Zali Shah I’ve spent years obsessing over renovation projects, smart home setups, and interior design, and I built this site to share what actually works. No fluff, no filler. Just honest advice for homeowners who want to get things right the first time.
