
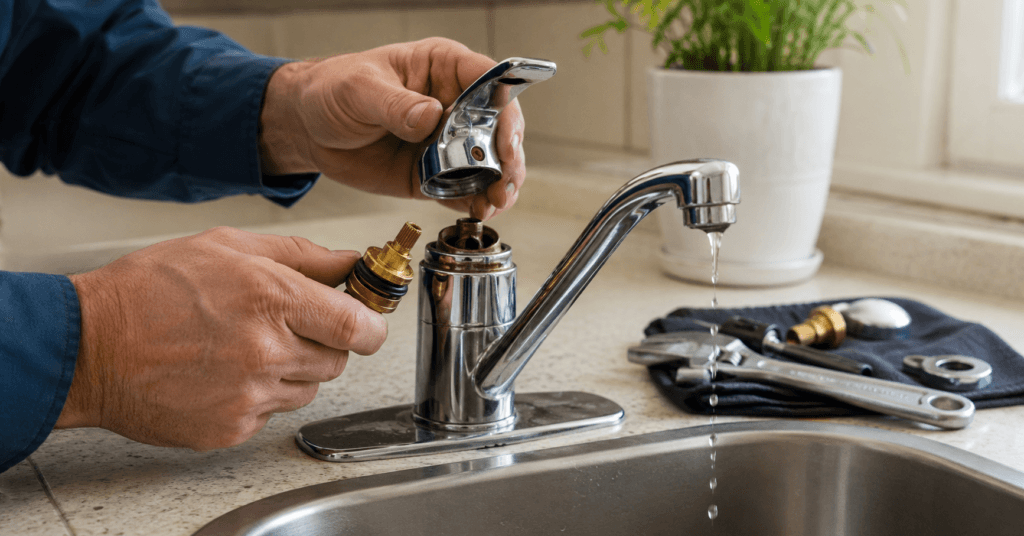
Quick Answer: To fix a dripping faucet, turn off the water supply valves under the sink, remove the handle, identify your faucet type (compression, ball, cartridge, or ceramic disc), replace the worn part (washer, O-ring, cartridge, or ceramic disc kit), reassemble, and turn the water back on. Most repairs take 20 to 45 minutes and cost $5 to $30 in parts. The faucet type determines everything. Get that wrong, and you buy the wrong part.
Knowing how to fix a dripping faucet is one of the most useful DIY skills any US homeowner can have. That steady drip from your faucet is not a minor annoyance. A faucet dripping once per second wastes more than 3,000 gallons of water per year. A faster drip pushes that above 10,000 gallons annually. That is real money disappearing from your water bill every month, and it compounds into visible water damage inside the cabinet below the sink if the drip runs down the supply line rather than out the spout.
The good news is that the vast majority of dripping faucets come down to one worn part that costs $5 to $15 to replace. You do not need a plumber for this. You need to correctly identify your faucet type before you buy anything, which is the step most guides rush past too quickly.
This guide covers all four faucet types found in US homes, the exact fix for each, what to do when the repair does not stop the drip, and the one safety check every guide skips that saves you from flooding your kitchen.
How to Fix a Dripping Faucet: Identify Your Faucet Type First
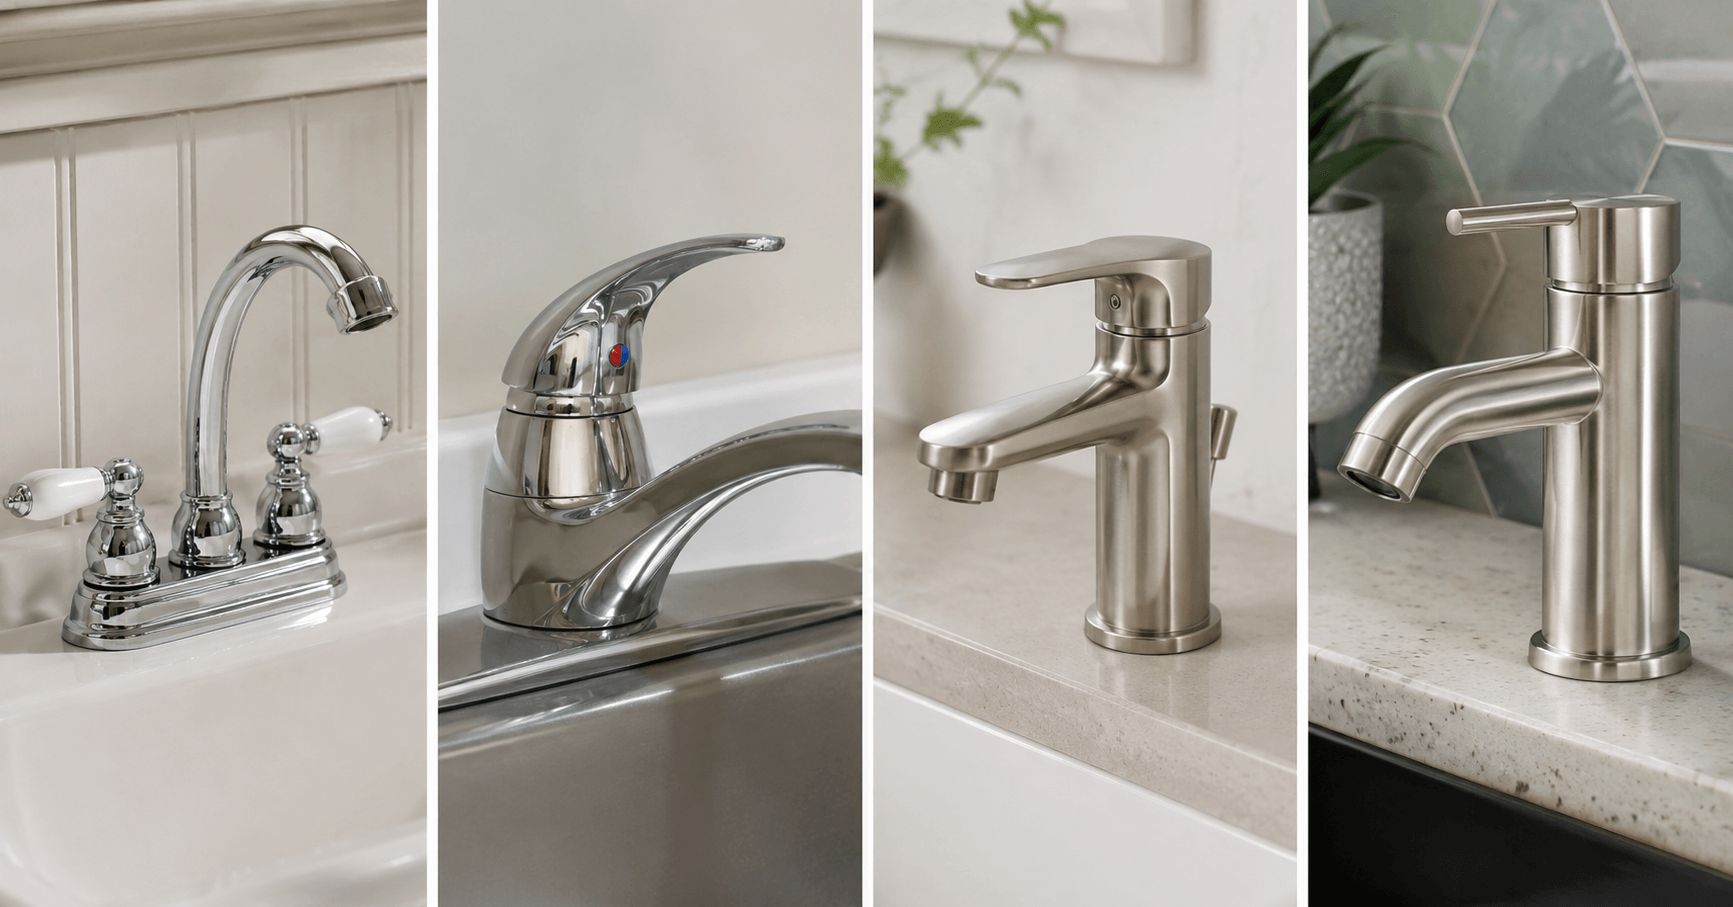
This is where most failed faucet repairs begin. Buying the wrong parts wastes money and a trip to the hardware store. Take two minutes to identify your faucet type before touching anything else.
Compression Faucet
Two separate handles, one for hot and one for cold. When you turn the handle, you feel resistance that increases as the water shuts off, like screwing something closed. These are the oldest design and the most common in homes built before 1980.
What fails: A rubber washer at the bottom of the stem compresses against a seat each time you close the faucet. Over thousands of uses, the washer wears flat or cracks. This is the cheapest and simplest faucet repair available.
Ball Faucet
A single handle that rotates in all directions, left and right for temperature, up and down for flow. Common in kitchens. You can feel a ball moving freely inside when you wiggle the handle. These are identified by the rounded cap under the handle spout area.
What fails: Springs, rubber seats, and a slotted ball inside the body control water flow. Any of these components wears over time. Ball faucets have the most internal parts of any faucet type and are best fixed with an all-in-one repair kit rather than individual parts.
Cartridge Faucet
Single or double handle with smooth, consistent up-and-down movement to control flow. No increasing resistance when turning. The handle moves cleanly through its range. These are the most common faucet type in US bathrooms and kitchens installed after 1990.
What fails: A self-contained cartridge inside the body wears or cracks. The repair is removing the old cartridge and inserting an identical replacement. Straightforward, but you must get the exact replacement cartridge for your brand and model.
Ceramic Disc Faucet
Single lever with a noticeably wide, cylindrical body beneath the spout. The handle moves from side to side rather than up and down. These are premium faucets and rarely drip from the disc itself. When they do drip, it is usually from a cracked disc or worn inlet seals.
What fails: Two ceramic discs inside a cylinder control water flow by rotating against each other. The discs themselves are extremely durable, so when a ceramic disc faucet drips, check the inlet and outlet seals first before assuming the discs need replacement.
Before You Touch Anything: The Safety Steps
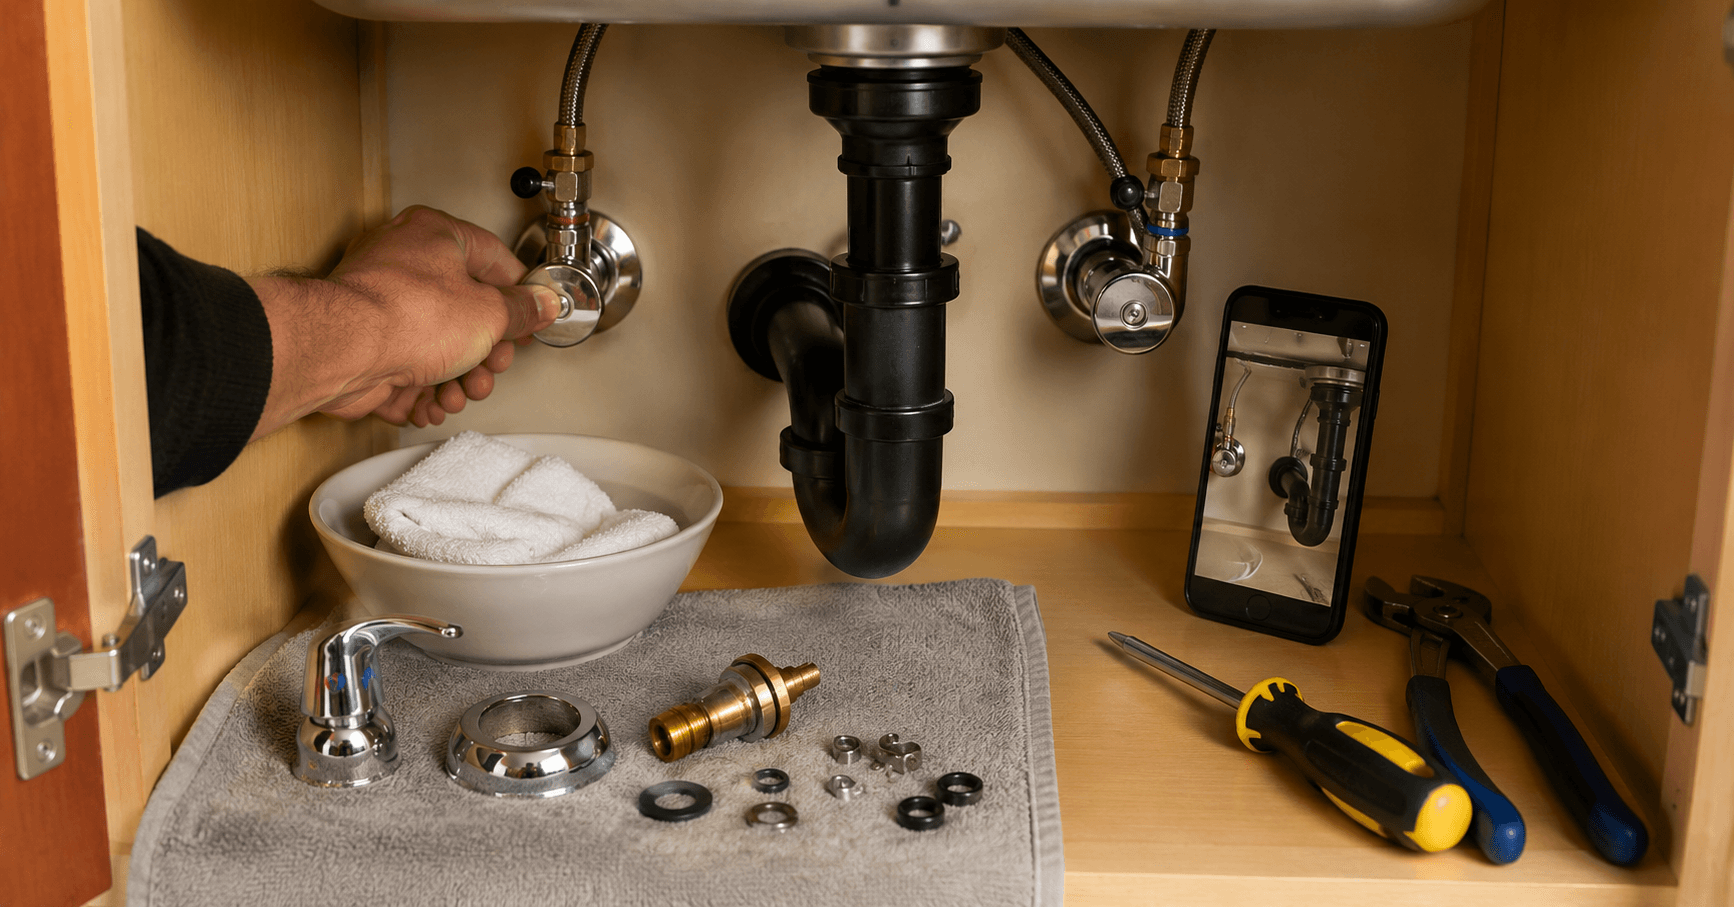
Skip these and you will either flood your kitchen or lose a small part permanently down the drain.
Step 1: Shut off the water supply valves. Look under the sink for two oval handles or round knobs on the supply lines, one for hot and one for cold. Turn both clockwise until they stop. Even if only one side is dripping, shut off both valves. If you cannot find valves under the sink, shut off the main water supply to the house at the meter or the main shutoff valve near your water heater or front exterior wall.
Step 2: Confirm the water is off. Turn the faucet handle and let any remaining water in the line drain into the sink. If water keeps flowing steadily, the supply valves are not fully closed. Close them further or shut off the main.
Step 3: Plug the drain. Put the drain stopper in or stuff a rag in the drain opening. Small parts including screws, springs, and O-rings roll straight into open drains and disappear permanently. This two-second step prevents an infuriating loss.
Step 4: Photograph everything before disassembly. Use your phone to photograph the faucet, the handle orientation, and each part as you remove it. Reassembly goes significantly faster when you can refer to the photos rather than relying on memory.
How to Fix a Compression Faucet
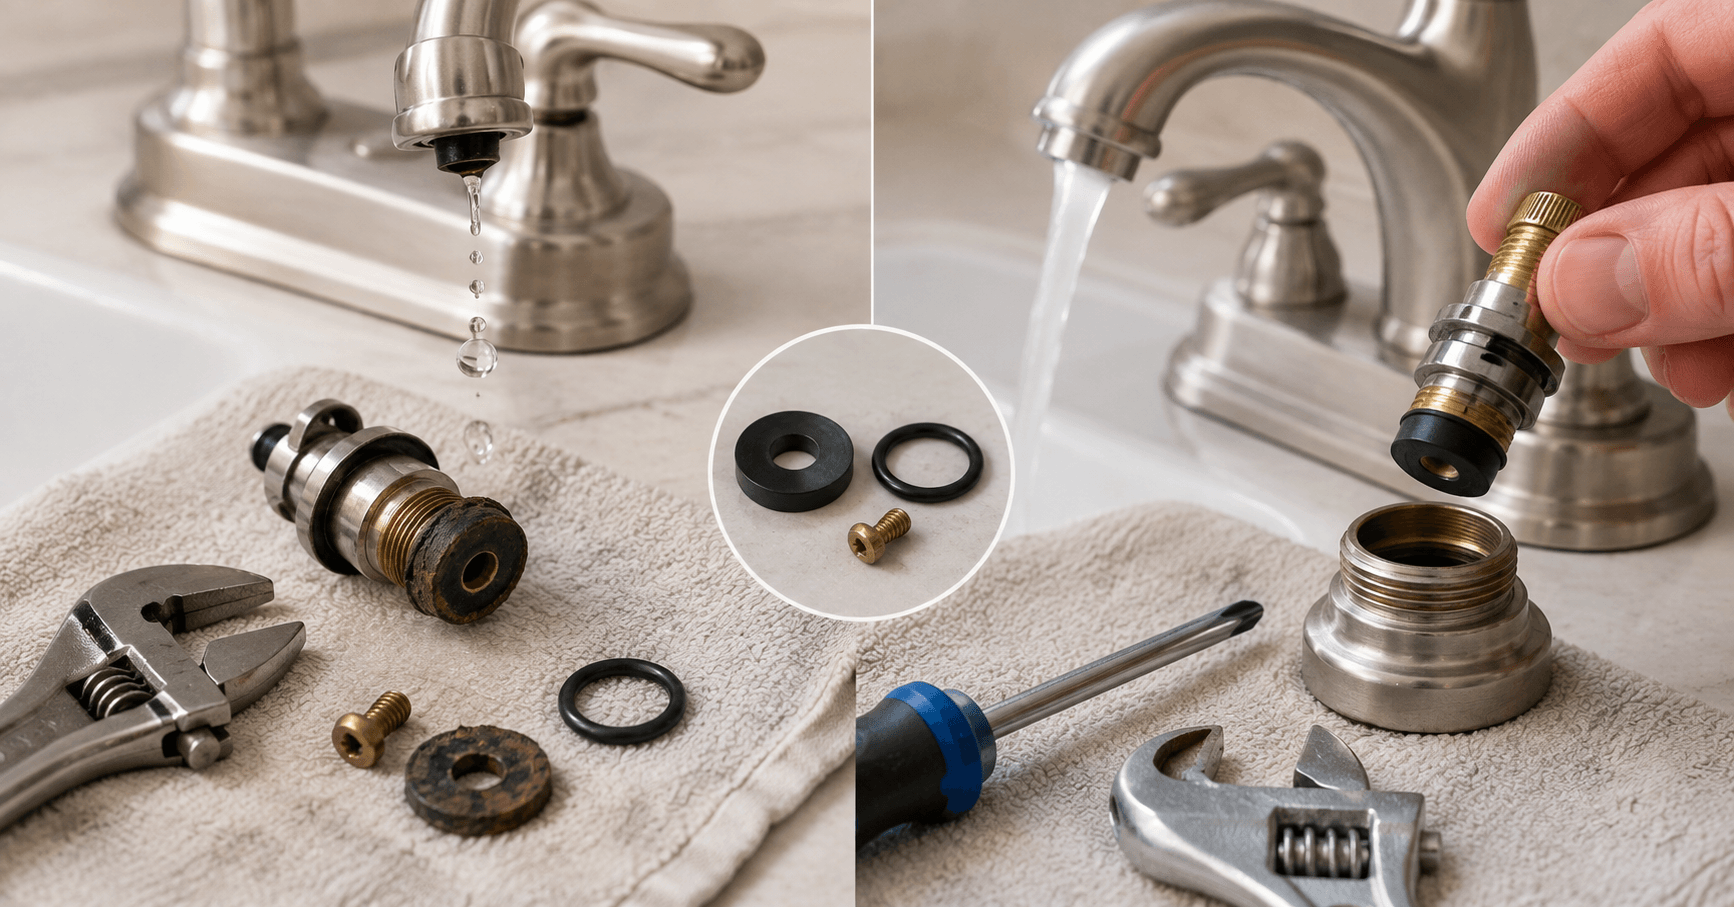
Replacing a compression faucet is the simplest plumbing repair. The worn washer is almost always the culprit.
Parts needed: Replacement rubber washer (bring the old one to the hardware store for an exact match), O-ring, and potentially a valve seat wrench if the seat is also damaged.
Step 1: Remove the decorative cap on the handle with a flat screwdriver. Find and remove the screw underneath.
Step 2: Pull the handle straight off. If it is stuck, do not force it. Spray penetrating oil around the base, wait five minutes, and try again. Forcing a stuck handle strips the stem threads.
Step 3: Use an adjustable wrench to unscrew the packing nut counterclockwise. Pull the stem straight up and out of the faucet body.
Step 4: At the bottom of the stem you will find a rubber washer held by a small brass screw. Remove the screw and the washer. Replace both the washer and any O-rings on the stem body. Even if the O-ring looks fine, replace it while you are in there.
Step 5: Run your finger around the valve seat inside the faucet body, the brass ring the washer presses against. If it feels rough, pitted, or corroded, it has damaged the old washer and will damage the new one too. A seat wrench removes and replaces the seat for $15 to $25 at any hardware store. Skipping this step when the seat is damaged guarantees the new washer fails quickly.
Step 6: Reassemble in reverse order. Hand-tighten the packing nut first to avoid cross-threading, then snug with the wrench. Do not overtighten. Over-tightening compresses the new washer immediately and creates the same drip you started with.
Step 7: Turn the water supply back on slowly. Check for drips at the spout and around the packing nut. If water leaks around the nut, tighten it one-quarter turn at a time until it stops.
How to Fix a Ball Faucet
Ball faucets have more components than any other faucet type. The most efficient approach is a brand-specific repair kit that includes all the parts that commonly wear simultaneously.
Parts needed: Ball faucet repair kit for your brand (Delta, Moen, Kohler, and Price Pfister all sell specific kits). The kit typically includes springs, seats, O-rings, and a replacement ball. Buy the kit, not individual parts.
Step 1: Remove the handle screw, which is usually under a decorative cover on the side of the handle. Pull the handle off.
Step 2: Use pliers to remove the cap and collar. Beneath them is the cam assembly, which is a plastic piece with a flat or notched profile. Lift it off along with the ball.
Step 3: Use needle-nose pliers to remove the springs and rubber seats from the two openings inside the faucet body. These are small and easy to drop, which is why the drain is plugged.
Step 4: Replace the springs and seats with the new ones from the kit. Push them in with the tip of a pen to seat them correctly.
Step 5: Drop the new ball into the faucet body. Align the slot or pin on the ball with the pin inside the body. This alignment is specific to each brand and is shown in the kit instructions.
Step 6: Install the new cam assembly, aligning the tab with the slot on the faucet body. Replace the cap and collar.
Step 7: Replace all O-rings on the exterior of the faucet body if the kit includes them. These cause leaks around the base of the spout rather than from the spout tip.
Step 8: Reassemble the handle, turn the water on slowly, and check for drips.
How to Fix a Cartridge Faucet
Cartridge faucets are the most common type in US homes built after 1990. The repair involves removing the old cartridge and inserting an exact replacement. Getting the correct replacement cartridge is the most important step.
Parts needed: Replacement cartridge specific to your faucet brand and model. Take a photo of your faucet, write down the brand name, and look for a model number on the faucet body or the original packaging. Bring the old cartridge to the hardware store for a visual match if you cannot find the model number.
Step 1: Remove the handle cap and screw. Pull the handle off.
Step 2: Look for a retaining clip or retaining nut holding the cartridge in place. Cartridge faucets use one or the other depending on brand. Remove the clip with needle-nose pliers or unscrew the retaining nut counterclockwise.
Step 3: Grip the top of the cartridge with pliers and pull it straight up and out. Note the orientation of the cartridge before removal. Most cartridges have a tab, flat side, or arrow that must face a specific direction. Photograph it before pulling it out.
Step 4: Insert the new cartridge in the same orientation as the old one. The orientation matters significantly. A backward cartridge reverses hot and cold, which is technically functional but genuinely confusing and also causes premature wear.
Step 5: Replace the retaining clip or retaining nut. Replace any O-rings on the faucet body that show wear. Reassemble the handle.
Step 6: Turn the water on slowly and test. If the new cartridge drips immediately, the cartridge may be installed backward or may not be the correct replacement. Check orientation and part number before assuming the cartridge itself is defective.
How to Fix a Ceramic Disc Faucet
Ceramic disc faucets are designed to last for decades without significant maintenance. When they do drip, the discs themselves are rarely the cause. Start with the inlet and outlet seals.
Parts needed: Ceramic disc replacement kit for your brand, or individual inlet and outlet seals if the discs themselves are intact.
Step 1: Remove the handle by locating the set screw, typically underneath a decorative cover on the handle side or back. Remove the screw and lift the handle off.
Step 2: Remove the cartridge cylinder, which is a wide round component held by two or three screws. Unscrew it and lift the cylinder out.
Step 3: Turn the cylinder upside down to access the ceramic discs and the rubber inlet and outlet seals around them. Remove the seals and inspect the disc surfaces.
Step 4: If the seals are cracked, flattened, or perished, replace them. If the ceramic discs themselves are cracked or chipped, they need replacement. Clean any mineral deposits from the disc surfaces with white vinegar on a soft cloth before reassembling. Hard water deposits between the discs are a common cause of reduced performance.
Step 5: Reassemble in reverse order. Insert the cylinder and tighten the screws evenly to avoid cracking the ceramic discs. Do not overtighten.
Step 6: Turn the water on very slowly when testing a ceramic disc faucet. These faucets can crack if water pressure is applied suddenly while the handle is in the wrong position. Open the supply valve slowly, then move the handle to the open position gradually.
How to Fix a Dripping Faucet That Still Drips After Repair
Even with new parts installed correctly, a faucet sometimes continues to drip. Before calling a plumber, check these specific things.
Wrong part for your faucet model. Generic replacement parts labeled as universal rarely fit as well as brand-specific parts. If the repair used a generic washer or O-ring, try a brand-specific replacement.
Part installed in wrong orientation. Cartridges especially must face the correct direction. An upside-down or backward cartridge drips immediately.
Damaged valve seat on a compression faucet. A new washer on a roughened or pitted seat wears out within days. The seat must be resurfaced or replaced.
Mineral buildup blocking the seal. Hard water deposits can prevent a new washer or cartridge from seating fully. Clean the seat area thoroughly with white vinegar before inserting new parts.
Overtightening. A packing nut or retaining nut tightened too hard compresses and deforms the new seal before the water even runs. Snug is correct. Clamped-as-hard-as-possible is not.
The Real Cost of Ignoring a Dripping Faucet
The EPA’s WaterSense program provides data showing that household leaks waste nearly 1 trillion gallons of water annually in the US. A single dripping faucet at one drip per second wastes over 3,000 gallons per year. The full guidance is available at the EPA WaterSense leak page.
On a typical US water bill, 3,000 gallons runs approximately $15 to $40 per year depending on your municipality’s rate. A faster drip can push that to $75 or more annually. Over five years of inaction on a leaking faucet, the wasted water cost alone often exceeds what a plumber would charge to fix it in an hour.
Beyond the water bill, persistent dripping causes moisture damage inside the cabinet below the sink. Consistent drips running down supply lines or the faucet body lead to swollen cabinet bottoms, mold inside the cabinet, and eventually paint failure on adjacent walls. The guide on how to fix peeling paint covers the specific moisture-related paint failure that commonly appears on walls adjacent to sinks with persistent leaks, including the correct prep and repair process before repainting.
When to Replace Instead of Repair
Some faucets are not worth repairing. Here is when replacement makes more sense than another repair attempt.
The faucet body is cracked or heavily corroded. A cracked faucet body cannot be repaired. The crack will leak regardless of what you do to the internal components.
Parts are no longer available. Discontinued faucet models lose parts availability over time. If you cannot find the specific replacement cartridge or washer for your faucet, replacement is the practical path.
The faucet has been repaired twice and still drips. Repeated repair failure usually indicates the valve seat is damaged or the faucet body itself is worn beyond what internal parts can compensate for.
The faucet is over 20 years old. At 20 years, most compression and ball faucets have worn threading, roughened seats, and degraded supply line connections that make long-term repair progressively less reliable.
If you are replacing a faucet rather than repairing it, doing so before a home sale eliminates a common inspection finding. Dripping faucets are one of the most frequently noted items on home inspection reports and give buyers grounds for repair requests or price negotiations. The home inspection checklist for buyers covers exactly how inspectors evaluate plumbing findings and what the negotiation implications look like.
For detailed installation guidance on replacing a faucet entirely, This Old House’s faucet repair guide covers both repair and replacement with step-by-step photography for each faucet type.
Tools and Materials Reference
| Item | Cost | Where to Find |
| Adjustable wrench | $10 to $20 | Any hardware store |
| Needle-nose pliers | $8 to $15 | Any hardware store |
| Phillips and flat screwdrivers | Already own | |
| Replacement washer (compression) | $1 to $3 | Hardware store, plumbing aisle |
| Ball faucet repair kit | $12 to $25 | Hardware store, by brand |
| Replacement cartridge | $8 to $35 | Hardware store, by brand and model |
| Ceramic disc kit | $15 to $40 | Hardware store or online |
| Plumber’s grease | $5 to $8 | Hardware store, plumbing aisle |
| White vinegar (mineral deposits) | $2 | Grocery store |
| Penetrating oil (stuck parts) | $5 to $8 | Hardware store |
Plumber’s grease applied to new O-rings and washers before installation extends their lifespan by preventing dry-contact wear from the moment the faucet is first used. It is worth the extra step.
For homeowners looking to build a complete DIY tool kit that handles faucet repairs alongside other common home maintenance tasks, the guide on home renovation tips and money-saving tricks covers how to equip yourself for common repairs without overspending on tools you will rarely use.
Frequently Asked Questions
Q: How do I know what type of faucet I have?
A: Look at the handle configuration and how it moves. Two separate handles that tighten progressively as you close them mean compression. A single handle that rotates in all directions over a rounded cap means ball. A single or double handle with smooth up-and-down or side-to-side movement means cartridge. A single lever over a wide cylindrical body beneath the spout means ceramic disc.
Q: Can I fix a dripping faucet without turning off the water?
A: No. Attempting faucet repair without shutting off the supply valves results in water spraying from the open faucet body the moment you remove the stem or cartridge. Always shut off both supply valves under the sink before starting any repair.
Q: Why is my faucet still dripping after I replaced the washer?
A: The most common cause is a damaged valve seat, the brass ring the washer presses against. A rough or pitted seat wears through new washers quickly. Inspect the seat with your fingertip. If it feels rough or irregular, it needs resurfacing with a seat wrench or replacement. Using the wrong size washer and overtightening the packing nut are the other two common causes.
Q: How long does a faucet repair last?
A: A properly done repair using brand-specific parts on a faucet with a sound valve body typically lasts three to eight years. Repairs using generic universal parts on older faucets often last one to three years. If you are repairing a faucet for the third time, replacement is usually the more cost-effective long-term decision.
Q: Is a dripping faucet an emergency?
A: Not immediately, but it should be addressed within weeks rather than months. A steady drip wastes significant water and money over time and causes cumulative moisture damage to the cabinet interior and adjacent wall surfaces. A faucet that suddenly starts dripping heavily or leaking around the base rather than just from the spout deserves more urgent attention.
Dealing with a drip that does not match any of the four faucet types described above, or a repair that keeps failing? Drop your faucet brand, model if you know it, and what the drip looks like in the comments and we will help you diagnose the specific cause

Samreen Khadim Hussain is a home improvement writer and content creator at Domelite Home. She specializes in making home renovation, interior design, and bathroom safety accessible to everyday US homeowners, turning technical subjects into clear, actionable advice. Her work is rooted in research, real-world practicality, and a genuine belief that a better home is within everyone’s reach.
1 thought on “How to Fix a Dripping Faucet: The Complete DIY Guide That Actually Works”