

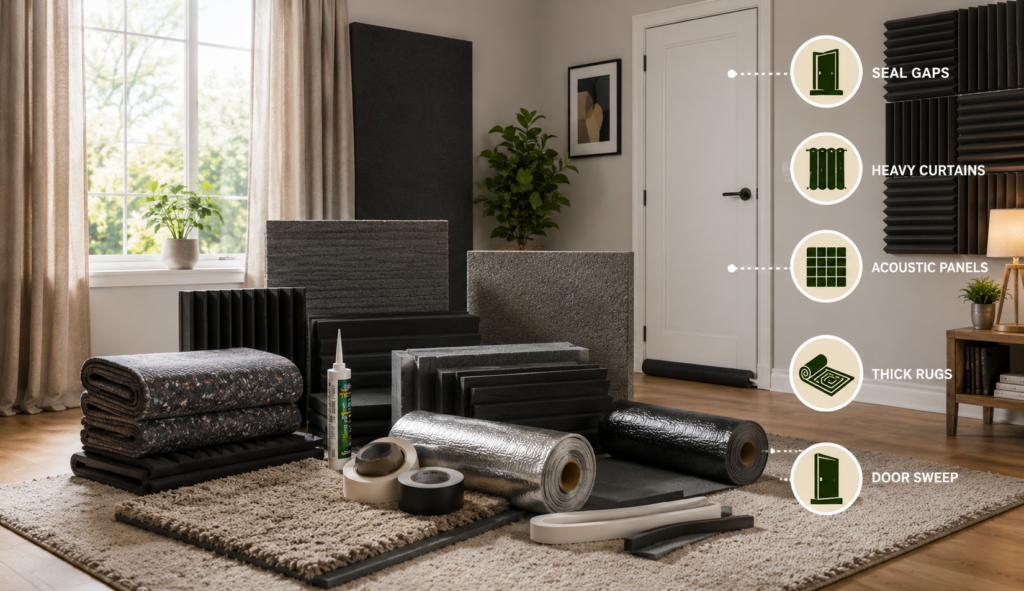
Quick Answer: You can soundproof a room cheaply by sealing gaps, adding heavy curtains, laying thick rugs, and hanging acoustic panels. Most US homeowners spend $50 to $300 on budget soundproofing that makes a real difference. No wall demolition needed and no contractor required.
If you want to know how to soundproof a room cheaply, you are in the right place. You can hear your neighbor’s TV through the wall. The street traffic bleeds into your bedroom at 6 am. Your home office sounds like a fishbowl, and every Zoom call picks up noise from the next room.
Sound problems at home are genuinely exhausting, and the internet makes fixing them feel expensive and complicated. Acoustic engineers. Specialty contractors. Tearing open walls. Most guides jump straight to the heavy-duty solutions and skip the simple stuff that actually works for most people.
Here is the truth: the majority of noise problems in US homes can be improved significantly for under $200, with materials from Amazon or your local hardware store, installed in a weekend. You do not need to gut your walls. You do not need a professional. You just need to know which methods actually move the needle and which ones are a complete waste of money.
This guide covers exactly how to soundproof a room cheaply, in plain language, with real costs for every method.
Sound Blocking vs Sound Absorbing: Know the Difference First
Before spending a single dollar, you need to understand one thing that most soundproofing guides never explain clearly. There are two completely different things happening when you soundproof a room, and they require different solutions.
What Sound Blocking Does
Sound blocking stops noise from traveling through a surface into or out of your room. It is about mass and sealing. Heavy materials like mass loaded vinyl, extra drywall, and solid doors block sound because sound waves lose energy trying to push through dense objects. Sealing gaps blocks sound because it eliminates the air paths that carry noise directly through.
Sound blocking is what you need when the problem is noise coming in from outside or from an adjacent room.
What Sound Absorbing Does
Sound absorbing reduces echo and reverberation inside your room. Soft materials like rugs, curtains, foam panels, and upholstered furniture soak up sound waves that bounce around inside the space. This makes your room sound quieter and cleaner, but it does not stop noise from traveling through the walls.
Sound absorption is what you need when the problem is that your room sounds echoey, or your voice carries too easily into the next room.
Most cheap soundproofing guides mix these two things up and send people in the wrong direction. Knowing which problem you have tells you exactly which solutions to use.
What Type of Noise Are You Dealing With?
Different noise sources need different fixes. Identifying your specific problem before buying anything saves you money and frustration.
Airborne Noise (Voices, TV, Traffic, Music)
Airborne noise travels through the air and then through walls, windows, and doors. This is the most common problem in US homes and apartments. You can hear your neighbor talking. Street traffic bleeds through your bedroom window. The TV in the next room is audible at night. Airborne noise is best addressed by sealing gaps, adding mass, and using heavy curtains and solid door upgrades.
Impact Noise (Footsteps, Dropped Objects, Banging)
Impact noise is created by physical contact with a surface, most commonly footsteps on the floor above you. It travels through the building structure itself rather than through the air. Rugs and underlays are your best cheap defense against impact noise coming through a floor above you. Addressing impact noise in your own floor, for the benefit of people below you, requires underlayment under the flooring, which is more involved.
Flanking Noise (Through Walls, Floors, and Ductwork)
Flanking noise travels around a sound barrier through indirect paths. Even if you seal and insulate a wall perfectly, sound can travel through the shared floor, ceiling, or ductwork and come out on the other side. Flanking is why, sometimes, a well-treated wall still lets noise through. It is the hardest type to address cheaply, but sealing gaps around vents and pipes helps significantly.
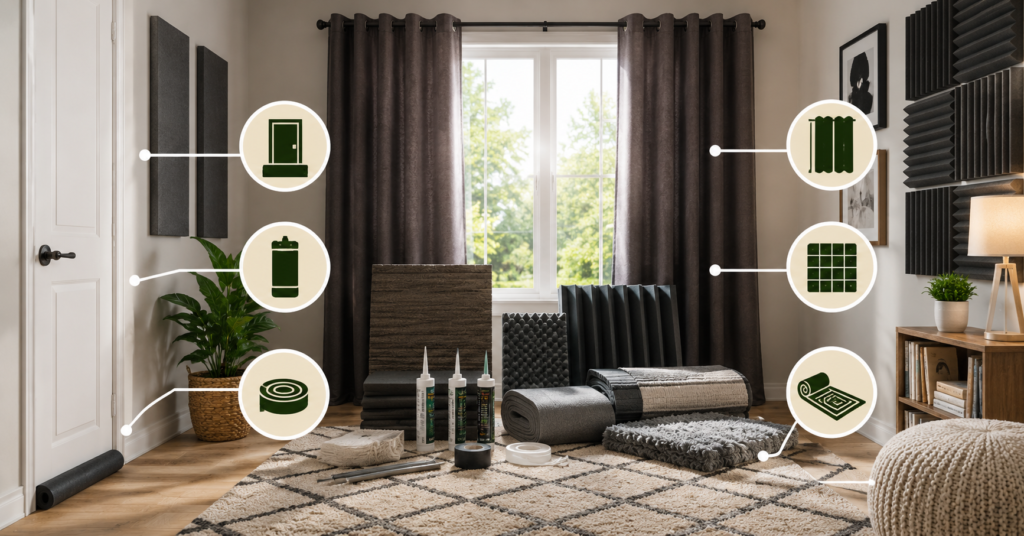
9 Cheapest Ways to Soundproof a Room Cheaply
1. Seal Every Gap First (Free to $30)
This is the single most impactful thing you can do, and it costs almost nothing.
Sound travels exactly like water. If there is a gap, noise finds it. Gaps around door frames, window frames, electrical outlets, baseboards, and pipe penetrations are all open highways for sound to travel through. A room with perfect walls but a gap under the door loses most of its soundproofing effectiveness through that one opening.
Walk around your room and check every edge. Run your hand around door frames and window frames on a windy day. If you feel air, you feel the path sound is using. Seal everything with acoustic caulk ($5 to $10 at any hardware store) around fixed penetrations, and weatherstripping around anything that moves. The U.S. Department of Energy’s guide on air sealing confirms that even small gaps dramatically reduce any barrier’s effectiveness, and the same principle applies directly to soundproofing. You can read the full guidance at the DOE’s air sealing resource.
Cost: $5 to $30 total Noise reduction: High for airborne noise DIY difficulty: Very easy
2. Install a Door Sweep ($10 to $30)
The gap under your door is one of the biggest sound leaks in any room. A standard hollow-core interior door with a half-inch gap at the bottom transmits almost as much sound as if you left a small window open.
A door sweep is a rubber or brush strip that attaches to the bottom of your door and closes that gap when the door shuts. Automatic door sweeps are the best option; they drop down when the door closes and lift when it opens, so you do not have to drag them across the carpet.
If you have a hollow-core door, upgrading to a solid-core door makes a significant difference, but that is a bigger investment. For cheap soundproofing, start with the sweep and add weatherstripping around the door frame perimeter. The combination of these two fixes makes a hollow door perform significantly better.
Cost: $10 to $30 Noise reduction: High for under-door sound leakage DIY difficulty: Very easy, no tools needed for most models
3. Hang Heavy Curtains ($30 to $100)
Windows are the weakest point in any room for sound transmission. Even with the window closed, a standard single-pane window lets in a significant amount of outside noise. Double-pane windows are much better, but still not perfect.
Heavy curtains add mass to the window opening and absorb sound before it fully enters the room. Look specifically for curtains marketed as blackout or thermal curtains. These are made from thick, tightly woven fabric that also happens to dampen sound effectively. A curtain with multiple layers performs better than a single thick panel.
For maximum effectiveness, hang curtains as wide and as high as possible, covering the full wall area around the window rather than just the window itself. Floor-to-ceiling curtains that extend 6 to 12 inches beyond the window frame on each side perform significantly better than curtains that just cover the glass.
Cost: $30 to $100 per window Noise reduction: Moderate for outside traffic and street noise DIY difficulty: Very easy
4. Add Rugs and Thick Underlays ($20 to $150)
Hard floors reflect sound and allow impact noise from footsteps to transmit both through your room and down to rooms below. A bare hardwood or tile floor in a bedroom or home office creates a noticeably noisier space than a carpeted one.
Thick area rugs with dense underlays address both problems at once. They absorb airborne sound within the room, reducing echo and making conversations less audible through walls. They also dampen impact noise from footsteps, which matters both for the people below you and for how the room feels to work or sleep in.
For maximum effect, choose the thickest rug pad you can find. Felt and rubber combination underlays outperform thin foam pads significantly. Covering 60% or more of the floor area in a room makes a noticeable acoustic difference.
Cost: $20 to $150, depending on rug size. Noise reduction: Good for impact noise and room echo. DIY difficulty: No tools needed
5. Hang Acoustic Panels ($30 to $200)
Acoustic foam panels absorb sound waves inside a room, reducing echo and making it harder for your voice and sounds to carry through the walls. They are the standard solution for home recording studios and home offices where voice clarity and sound containment matter.
Acoustic panels are a sound absorbing solution, not a sound blocking one. They will not stop the noise from coming in from outside. What they will do is make your room sound less live and echoey, which reduces how much sound escapes and makes the room more comfortable to work and sleep in.
Panels from brands like Acoustic Panels Pro or similar Amazon options cost $30 to $80 for a pack of 12. Mount them on the walls that face the noise source, and behind your desk or workspace if you are treating a home office. You do not need to cover every wall; targeting the main reflection points makes a significant difference.
If you are patching walls before adding panels, the process for wall repair is worth doing properly first. This guide on wall paint repair and fixing peeling paint covers exactly how to prep wall surfaces before adding anything to them.
Cost: $30 to $200 Noise reduction: Good for room echo and internal sound control DIY difficulty: Easy, adhesive strips or small nails
6. Rearrange Furniture Strategically (Free)
This is genuinely free and works better than most people expect. Furniture adds mass to walls and breaks up sound reflection paths inside a room. A large bookshelf filled with books against a shared wall is one of the most effective cheap soundproofing solutions available.
Books are dense and irregular, which makes them excellent at absorbing and scattering sound waves. A full bookshelf against the wall you share with a noisy neighbor can noticeably reduce what you hear through that surface. Large upholstered sofas and armchairs do the same thing on a smaller scale.
Move your bed away from the wall you share with noisy neighbors. Place your heaviest furniture against problem walls. Use what you already have before spending anything.
Cost: Free Noise reduction: Moderate for shared walls DIY difficulty: No tools needed
7. Add a Bookshelf Against Problem Walls (Free to $100)
Building on the furniture point above, a dedicated floor-to-ceiling bookshelf against a noisy shared wall is one of the most cost-effective permanent soundproofing upgrades for a bedroom or living room.
The combination of the shelf structure, the air gap between the shelf and the wall, and the mass of the books creates a layered barrier that addresses both sound blocking and sound absorption at once. It is also completely reversible and renter-friendly, which makes it particularly valuable in apartments.
If you do not have books to fill it, thick storage boxes, fabric bins, and similar soft objects work well too. The goal is to fill the shelf with mass and softness rather than leaving it empty.
Cost: Free if you have shelving already, $50 to $100 for a new basic shelf. Noise reduction: Good for shared walls. DIY difficulty: Easy
8. Mass Loaded Vinyl for Serious Problems ($1 to $2.50 per sq ft)
Mass loaded vinyl, usually called MLV, is the step up from all the methods above. It is a heavy, flexible vinyl sheet infused with metal particles to increase its density. It blocks sound by sheer mass, in the same way a thick concrete wall does, but in a material thin enough to hang on a wall or lie under flooring.
MLV costs $1 to $2.50 per square foot and is available on Amazon and at most major home improvement retailers. For a 10-by-12-foot wall, expect to spend $120 to $300 in materials. You can hang it directly on a wall and cover it with fabric panels or drywall, or lay it under a rug for floor applications.
MLV is the right choice when the cheap methods above have made a difference, but the noise problem is still significant. It is particularly effective for home recording setups, bedrooms next to extremely loud neighbors, or rooms adjacent to mechanical equipment. For most casual noise problems in US homes, the methods before this one will be enough.
Cost: $1 to $2.50 per square foot. Noise reduction: High, particularly for mid and high frequency airborne noise. DIY difficulty: Moderate, heavy, and awkward to handle alone
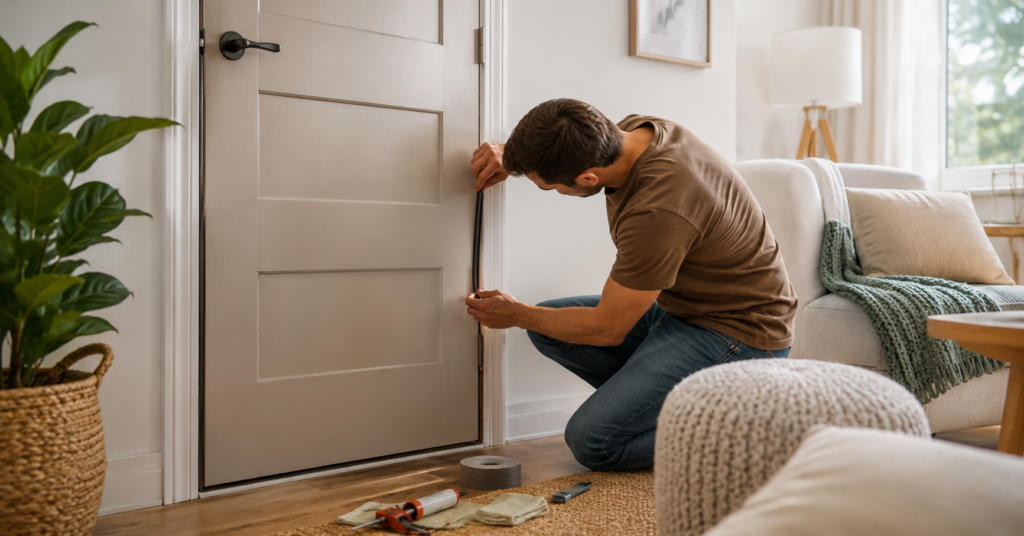
9. Weatherstrip Windows and Doors ($10 to $50)
Weatherstripping creates a tight seal around moving surfaces, eliminating the air gaps that carry sound directly into your room. It is one of the most cost-effective improvements you can make, and it has the added benefit of improving your home’s energy efficiency at the same time.
Self-adhesive foam weatherstripping is the easiest to apply and works well for windows and interior doors. Rubber or vinyl weatherstripping lasts longer and seals more tightly, making it worth the small extra cost for exterior doors and windows that face street noise. The same weatherstripping products used for energy efficiency work equally well for sound reduction, since both problems share the same root cause: air gaps.
Applying weatherstripping to your windows is closely related to weather sealing other door and window systems in your home. If you have sliding glass doors, this guide on sliding glass door weather stripping covers the specific products and techniques that work best for those systems.
Cost: $10 to $50 per door or window. Noise reduction: High for gap-related sound leakage DIY difficulty: Very easy, no tools required
Renter-Safe Soundproofing Methods (No Damage, No Landlord Issues)
If you are renting, your options narrow because you cannot make permanent changes to the walls, floors, or doors. But you still have solid options that make a real difference without risking your deposit.
Removable acoustic panels using damage-free adhesive strips (Command strips work well for lighter panels) let you treat walls without any permanent attachment.
Heavy curtains on tension rods or existing curtain hardware require no drilling and come down cleanly when you move.
Area rugs and thick underlays need no installation at all and address both sound absorption and impact noise effectively.
Bookshelves and furniture rearrangement are completely free and completely reversible.
Draft stopper door sweeps that slide under the door without attaching to it are available for around $15 and can be moved between rooms or taken when you leave.
Acoustic curtain room dividers on tension rods across a shared wall area are a creative solution for studio apartments where one corner of a room needs treating.
For apartment dwellers who are also thinking about home security alongside noise reduction, this guide on smart home security for apartments covers the renter-friendly options that work without permanent installation.
Room-by-Room Soundproofing Guide
Bedroom
The priority in a bedroom is blocking outside noise and preventing early morning sounds from waking you. Start with heavy blackout curtains on all windows, a door sweep on the bedroom door, and weatherstripping around the door frame. Add a thick rug with underlay if you have hard floors. These four changes address the most common bedroom noise problems and cost under $200 in most cases.
If street noise or neighbors are still a problem after these steps, white noise machines ($30 to $50) work surprisingly well at masking residual noise without any construction at all.
Home Office
A home office needs both sound blocking (to keep outside noise from disrupting your focus) and sound absorbing (to make your voice sound clean on calls and recordings). Start with acoustic panels on the wall behind your monitor and the wall you face most often. Add a door sweep and weatherstrip the door. A rug under your desk area helps with floor reflections.
If your office is separated from the rest of the home by a sliding panel or room divider, the acoustic treatment of that divider matters significantly. This guide on sliding panel room dividers covers how to choose dividers that provide meaningful sound separation.
Apartment Living Room
Living rooms in apartments typically share walls with neighbors on multiple sides. Prioritize the walls where noise is coming through the most. Place your sofa and largest bookshelves against shared walls. Use heavy curtains on windows. Add a large area rug to address both floor reflection and impact noise from your own footsteps for the neighbor below.
What Does NOT Work (Save Your Money)
These products and methods are widely marketed for soundproofing but deliver little to no real noise reduction. Do not waste money on them.
Soundproof paint. Regular paint and so-called soundproof paint both add negligible mass to a wall. The difference in sound blocking between painted and unpainted drywall is essentially zero. No paint product will noticeably reduce noise transmission through a wall.
Egg cartons and cardboard. A popular DIY myth. These materials have almost zero acoustic mass, and their irregular surface provides minimal absorption. They are a fire hazard and an aesthetic problem with no meaningful soundproofing benefit.
Thin foam tiles. The very thin decorative foam squares sold as acoustic tiles on Amazon are primarily decorative. They provide minimal sound absorption and essentially no sound blocking. They are better than nothing in a very echoey room,m but do not confuse them with proper acoustic treatment.
Window inserts are marketed as soundproof. Some products work. Many do not. If the product does not have a published STC (Sound Transmission Class) rating from an independent test, assume it performs poorly.
Total Cost Breakdown by Budget
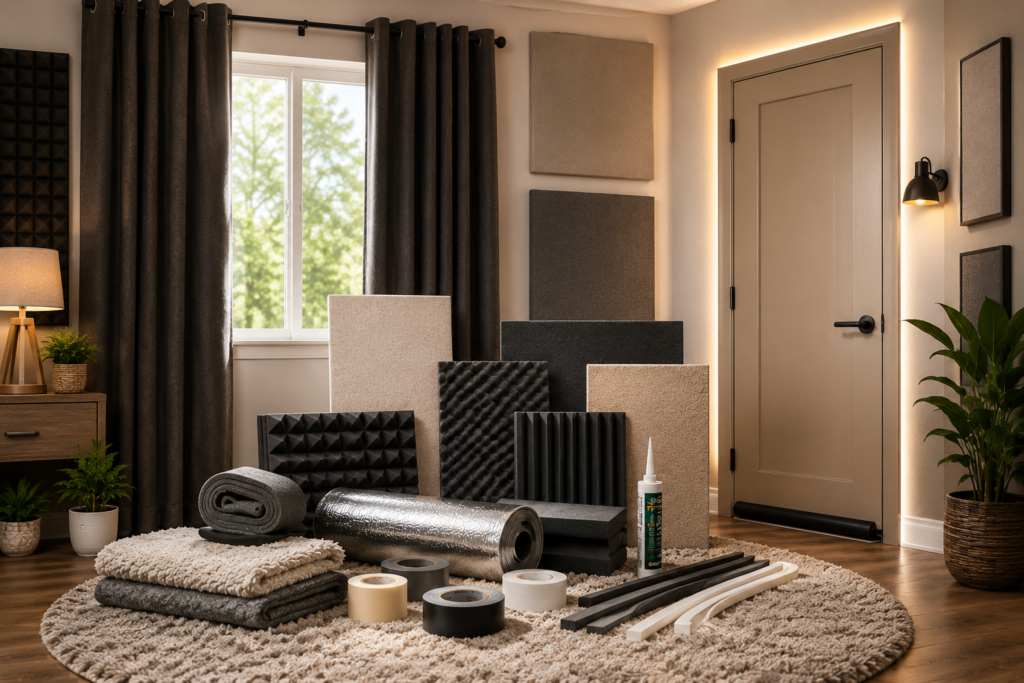
Here is a realistic overview of what each budget level buys you in terms of noise reduction, based on current US pricing:
| Budget | What to Buy | Expected Improvement |
| Under $50 | Gap sealing, door sweep, weatherstripping | Significant reduction in gap-based noise leakage |
| $50 to $150 | Above, plus heavy curtains and a door sweep | Noticeable improvement for street and airborne noise |
| $150 to $300 | Above, plus acoustic panels and a thick rug | Good overall treatment for the bedroom or home office |
| $300 to $600 | Above plus MLV on the problem wall | Serious noise reduction for persistent neighbor or traffic noise |
| $600 plus | Professional assessment plus a combination of all the above | Maximum improvement without structural work |
For professional cost estimates in your specific area, Angi’s soundproofing cost guide gives current US pricing benchmarks across different room types and methods.
Frequently Asked Questions
Q: What is the cheapest way to soundproof a room?
A: Sealing gaps around doors and windows with acoustic caulk and weatherstripping is the cheapest and most impactful starting point. It costs $10 to $30 and addresses the most common source of noise leakage in US homes. Adding a door sweep and rearranging furniture costs almost nothing and delivers real results before you spend anything on panels or materials.
Q: Can you soundproof a room without construction?
A: Yes. Heavy curtains, door sweeps, weatherstripping, thick rugs, acoustic panels on adhesive strips, and furniture placement all improve soundproofing without any construction. Most rental-friendly methods require no tools at all and can be undone completely when you move.
Q: Does soundproof paint actually work?
A: No. Soundproof paint adds negligible mass to a wall and provides no meaningful reduction in noise transmission. It is one of the most overhyped products in the soundproofing market. Save that money for a door sweep and weatherstripping, which actually work.
Q: How much does it cost to soundproof a bedroom in the US?
A: A meaningful DIY bedroom soundproofing project costs $100 to $300 using the methods in this guide. Professional soundproofing that involves wall treatment or window upgrades starts at $1,000 and goes up significantly from there. Most homeowners get 70 to 80% of the benefit from the cheap DIY methods before reaching for professional solutions.
Q: What is the STC rating, and does it matter?
A: STC stands for Sound Transmission Class. It is the standard measurement used in the US to rate how much sound a material or assembly blocks. A higher STC means more sound is blocked. A standard interior wall has an STC of around 33 to 35. A well-treated wall might reach 50 to 55. When buying any soundproofing product, look for a published STC rating from an independent test. If a product does not list one, be skeptical of its performance claims.
Q: Is Mass Loaded Vinyl worth the cost?
A: For serious noise problems, yes. MLV at $1 to $2.50 per square foot delivers real sound blocking that soft materials cannot match. For casual noise issues, start with the cheaper methods first. Most US homeowners find that gap sealing, door sweeps, heavy curtains, and rugs address their noise problems adequately without needing MLV at all.
Dealing with a specific noise problem that is not covered here? Drop your situation in the comments, and we will help you figure out the right fix for your home.

Samreen Khadim Hussain is a home improvement writer and content creator at Domelite Home. She specializes in making home renovation, interior design, and bathroom safety accessible to everyday US homeowners, turning technical subjects into clear, actionable advice. Her work is rooted in research, real-world practicality, and a genuine belief that a better home is within everyone’s reach.
