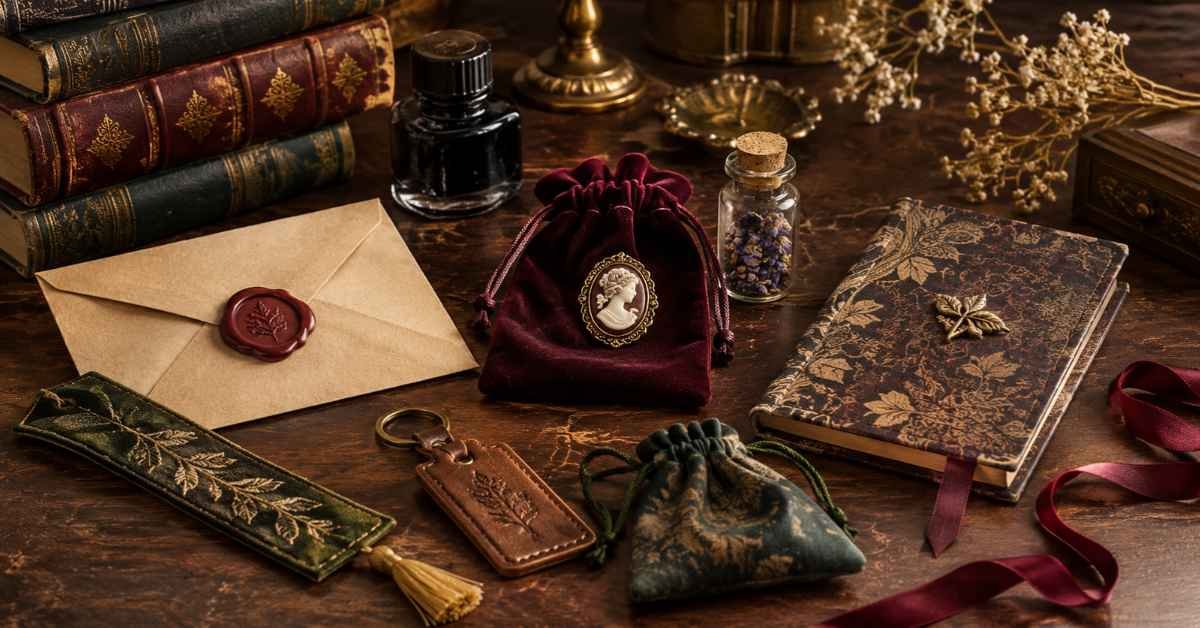
Quick Answer: Dark academia DIY decor can include small handmade crafts that bring vintage character to everyday objects. Try making wax-seal stationery, fabric bookmarks, miniature notebooks, apothecary-style vials, velvet jewelry pouches, antique-inspired brooches, and decorative key fobs. These projects use affordable materials such as paper, fabric, ribbon, glass containers, and metal findings. Most can be completed at home without power tools or major decorating changes.
Dark academia style is not limited to dark walls, antique furniture, or elaborate bookshelves. Small details can capture its scholarly, literary character too. Handmade accessories are a practical way to explore the aesthetic while creating useful objects for personal use or thoughtful gifts.
1. Make Wax-Seal Letter Sets
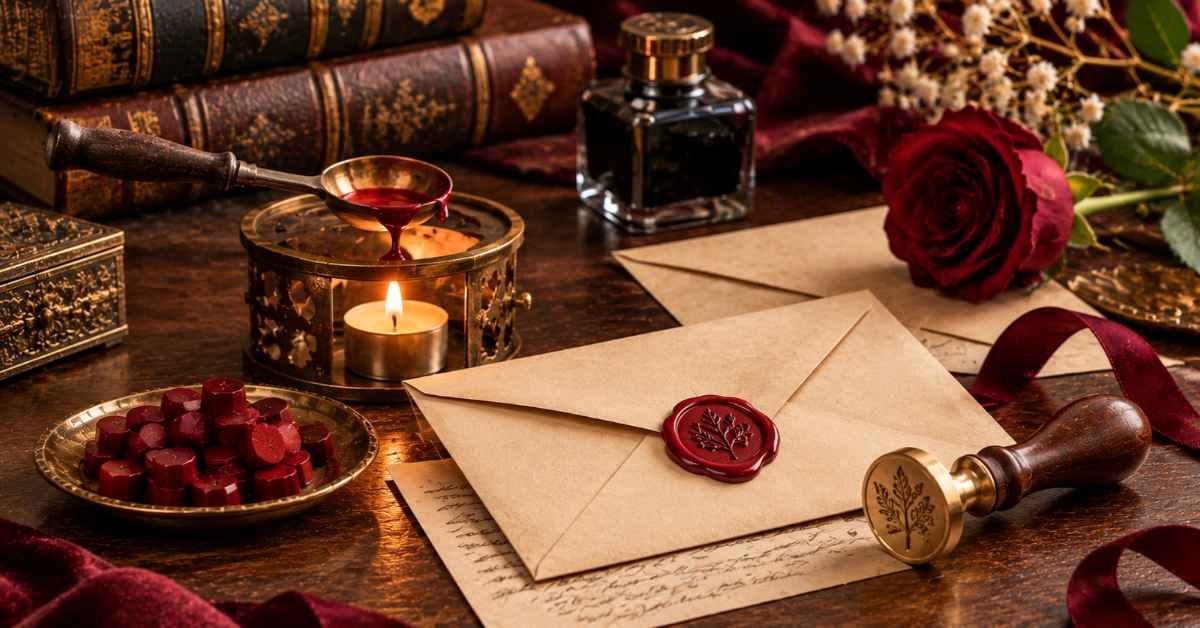
A wax-seal letter set gives ordinary correspondence an old-fashioned, literary feel. It is also a useful craft for handwritten notes, invitations, and gift messages.
Materials required:
- Cream, ivory, or pale beige writing paper
- Matching envelopes
- Wax sealing beads or sealing wax sticks
- Wax seal stamp
- Small melting spoon
- Heat-safe surface
Steps:
- Cut the paper into matching sheets or purchase a simple stationery set.
- Choose a wax color such as burgundy, forest green, antique gold, or dark brown.
- Melt a small amount of wax according to the product instructions.
- Pour a small pool of wax onto the envelope flap.
- Press the seal stamp into the wax and hold it steady until it sets.
- Allow the wax to cool completely before handling the envelope.
Approximate cost: 8–18.
Styling or placement advice: Keep the finished stationery in a simple envelope wallet or a small desk drawer. Use one seal design consistently for a coordinated collection.
Finished result: A personalized correspondence set with sealed envelopes that look inspired by traditional handwritten letters.
2. Create Personalized Vintage-Style Bookplates
Bookplates are small labels placed inside book covers to identify the owner. A custom design can give personal books a traditional library-inspired detail without changing the books themselves.
Materials required:
- Cream or parchment-colored cardstock
- Small scissors or paper cutter
- Fine-tip black or dark brown pen
- Lettering stencil or printed template
- Decorative border stamp
- Glue stick for attaching labels to your own books
Steps:
- Cut cardstock into small rectangles or decorative label shapes.
- Draw a thin border around each piece.
- Add the words “From the Library of” at the top.
- Leave space below for a name or initials.
- Add a small decorative motif, such as a laurel branch, quill, or classical column.
- Let the ink dry before using the labels.
Approximate cost: 3–9.
Styling or placement advice: Keep the labels in a small paper envelope until needed. Use them in personal books rather than valuable borrowed or antique volumes.
Finished result: A collection of personalized bookplates that gives an ordinary book a distinctive, traditional touch.
3. Sew a Miniature Fabric Bookmark

A fabric bookmark is a simple alternative to paper bookmarks. Velvet, cotton, and satin ribbon work especially well with dark academia colors.
Materials required:
- Burgundy, dark green, brown, or black fabric
- Matching thread
- Needle or sewing machine
- Fabric scissors
- Thin interfacing
- Optional narrow ribbon or small tassel
Steps:
- Cut two matching fabric strips, approximately 2 × 7 inches.
- Cut a piece of interfacing slightly smaller than the fabric.
- Place the fabric pieces together with their finished sides facing inward.
- Sew around the edges, leaving a small opening.
- Turn the bookmark right side out and close the opening with small stitches.
- Add a ribbon or tassel at one end if desired.
Approximate cost: 4–10.
Styling or placement advice: Make several bookmarks in different fabrics and keep them with your current reading materials. Choose lightweight fabric so the bookmark does not make a book difficult to close.
Finished result: A soft, reusable bookmark with a neat fabric finish and a personalized color combination.
4. Make a Handbound Pocket Notebook
A small stitched notebook is useful for quotations, reading notes, lists, and personal reflections. Its handmade construction gives it more character than a standard notepad.
Materials required:
- Plain or lightly textured paper
- Heavy cardstock for the cover
- Waxed bookbinding thread
- Needle
- Ruler
- Pencil
- Awl or another suitable paper-piercing tool
- Decorative cover paper
Steps:
- Cut several sheets of paper to the same size.
- Fold each sheet in half to create small page sections.
- Stack the folded sections inside one another.
- Mark three or five evenly spaced stitching points along the fold.
- Carefully pierce the marked points.
- Stitch through the holes with waxed thread, securing the pages to the folded cover.
- Decorate the cover with a simple title or initials.
Approximate cost: 5–12.
Styling or placement advice: Keep it in a handbag, reading bag, or stationery pouch. Use a different cover for each notebook to distinguish reading notes from personal writing.
Finished result: A compact handmade notebook with visible stitching and a custom cover.
5. Turn Small Glass Bottles into Apothecary-Style Vials
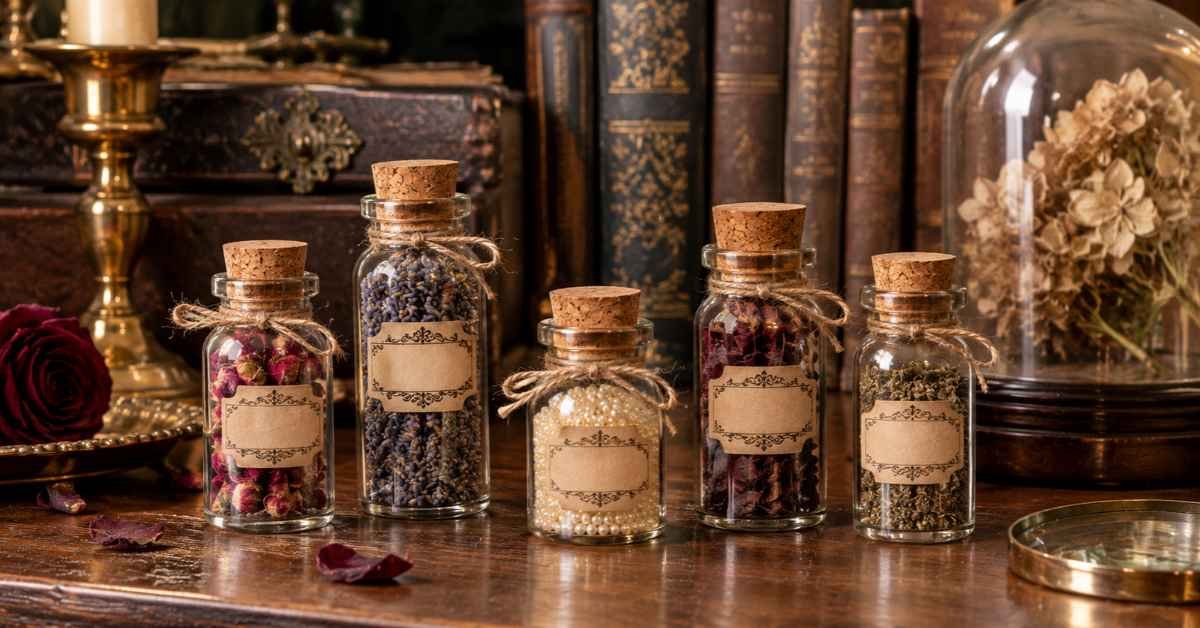
Small glass containers can become useful holders for beads, dried petals, tiny craft supplies, or other non-food items. Their old-fashioned appearance suits the dark academia aesthetic.
Materials required:
- Small clean glass bottles with lids or corks
- Cream or brown label paper
- Fine-tip pen
- Dark brown or black ink
- Twine or narrow ribbon
- Optional metallic paint for the lid
Steps:
- Wash the bottles and allow them to dry completely.
- Cut small labels to fit the front of each bottle.
- Write a simple name or description on each label.
- Add a thin decorative border.
- Attach the labels using removable adhesive or a small amount of suitable craft glue.
- Tie a short piece of twine around the neck if desired.
Approximate cost: 5–14.
Styling or placement advice: Use these containers for small craft materials, dried decorative ingredients, or collectible objects. Keep them away from children and do not reuse containers that held chemicals for food or drink.
Finished result: A coordinated set of miniature labeled glass vials with an old apothecary-inspired appearance.
For more inspiration on patterns and finishes that suit this aesthetic, see these dark academia wallpaper ideas.
6. Make an Antique-Inspired Cameo Brooch
A cameo-style brooch adds a vintage accessory to a jacket, scarf, or fabric bag. You can create the look without buying an expensive antique piece.
Materials required:
- Plain brooch backing
- Cameo-style cabochon or small decorative image
- Cabochon setting
- Suitable jewelry adhesive
- Small tweezers
- Soft cloth
Steps:
- Choose a small cameo image or decorative cabochon.
- Check that it fits the brooch setting.
- Clean the setting and the back of the cabochon.
- Apply jewelry adhesive according to its instructions.
- Position the cabochon carefully.
- Allow the adhesive to cure fully before attaching the brooch to clothing.
Approximate cost: 6–15.
Styling or placement advice: Choose muted ivory, dark red, antique gold, or black details. Attach the brooch to a coat lapel, scarf, or fabric bag.
Finished result: A small vintage-inspired brooch with a classical portrait or ornamental design.
7. Sew a Velvet Jewelry Pouch
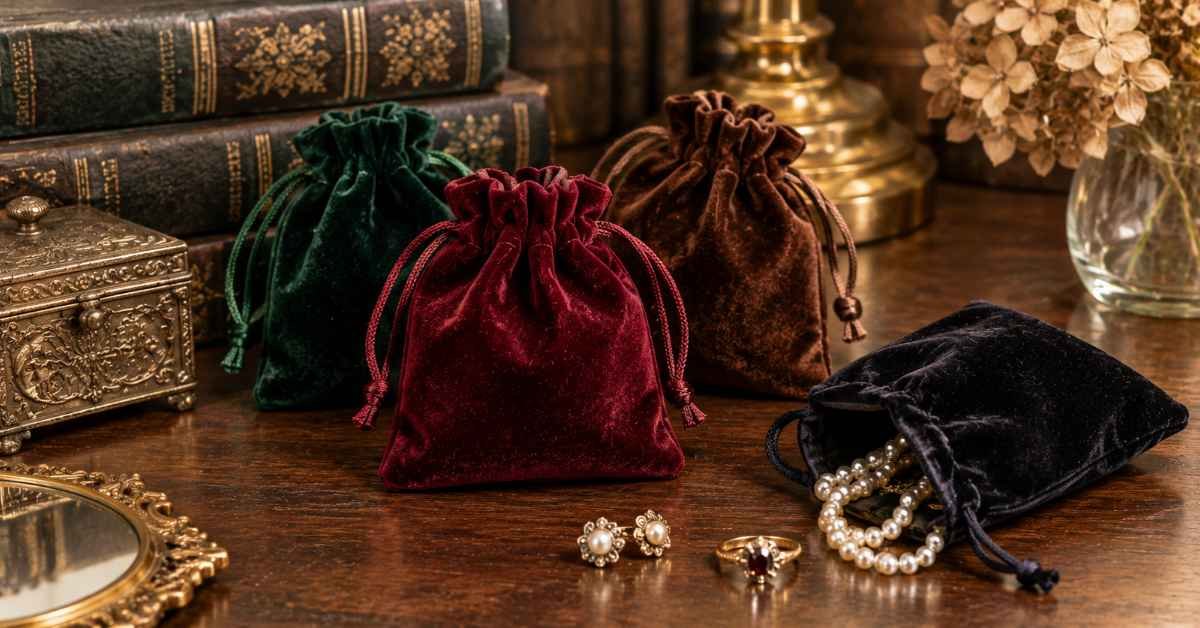
A velvet pouch is a practical way to store rings, earrings, small pendants, or other personal accessories. It also makes a handmade gift feel more considered.
Materials required:
- Small piece of velvet or velvet-look fabric
- Matching thread
- Needle or sewing machine
- Fabric scissors
- Narrow satin cord or ribbon
- Safety pin
Steps:
- Cut two equal fabric rectangles, approximately 6 × 8 inches.
- Place the finished sides together.
- Sew the two sides and bottom, leaving the top open.
- Fold the top edge inward to create a channel for the cord.
- Stitch the channel while leaving a small opening.
- Attach a safety pin to the cord and guide it through the channel.
- Turn the pouch right side out and pull the cord to close it.
Approximate cost: 5–12.
Styling or placement advice: Make one pouch for everyday jewelry and smaller versions for individual pieces. Burgundy, dark green, and chocolate brown fabrics create a traditional look.
Finished result: A soft drawstring pouch that protects small accessories and works well as a gift bag.
8. Create Scented Drawer Sachets
Fabric sachets are small, useful accessories that can hold dried lavender or other suitable dried botanicals. They add a gentle fragrance to a drawer or storage area.
Materials required:
- Breathable cotton or linen fabric
- Dried lavender or another suitable dried botanical
- Needle and thread
- Fabric scissors
- Small funnel or paper cone
- Narrow ribbon
Steps:
- Cut two matching fabric squares, approximately 4 × 4 inches.
- Place the finished sides together.
- Sew around three sides.
- Turn the pouch right side out.
- Fill it loosely with fully dried lavender.
- Fold the open edges inward and sew them closed.
- Add a small ribbon loop if desired.
Approximate cost: 4–10.
Styling or placement advice: Place sachets in clothing drawers, linen storage, or a wardrobe. Keep them away from pets and avoid direct contact with delicate fabrics if the contents may stain.
Finished result: A small fabric sachet with a subtle botanical scent and a handmade finish.
9. Make a Vintage-Inspired Key Fob

A fabric key fob is an easy way to turn leftover material into a useful everyday accessory. Choose a dark, textured fabric or a muted floral pattern.
Materials required:
- Small piece of cotton, velvet, or faux leather
- Key-fob hardware or a split key ring
- Matching thread
- Needle or sewing machine
- Scissors
- Small piece of interfacing
Steps:
- Cut a fabric strip approximately 2 × 8 inches.
- Add interfacing to give it structure.
- Fold the long edges inward and press them flat.
- Fold the strip in half lengthwise.
- Sew along the edges to secure the shape.
- Fold it around the key-fob hardware or split ring.
- Secure the end with strong stitches or suitable hardware.
Approximate cost: 4–10.
Styling or placement advice: Use it for house keys, a small storage key, or a bag zipper. Choose a fabric pattern that is easy to recognize so the keys are easier to identify.
Finished result: A personalized fabric key fob that combines a practical purpose with vintage-inspired style.
You can also take inspiration from the materials and finishes featured in this guide to dark academia furniture
10. Decorate a Small Matchbox Sleeve
A decorative matchbox sleeve is a simple paper craft that can make an ordinary household item look more polished. The original matchbox remains functional and removable.
Materials required:
- Plain paper or lightweight cardstock
- Small matchbox
- Ruler
- Pencil
- Scissors
- Glue stick
- Decorative paper or printed motifs
Steps:
- Measure the matchbox’s length, width, and height.
- Cut a strip of cardstock long enough to wrap around the outer sleeve.
- Score the folds lightly so the paper bends neatly.
- Wrap the cardstock around the matchbox sleeve.
- Secure the overlapping edge with glue.
- Add a small decorative motif or a simple border.
- Allow the glue to dry before sliding the sleeve back over the matchbox.
Approximate cost: 2–6.
Styling or placement advice: Keep the decorative sleeve on the outer box only. Never cover the striking surface, and remove the sleeve before using matches if it interferes with safe handling. Store matches away from heat, children, and open flames.
Finished result: A custom matchbox with a paper cover inspired by vintage packaging.
11. Craft Embossed Luggage Tags
A handmade luggage tag can make a travel bag easier to identify. A faux leather finish and restrained lettering give it a traditional, understated appearance.
Materials required:
- Faux leather sheet or sturdy leather-look cardstock
- Craft knife or suitable scissors
- Metal eyelet or reinforced hole
- Eyelet setter, if required
- Small buckle strap or leather cord
- Letter stamps or permanent marker
- Small paper insert
Steps:
- Cut two matching tag shapes from the material.
- Round the corners slightly.
- Add a small hole near the top and reinforce it with an eyelet if the material allows.
- Decorate the front with initials or a simple border.
- Attach the two pieces together, leaving one side open for the information insert.
- Add the strap or cord through the reinforced hole.
- Write contact information on the removable insert.
Approximate cost: 5–12.
Styling or placement advice: Use dark brown, black, or oxblood-colored material. Keep personal contact details on the removable insert rather than displaying them prominently on the outside.
Finished result: A handmade travel tag with a textured finish and personalized lettering.
12. Assemble a Mini Correspondence Folio
A correspondence folio keeps loose notes, envelopes, stamps, and small paper items together. It is a useful alternative to storing stationery in separate piles.
Materials required:
- Heavy cardstock
- Decorative paper
- Two small paper pockets
- Ribbon or elastic closure
- Ruler
- Scissors or paper cutter
- Glue stick
- Pencil
Steps:
- Cut a large cardstock rectangle and fold it into three sections to create a simple folder.
- Cover the outside with decorative paper.
- Cut two smaller rectangles to make interior pockets.
- Attach one pocket to each inside panel.
- Allow the adhesive to dry completely.
- Add a ribbon or elastic closure.
- Label the pockets for letters, envelopes, stamps, or notes.
Approximate cost: 5–12.
Styling or placement advice: Keep the folio with your writing supplies or carry it when traveling. Use separate pockets for blank stationery and finished correspondence.
Finished result: A compact handmade stationery organizer that keeps small paper items together.
How Much Do These Dark Academia DIY Projects Cost?
The following estimates are approximate material costs in US dollars. They assume basic tools are already available and that some supplies can be used for more than one project.
| DIY project | Estimated cost |
| Wax-seal letter set | 8–18 |
| Personalized bookplates | 3–9 |
| Fabric bookmark | 4–10 |
| Pocket notebook | 5–12 |
| Apothecary-style vials | 5–14 |
| Cameo brooch | 6–15 |
| Velvet jewelry pouch | 5–12 |
| Scented drawer sachets | 4–10 |
| Fabric key fob | 4–10 |
| Matchbox sleeve | 2–6 |
| Luggage tags | 5–12 |
| Correspondence folio | 5–12 |
The least expensive options are the matchbox sleeve, bookplates, and fabric bookmark. Wax-seal stationery and the cameo brooch may cost more because they require specialized supplies.
Tips for Making Dark Academia Crafts Look Authentic
Small details can make handmade accessories feel more cohesive without making them look artificially aged or overly decorated.
- Choose restrained colors: Use burgundy, forest green, dark brown, black, muted gold, and warm ivory. For more color inspiration, see our dark academia color palette guide.
- Use texture thoughtfully: Velvet, linen, textured cardstock, faux leather, and aged-look paper can add depth.
- Keep lettering simple: Serif lettering, small capitals, and handwritten details work well on labels and stationery.
- Avoid excessive distressing: Torn edges, fake stains, and darkened paper do not automatically make a craft look authentic.
- Make accessories useful: A bookmark, pouch, folio, or key fob is more likely to be used than an object made only for display.
- Use modern reproductions: Do not cut, glue, stain, or otherwise alter genuine antique letters, valuable books, or historical documents to create a vintage effect.
The Library of Congress advises careful handling of paper collections and warns against using adhesive tape or glue on collection materials. Its guidance is intended for original collection items, not ordinary craft paper, but it is a useful reason to keep valuable originals out of DIY projects. See its care and handling guidance for works on paper.
For additional information, the US National Archives also explains why adhesives and pressure-sensitive tapes can damage original paper records over time: Paper-Based Records: National Archives.
Common Mistakes to Avoid

- Using too many decorative details: A few carefully chosen elements usually look better than several competing patterns.
- Choosing unsuitable materials: Thin paper may tear, weak thread may break, and unsuitable adhesive may not hold a project together.
- Over-aging paper: Artificial stains can make stationery look dirty rather than vintage-inspired.
- Ignoring proportions: Oversized labels, thick bookmarks, and bulky pouches can become impractical.
- Using genuine antiques as craft materials: Use reproductions or inexpensive new supplies instead of damaging collectible objects.
- Skipping drying time: Allow glue, paint, and jewelry adhesive to cure according to the manufacturer’s directions before using the finished item.
Frequently Asked Questions
1. What are some easy dark academia DIY decor projects?
Fabric bookmarks, personalized bookplates, paper matchbox sleeves, and scented drawer sachets are easy projects for beginners. They require relatively few materials and can be completed without specialized equipment.
2. What materials work best for dark academia crafts?
Velvet, linen, faux leather, textured paper, glass, ribbon, wax seals, and antique-style metal findings work well. Choose materials in muted colors such as burgundy, forest green, brown, black, and ivory.
3. Can I make dark academia accessories on a budget?
Yes. Many small crafts cost between $2 and $12 in materials. Reusing fabric scraps, leftover cardstock, ribbon, and small glass containers can reduce costs further.
4. What can I make as a dark academia handmade gift?
A wax-seal stationery set, handbound notebook, fabric bookmark, cameo brooch, or velvet jewelry pouch can make a thoughtful handmade gift. Choose a project that suits the recipient’s interests and everyday needs.
5. Do dark academia crafts have to look old?
No. The style draws on traditional materials, literary details, muted colors, and vintage-inspired designs. New materials can create the same visual character without artificial damage or staining.
6. Which dark academia DIY project is best for beginners?
A fabric bookmark or personalized bookplate is a good starting point. Both require inexpensive supplies and simple steps, making them suitable for someone new to crafting.
Conclusion
Dark academia DIY decor can be personal, practical, and affordable without involving a full room makeover. Small handmade pieces such as wax-seal stationery, fabric bookmarks, miniature notebooks, and velvet pouches bring the aesthetic into everyday life. Start with one project, choose materials you enjoy working with, and build a collection of useful accessories over time.

I’m Samreen Khadim Hussain, a home improvement writer specializing in practical, research-driven content for U.S. homeowners. At Domelite Home, I cover home renovation, interior design, home maintenance, and residential safety, translating technical information and industry research into clear, actionable guidance. My approach combines search intent research, reliable sources, and reader-focused writing to help homeowners understand their options, make informed decisions, and create safer, more functional living spaces.