
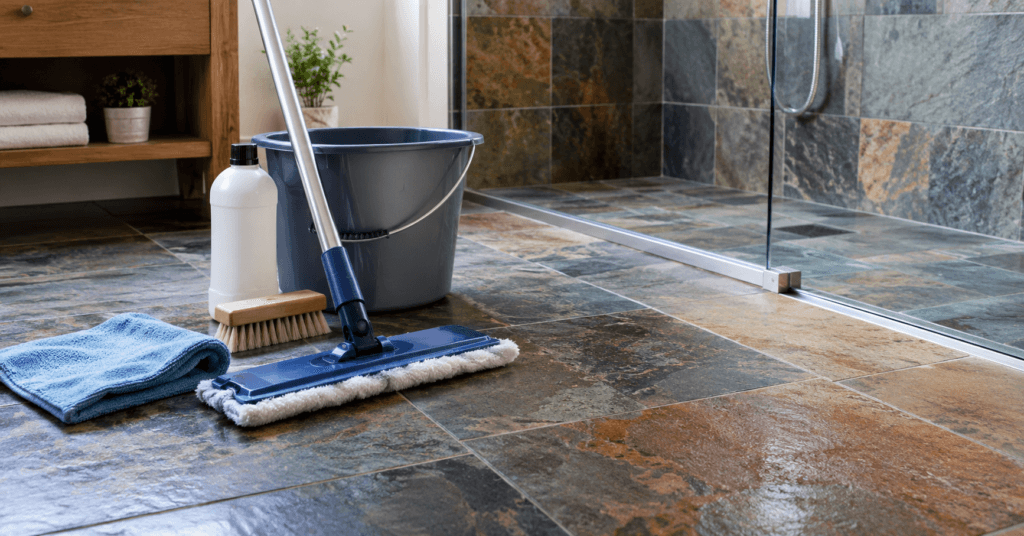
How to clean slate tiles safely and effectively is easier than it may seem. Slate is a natural stone with a textured surface that can trap dirt, dust, soap residue, and other grime, so it needs a gentler cleaning approach than many manufactured tiles. The right cleaner, tools, and technique can keep slate floors and shower tiles looking clean without damaging the stone or its sealer.
Slate has a way of making a room feel grounded. Its natural color variation, textured surface, and earthy character can turn an ordinary floor or shower into something that looks custom-built. The catch? Slate tile does not clean exactly like ceramic, porcelain, or vinyl. Because slate is natural stone and often has a naturally uneven or cleft surface, dirt can settle into tiny grooves, while the wrong cleaner can leave residue or gradually affect the stone’s appearance. The good news is that cleaning slate does not have to be complicated.
For most routine cleaning, you need a soft brush or microfiber mop, clean water, and a pH-neutral cleaner formulated for natural stone. Start by removing loose grit, clean with as little water as practical, rinse away residue when needed, and dry the surface instead of leaving it wet. That simple routine goes a surprisingly long way. If your slate is in a bathroom, you may also need to deal with soap film, mineral deposits, and moisture-related grime, but the same principle applies: clean the stone without attacking the stone. And if you’re planning a bathroom update around existing slate, ideas such as these bathroom tile shower ideas can help you think about how the material fits into the rest of the space. The goal isn’t to make slate look artificial or brand-new; it’s to keep its natural character clean, healthy, and attractive.
What Is the Best Way to Clean Slate Tile?
The best way to clean slate tile is to remove loose debris first, then clean with a pH-neutral natural-stone cleaner and a soft cleaning tool, followed by appropriate rinsing and thorough drying. That sounds almost too simple, especially if you’re staring at a floor covered with muddy footprints or a shower with years of buildup. But natural stone rewards a gentle approach. Slate’s textured surface can hold onto particles that act like sandpaper under shoes or furniture, so dry cleaning is an important first step rather than something you skip. Once the grit is gone, a properly diluted stone cleaner can loosen everyday soil without introducing unnecessary acidity or harsh chemicals. Use a microfiber mop on relatively smooth slate and a soft nylon brush when the texture is more pronounced.
Work in manageable areas instead of flooding the entire floor. If the stone becomes excessively wet, remove the dirty solution and rinse according to the cleaner’s instructions. Then dry the surface. This routine is useful because it addresses the real problem soil and residue without creating a second problem through aggressive cleaning. For homeowners, that distinction matters. A cleaner that seems powerful because it produces lots of foam or has a strong smell isn’t necessarily better for natural stone. Gentle, consistent cleaning is usually more useful than occasional aggressive scrubbing.
Why Slate Needs a Different Cleaning Approach
Slate is a natural stone formed from layers of rock, and its appearance can vary significantly from one installation to another. Some slate has a relatively smooth surface, while other varieties have a pronounced cleft texture with ridges and small recesses. Those characteristics are part of the material’s charm, but they also change how cleaning works. A smooth manufactured tile gives dirt fewer places to hide, while textured slate can trap dust, hair, cooking residue, soap film, and other debris in its surface. That is why simply running a wet mop over slate often produces disappointing results.
You’re moving moisture around, but you may not be removing everything sitting inside the texture. Slate may also be sealed, and the condition and type of that sealer can affect how water and stains behave. Instead of treating every slate surface as identical, look at the installation first. Is it indoors or outdoors? Is it on a bathroom floor, shower wall, kitchen floor, entryway, or fireplace surround? Is the surface polished, honed, or naturally cleft? Those details help determine how much agitation and moisture are appropriate. When in doubt, test your cleaner on a small inconspicuous area first. Natural stone care is less about brute force and more about using the right method for the surface you actually have.
What You Need Before Cleaning Slate
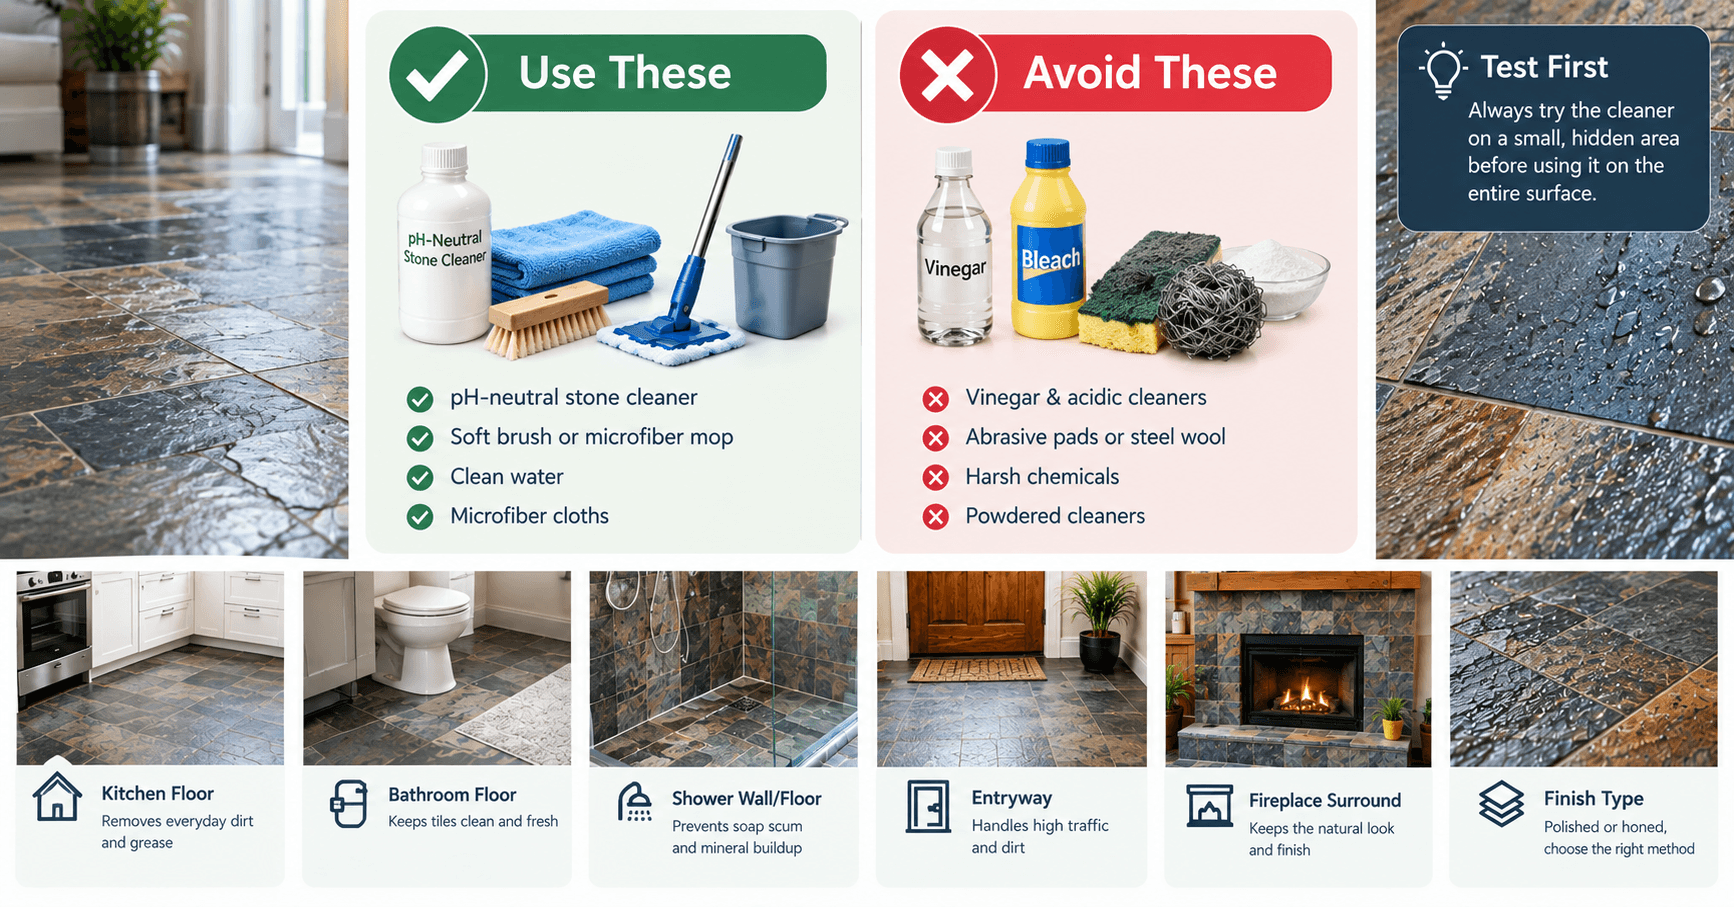
You don’t need a cabinet full of specialty equipment to clean slate tile properly. For routine maintenance, the basic setup is surprisingly small: a vacuum or soft broom, microfiber cloths, a microfiber mop or soft nylon brush, a bucket when appropriate, and a pH-neutral cleaner made for natural stone. Having clean water available is also important because cleaner residue can be just as annoying as the dirt you were trying to remove. A dirty mop head can spread soil from one part of the room to another, so use a clean pad or rinse your tool frequently. For walls and shower surfaces, microfiber cloths and soft brushes are often easier to control than a large mop.
If you’re dealing with a stubborn stain, resist the urge to immediately reach for the strongest chemical in the garage. Stain removal depends on what caused the stain, and using the wrong product can make the situation harder rather than easier. You should also check any care instructions supplied by the tile, sealer, or installation manufacturer. Slate is a natural material, and different finishes and sealers can have different maintenance requirements. A little preparation saves time because you aren’t stopping halfway through the job to improvise. Think of it like cooking: you can make a simple meal with basic ingredients, but having everything ready before you start makes the whole process smoother.
Best Cleaners and Tools for Slate Tile
The safest everyday combination is a pH-neutral stone cleaner plus a soft, non-abrasive cleaning tool. Avoid choosing a product simply because its label says “heavy duty.” Heavy-duty formulas can be appropriate for some surfaces but unnecessarily harsh for natural stone. A soft nylon brush is particularly useful on cleft slate because it can reach textured areas without the aggressive scratching associated with abrasive tools. Microfiber is excellent for routine dust removal and damp cleaning because it picks up fine particles rather than simply pushing them around.
A vacuum can also work well when its hard attachments are not dragging or scratching the surface. For a shower, keep separate cloths or pads for the stone and other bathroom surfaces so you don’t accidentally transfer harsh bathroom chemicals onto the slate. The Natural Stone Institute’s consumer care guidance is a useful reference when you’re choosing a maintenance approach for natural stone: https://www.naturalstoneinstitute.org/consumers/care/. Always follow the specific directions on your chosen cleaning product, particularly regarding dilution, dwell time, rinsing, and whether it is approved for sealed natural stone. The right tools make cleaning easier, but technique matters just as much. A soft brush used patiently will often outperform an aggressive scrubber used for thirty seconds.
How to Clean Slate Tiles Step by Step
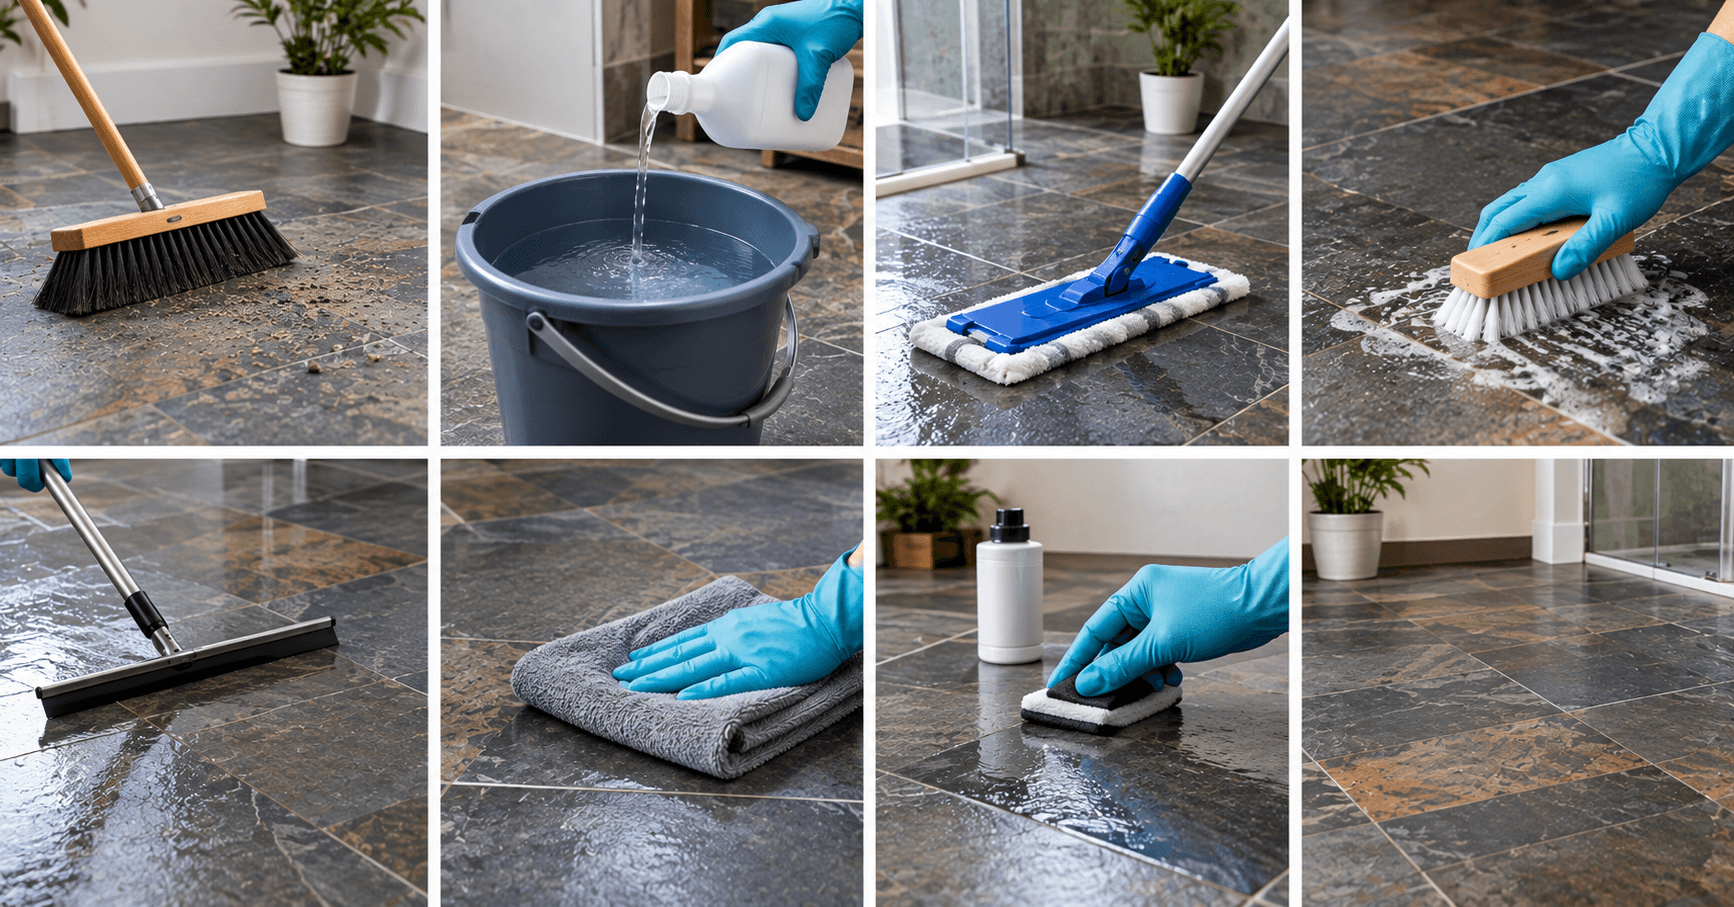
Cleaning slate is easiest when you break the job into a predictable sequence. The biggest mistake is starting with a soaking-wet mop before removing dry debris. Once dirt and grit mix with water, they become a muddy film that can be pushed into the slate’s texture and grout lines. Instead, begin dry, work with a modest amount of cleaning solution, and avoid allowing dirty water to sit on the surface for long periods. For floors, divide a large room into smaller sections so you can clean, rinse, and dry without losing control.
For showers and walls, work from higher areas toward lower areas while paying attention to corners, grout lines, and areas around fixtures. Don’t rush the rinsing stage. Cleaner residue can leave a dull or sticky-looking film, which sometimes makes homeowners think the slate itself has become damaged when the real problem is leftover product. Finally, dry the surface thoroughly. This is especially important in bathrooms, where constant moisture can encourage grime and make a freshly cleaned surface look dirty again sooner. A good slate-cleaning routine is controlled rather than aggressive.
Step 1: Remove Loose Dirt and Debris
Start with a dry floor or surface whenever possible. Sweep gently with a soft broom or vacuum using an attachment that won’t scratch the slate. Pay special attention to entrances, corners, transitions, and areas beneath furniture because those locations tend to collect abrasive grit. On a shower wall, wipe away loose dust and hair before introducing water. This first step may feel insignificant, but it is one of the most useful parts of the entire process. Tiny particles of sand and dirt can become abrasive when trapped beneath a mop or cleaning cloth, particularly on a floor where repeated foot traffic creates friction. With cleft slate, run your hand visually, not aggressively, across the surface and look for recessed areas where debris has collected.
A soft brush can help lift particles from those spots. Don’t scrape the surface with a knife, metal tool, or stiff wire brush. The objective is to lift debris away, not carve it out of the stone. Once the loose material is gone, the wet-cleaning stage becomes much easier because you’re dealing primarily with adhered soil instead of a mixture of dirt, water, and cleaning solution.
Step 2: Use a pH-Neutral Cleaner
Prepare your cleaning solution according to the manufacturer’s instructions. If you’re using a concentrated product, don’t assume that adding extra cleaner will make the slate cleaner. Over-concentration can increase residue and may make rinsing more difficult. Apply enough solution to loosen dirt without flooding the stone. On floors, a damp microfiber mop is often sufficient for routine maintenance. On heavily textured slate, a soft nylon brush can provide the additional agitation needed to reach recessed areas. For showers, apply the cleaner to a cloth or appropriate surface rather than allowing large quantities of liquid to pool. Give the product the amount of contact time specified on the label, if applicable.
This is where patience beats muscle. Letting a suitable cleaner loosen soil can reduce the amount of scrubbing you need to do. Before treating a large visible area, test the product in a discreet spot, especially if the slate is sealed or has an unusual finish. Never mix cleaning chemicals, particularly products containing bleach, ammonia, acids, or other reactive ingredients. More chemicals do not equal more cleanliness; they often equal more risk.
Step 3: Mop, Scrub, and Rinse Carefully
Move across the surface methodically rather than repeatedly going over the same dirty water. For floors, rinse or replace your mop water when it becomes visibly dirty. For textured slate, use a soft brush with gentle pressure to loosen grime from the natural clefts. You don’t need to attack the stone as though you’re sanding a piece of wood. Let the cleaning solution and brush do the work. If you’re cleaning a shower, pay extra attention to corners, the floor-to-wall transition, around the drain, and behind fixtures where residue commonly collects. Once the soil has been lifted, remove the dirty solution rather than allowing it to dry back onto the surface. Depending on the cleaner, you may need to rinse with clean water.
Follow the product instructions rather than assuming every cleaner requires the same treatment. If you see streaks or a cloudy film after drying, excessive product or insufficient rinsing may be the culprit. Clean tools also matter. A microfiber pad that is saturated with dirty water cannot effectively pick up more soil. Clean in small sections, rinse your tools frequently, and keep dirty water under control.
Step 4: Dry the Slate Completely
Drying is the step many people overlook because the surface already looks clean when you’re finished mopping. But natural stone can look dramatically different when wet, and moisture can temporarily hide streaks, residue, or missed soil. Use a clean microfiber towel or dry mop to remove remaining moisture from floors and walls. In a bathroom, improve ventilation by running the exhaust fan and leaving the shower enclosure open when practical.
If you’re cleaning a shower floor, don’t leave standing water sitting in textured recesses. Drying also gives you a chance to inspect the finished surface under normal lighting. If you notice a hazy patch, oily area, or white deposit, don’t immediately start scrubbing harder. Identify what you’re seeing first. It may be cleaner residue, mineral buildup, a stain, or an issue with the sealer. Each problem calls for a different solution. Never assume that more pressure is the answer. Often, the better answer is a better diagnosis.
How to Clean Slate Floors Without Damaging Them
Slate floors need two kinds of care: routine cleaning and prevention. Routine cleaning removes dirt that is already there, while prevention keeps abrasive grit from accumulating in the first place. Place mats near exterior doors and encourage household members to remove particularly dirty footwear before walking across the floor. Sweep or vacuum regularly, especially in busy entryways and kitchens. When wet-cleaning, use a controlled amount of water rather than soaking the entire floor. Excess moisture can work into grout and other areas where it isn’t wanted, particularly if the installation has drainage or moisture-management issues.
If the slate has a sealer, remember that sealing does not make the floor maintenance-free. A sealer can improve resistance to staining and simplify cleaning, but the surface still needs regular care. Furniture legs should also be protected where appropriate so they don’t drag grit across the stone. If you’re tackling a broader home improvement project at the same time, these home renovation tips and money-saving tricks can help you plan the work without turning a simple maintenance job into an unnecessary replacement project. The goal is to preserve the slate you already have. Good maintenance is cheaper than repairing or replacing neglected natural stone.
How Often Should You Clean Slate Floors?
There isn’t one perfect cleaning schedule for every slate floor because traffic levels vary enormously. A busy kitchen or entryway may need frequent sweeping and damp cleaning, while a lightly used guest room can go longer between deep cleans. The important distinction is between dry maintenance and wet cleaning. Removing dust, sand, hair, and grit frequently is generally less demanding than repeatedly washing the floor. A practical routine is to remove loose debris whenever it becomes noticeable and damp-clean the surface when it actually needs it.
Spills should be addressed promptly because allowing liquids to sit gives them more opportunity to penetrate vulnerable areas. High-traffic households may need more frequent attention than homes where the floor sees little activity. Don’t clean by calendar alone; clean based on what the surface is telling you. If the slate looks dull because of a film, investigate residue before reaching for a stronger cleaner. If it looks dirty because of tracked-in grit, start with dry cleaning. Matching the method to the problem is the simplest way to avoid over-cleaning.
How to Clean Slate Shower Tiles
Slate showers require a slightly different mindset because they face constant exposure to water, body oils, soap, shampoo, and mineral deposits. The textured surface that makes slate visually interesting can also provide plenty of places for residue to collect. Start by removing loose hair and debris, then use a natural-stone-safe, pH-neutral cleaner according to its instructions. A soft nylon brush can be useful on textured areas, while microfiber cloths work well on smoother surfaces.
Don’t assume a conventional bathroom cleaner is safe simply because it is marketed for showers. Many bathroom products are designed to tackle mineral scale and soap buildup on nonporous surfaces, and their ingredients may not be appropriate for natural stone. Ventilation is part of the cleaning strategy too. A shower that remains damp for long periods is more likely to develop persistent grime, and drying the surfaces after use can make routine maintenance easier. If you’re designing or remodeling around a slate shower, consider the broader visual balance of the bathroom rather than treating the stone as an isolated feature. Your choice of vanity, backsplash, hardware, and lighting can either complement the slate or compete with it.
How to Remove Soap Scum and Hard-Water Marks
Soap film and hard-water deposits are two of the most frustrating problems on shower surfaces. The temptation is to grab an acidic cleaner designed to dissolve mineral scale quickly, but acidic products can be unsuitable for many natural-stone surfaces. Instead, use a cleaner specifically labeled for natural stone and follow its instructions carefully. For stubborn deposits, gentle mechanical agitation with a soft brush may help loosen residue without requiring an aggressive chemical approach.
Work on a small section first and observe the result. If the white deposit does not respond, don’t keep escalating the pressure. The material may not be ordinary surface residue at all. It could be mineral accumulation, efflorescence, grout-related residue, or an issue associated with moisture beneath or around the installation. At that point, identifying the source becomes more important than repeatedly cleaning the visible symptom. After shower cleaning, remove excess water with a squeegee or microfiber cloth where appropriate and keep ventilation running. Prevention can make a dramatic difference. The easiest soap-scum problem to clean is the one you don’t allow to build up for months.
How to Remove Stains From Slate Tile
Stain removal starts with one question: What caused the stain? Oil, grease, rust, organic material, hard-water deposits, and cleaner residue do not all respond to the same treatment. That’s why randomly applying stronger chemicals is a poor strategy. First, blot or remove any material sitting on the surface without spreading it. Then identify whether you’re dealing with a topical residue or a stain that has penetrated the stone. A dark spot around a kitchen cooking area may behave differently from an orange rust mark near a metal fixture. Organic discoloration can also require a different approach. For valuable, historic, expensive, or extensively damaged slate, professional stone-care advice may be worthwhile before attempting a major treatment. Always test a stain-removal method in an inconspicuous location. The appearance of natural slate can vary, so you want to know how the stone and sealer react before treating a prominent area. If the surface has already been damaged by an acidic cleaner, abrasive, or incorrect chemical, cleaning alone may not restore its original appearance. Cleaning removes contamination; it cannot always reverse physical or chemical damage.
What Cleaners Should You Never Use on Slate?
The biggest products to approach cautiously are acidic cleaners, abrasive powders, harsh scouring products, and unapproved chemicals that can affect natural stone or its sealer. Vinegar and lemon juice are common household cleaning suggestions, but their acidity makes them a poor default choice for slate. Steel wool and wire brushes are also unnecessarily aggressive for routine stone care. Even some highly alkaline or bleach-based products can be inappropriate depending on the stone, finish, grout, and sealer.
The safest rule is simple: choose a product specifically intended for natural stone and follow its label. If you’re trying to remove a particular stain, select a treatment based on the stain rather than choosing a chemical because it sounds powerful. The EPA’s Safer Choice program is also a useful starting point when you’re comparing cleaning products and looking for formulations with an emphasis on safer chemical ingredients. Never mix products together, even if each one appears harmless by itself. If one cleaner isn’t working, rinse the surface thoroughly before considering another product. A clean slate surface should never come at the cost of damaging the stone.
Should You Seal Slate Tile After Cleaning?
Sealing can be useful for some slate installations, but cleaning and sealing are separate jobs. You shouldn’t automatically seal every slate surface simply because it looks dry or because someone online recommends annual sealing. The appropriate sealer depends on the slate, its finish, its location, and the appearance and performance you want. Some sealers enhance color, while others are designed to provide a more natural appearance. Before resealing, the surface should be properly cleaned and completely dry, and you should confirm that the existing sealer is compatible with the new product.
If the stone has an existing coating, applying another product on top without understanding what is already there can create an uneven appearance or maintenance problems. A simple water-absorption observation can sometimes provide clues about how readily the surface takes in moisture, but it isn’t a substitute for manufacturer guidance or professional evaluation. If you’re unsure about the condition of the sealer, test in a hidden location. Sealing is about protecting and maintaining the installation, not making up for poor cleaning habits.
Common Slate Cleaning Mistakes to Avoid
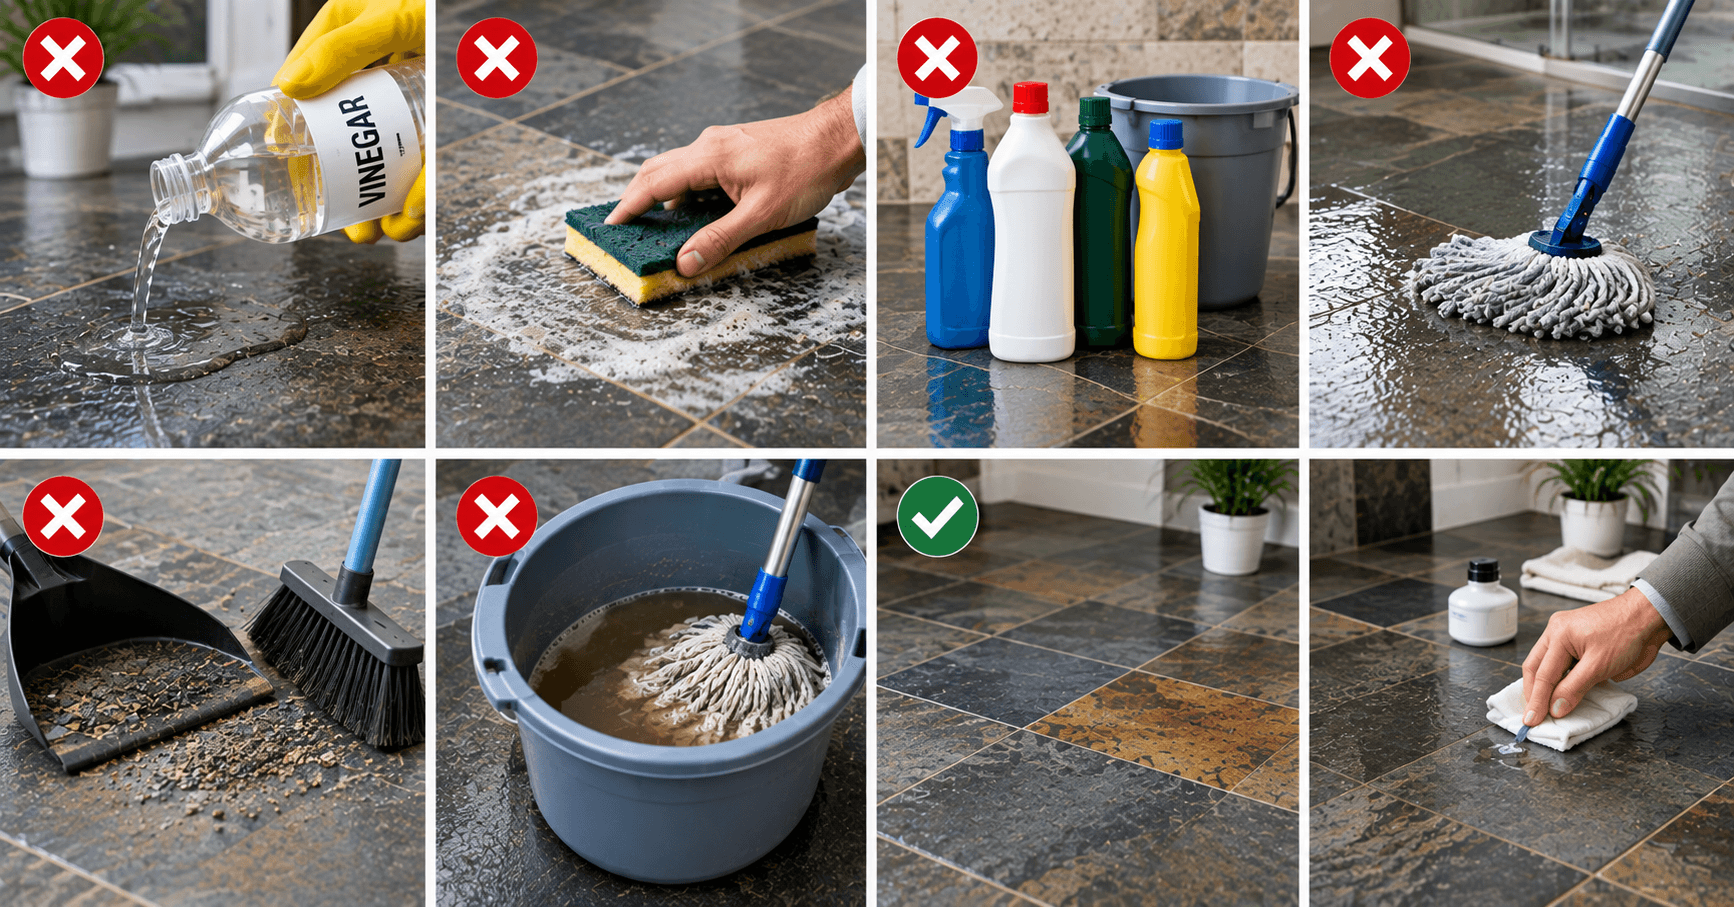
Most slate-cleaning problems come from doing too much rather than too little. Homeowners see a stubborn stain and immediately reach for vinegar, a rough scrub pad, or a concentrated chemical. Someone else may soak the floor because they assume more water means more cleaning power. Another common mistake is using the same bathroom cleaner on every surface without checking whether it is safe for natural stone. These shortcuts can leave residue, alter the appearance of the stone, or damage a sealer. Ignoring loose grit is another mistake because abrasive particles can continue grinding against the surface under foot traffic. Dirty mop water creates a similar problem by spreading contamination instead of removing it. Finally, people sometimes expect slate to look perfectly uniform after cleaning. Natural slate has variation, and that variation is part of why people choose it.
The objective is a clean, well-maintained natural surface, not a manufactured-looking floor with every natural characteristic erased. Slow down, identify the problem, choose the least aggressive effective method, and test unfamiliar products before using them across the entire installation.
Quick Answer: How Do You Clean Slate Tiles Naturally?
If you want the simplest natural approach, start with dry removal of dirt and grit, followed by a small amount of clean water and a suitable pH-neutral natural-stone cleaner when needed. For very light routine maintenance, a clean microfiber mop or cloth slightly dampened with water may be enough. The important part is not to interpret “natural” as permission to use acidic kitchen ingredients. Vinegar, lemon juice, and other acidic substances are not automatically safe for natural stone just because they come from the pantry. Likewise, baking soda and abrasive homemade pastes can be problematic when rubbed aggressively into textured or sealed surfaces. A gentle approach is usually the better approach.
If the slate has a stubborn stain, identify the substance first rather than experimenting with multiple homemade treatments. For daily life, prevention is even more valuable: sweep regularly, wipe spills promptly, control moisture in showers, and use appropriate mats in high-traffic areas. Natural cleaning works best when it means simple, controlled, low-residue care, not random household ingredients.
FAQs About Cleaning Slate Tile
Slate cleaning questions tend to come back to the same concerns: vinegar, water, stains, old-looking surfaces, and white residue. The answers below cover the most common situations while keeping one principle at the center: natural stone needs appropriate, surface-safe care. If your slate is unusually valuable, damaged, heavily stained, or part of a complicated shower installation, product-specific or professional advice can be smarter than experimenting.
Can I use vinegar to clean slate tile?
It’s best not to use vinegar as your routine slate cleaner. Vinegar is acidic, and acids can react with or damage some natural-stone surfaces and finishes. The fact that vinegar is a popular household cleaner doesn’t make it appropriate for every material. Instead, use a pH-neutral cleaner labeled for natural stone and follow the manufacturer’s dilution instructions. If you’ve already used vinegar once, don’t panic; one use does not automatically mean the slate is ruined. Inspect the surface for changes in appearance, particularly dull spots or altered areas, and avoid continuing the treatment. For future cleaning, switch to a stone-safe product and use soft tools. If you suspect the stone has been etched or chemically damaged, cleaning won’t necessarily reverse the change, and professional stone restoration may be needed.
Can I mop slate tile with water?
Yes, you can use water for appropriate routine cleaning, but avoid flooding slate floors. A damp microfiber mop is usually more controlled than soaking the entire surface. Too much water can leave moisture in textured areas, grout, transitions, and other parts of the installation where it may be difficult to dry. Change dirty mop water frequently so you’re not redistributing grit and soil. If the surface becomes excessively wet, remove the remaining moisture with a clean, dry mop or microfiber cloth. In bathrooms, ventilation also helps the surface dry more quickly. Water is useful for removing loose surface dirt, but it doesn’t replace a suitable cleaner when you’re dealing with grease, soap film, or other bonded residues.
How do you make old slate tiles look new again?
Start by determining why the slate looks old. If the problem is simply accumulated dirt, a careful deep clean may make a dramatic difference. If the surface has cleaner residue, mineral deposits, staining, worn sealer, or actual etching, the solution may be different. Avoid trying to “restore” slate by aggressively scrubbing it with abrasive products. Natural variation, color differences, and cleft texture are normal characteristics and should not automatically be treated as defects. Once the surface is clean and dry, inspect the condition of the sealer and determine whether resealing is appropriate. For badly worn or damaged slate, professional honing, refinishing, or restoration may be more appropriate than household cleaning. If you’re updating other bathroom elements around the stone, exploring bathroom vanity backsplash ideas can also help create a more cohesive look without trying to make the slate itself unnaturally uniform.
What is the best cleaner for slate floors?
For everyday maintenance, the best choice is generally a pH-neutral cleaner specifically formulated for natural stone, used according to its label directions. There isn’t one universal brand that is automatically best for every slate floor because installations differ in stone type, finish, sealer, grout, and traffic. A product that works well on one surface may not be appropriate for another. Check whether the product is explicitly intended for natural stone and whether the manufacturer provides instructions for slate. Use a microfiber mop or soft nylon brush rather than abrasive cleaning equipment. If you’re cleaning a floor with a heavy stain, choose a treatment based on the type of stain instead of simply increasing the strength of the everyday cleaner. When in doubt, test the product in a discreet area before applying it throughout the room.
How do you remove white residue from slate?
White residue can have several causes, including cleaner buildup, mineral deposits, or moisture-related deposits, so the first step is identifying what you’re seeing. If it appeared after cleaning, excessive product or inadequate rinsing may be responsible. In that case, carefully rinsing according to the cleaner’s directions and removing residue with clean microfiber materials may help. If the deposit is hard and mineral-like, don’t automatically reach for vinegar or another acidic cleaner because slate is natural stone. A product specifically designed for the suspected deposit and approved for the stone may be safer. If the residue repeatedly returns, especially in a shower or damp area, investigate the moisture source rather than repeatedly treating the surface. Persistent deposits can sometimes indicate a problem beyond ordinary surface cleaning. When a stain keeps coming back, finding the cause is usually more valuable than cleaning it harder.
Conclusion
Cleaning slate tiles doesn’t require a complicated collection of chemicals or an aggressive scrubbing routine. The most reliable approach is straightforward: remove loose dirt, use a pH-neutral natural-stone cleaner when needed, clean with soft tools, rinse appropriately, and dry the surface thoroughly. For slate floors, regular dry maintenance helps prevent abrasive grit from building up. For slate showers, controlling soap residue and moisture can make the biggest difference over time. When stains appear, identify the stain before choosing a treatment, and avoid the common temptation to use vinegar, lemon juice, abrasive powders, or harsh bathroom chemicals simply because they’re readily available. Sealing may also be appropriate depending on the particular slate and installation, but it should be treated as a separate maintenance decision rather than a substitute for proper cleaning.
Most importantly, remember why you chose slate in the first place. Its natural texture and variation are features, not flaws. Take care of those characteristics instead of trying to scrub them away, and your slate can continue looking distinctive for years.

Samreen Khadim Hussain is a home improvement writer and content creator at Domelite Home. She specializes in making home renovation, interior design, and bathroom safety accessible to everyday US homeowners, turning technical subjects into clear, actionable advice. Her work is rooted in research, real-world practicality, and a genuine belief that a better home is within everyone’s reach.